RAM or memory on your computer can cause several problems and sometimes the issues can be pretty random, including instability, data corruption, and more. It can be difficult to pinpoint what’s causing the issue.
If you are facing some issues with your computer, it’s a good idea to check for issues with the computer’s RAM or memory. But how do you do that? Worry not. We have got you covered.
In this step-by-step guide, we will show you how to run the Windows Memory Diagnostic tool on your Windows 10 computer to find RAM-related issues.
Checking RAM using Windows Memory Diagnostic
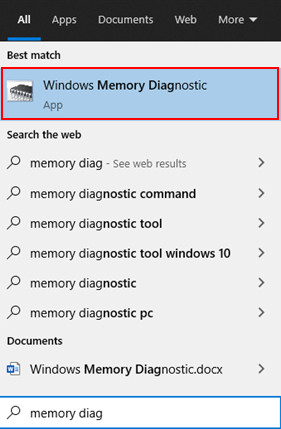
Step 1: Open the Windows Memory Diagnostic tool on your computer. One of the fastest ways to do this is by searching for “Windows Memory Diagnostic” in the Start menu and selecting the app from the search results.

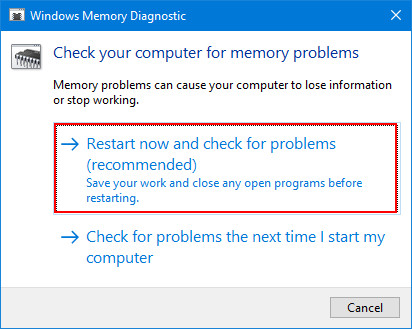
Step 2: The tool will offer you two options — Restart PC now and check for problems, and check for problems the next time PC restarts. In this case, we’ll be choosing to start the PC right away.

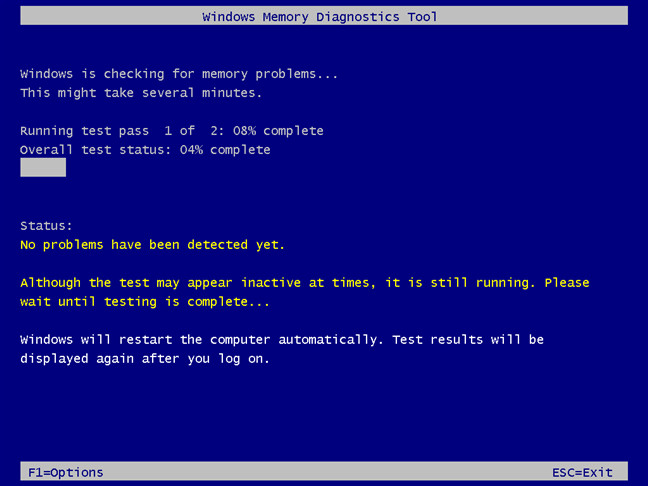
Step 3: Now, the computer will restart and the system will run in MS-DOS like interface. It will automatically run two Standard test passes and then reboots automatically to Windows.
However, if you are looking to change the settings for the test, you can press the “F1” key and select the settings that you want to opt for.

Step 4: Once you log into Windows, there will be a notification in the bottom-right corner of the Windows Memory Diagnostic tool with the information if any issues were detected or not.
This is the in-built tool from Microsoft in Windows to check for flaky or faulty RAM installed on your system. There are also several third-party tools available for Windows, which does the same thing.

