Microsoft Windows 11 operating system has a Startup feature similar to the previous version of the Windows OS. As the name itself indicates, the feature enables the selected applications to load up automatically when the computer starts.
While the required applications for the system are already added to the list, the Windows operating system allows users to configure the settings to allow other apps to be added to the list to load when the system starts.
There are several different ways to enable the auto-loading of applications in the Windows 11 operating system. In this guide, we will show you a step-by-step process of how you can configure apps to start automatically in the Windows 11 system using the Startup Settings option.
How to configure an app to start automatically in Windows 11
Step 1: Open the Settings application on your computer. For this, click on the Start menu and select the Settings app from there or press the Windows + I keys on the keyboard.
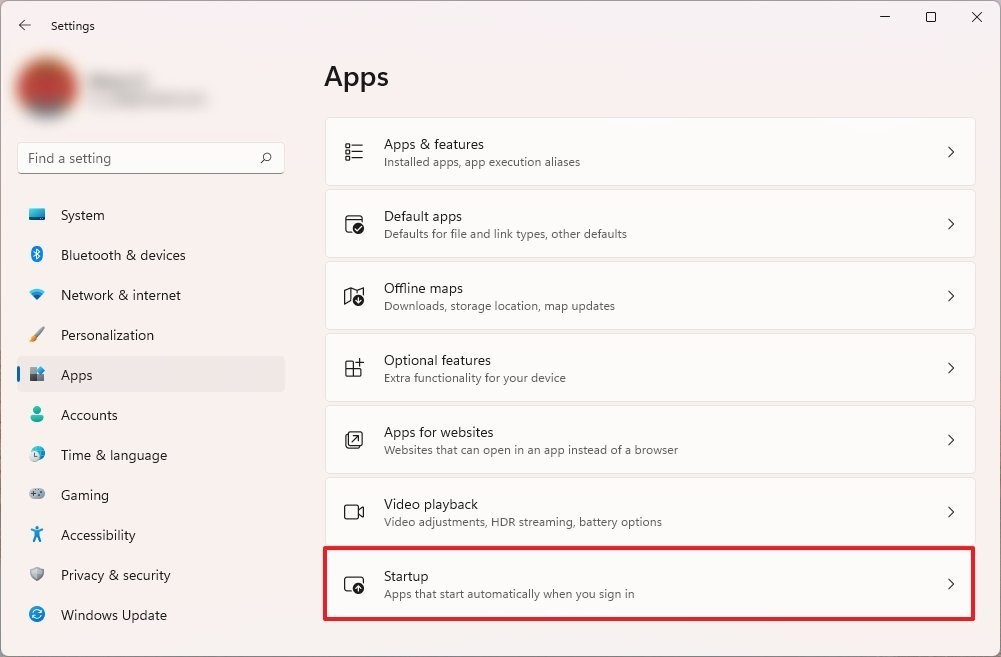
Step 2: When the Settings app opens, click on the “Apps” option from the left-side pane.

Step 3: On the right side pane, click on the “Startup” option.
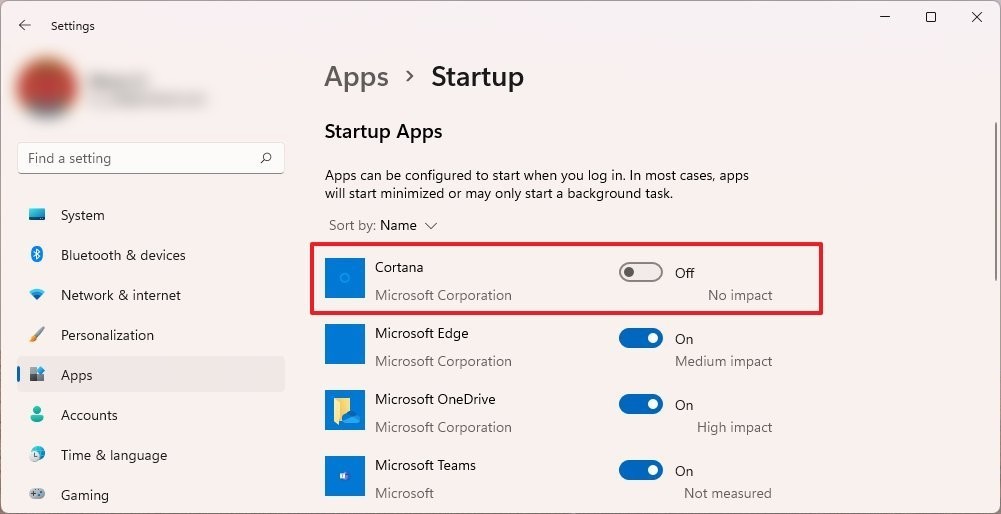
Step 4: Now, for the application that you want to start automatically, toggle the switch to ON.

That’s it. The applications that you enabled the toggle option will now automatically load up when the Windows operating system starts. Do note that you will have to manually toggle the switch to the ON position for each of the applications that you want to load up automatically after signing in to the system.

