Computers come with a network card installed, allowing users to connect to the internet service. When using the internet on your computer, you may face issues several times related to internet connectivity.
In such times, you may need to dig deeper into the network-related data to troubleshoot the issue. In this step-by-step guide, we will show you two different methods for checking the network card or network adapter information on your Windows 10 PC.
Method 1
For this method, we will be using the built-in System Information tool.
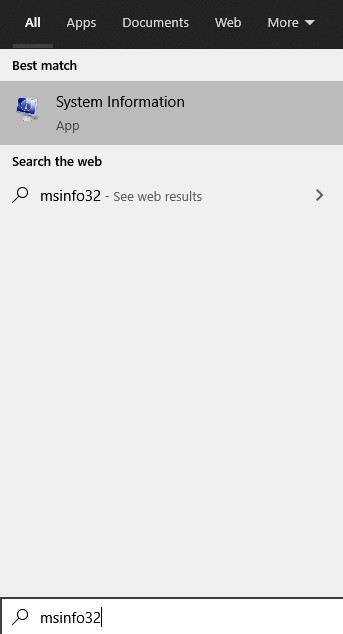
Step 1: First of all, open the Start menu and search for the term “msinfo32.” Now, from the search results, click on “System Information.”

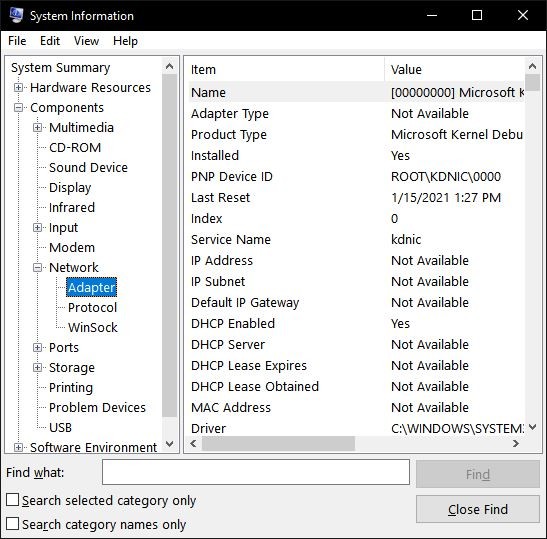
Step 2: Now, in the window that opens, go to Components > Network > Adapter.

Step 3: You can now scroll through the list of adapters in the right-side pane.
Method 2
In this method, we will make use of the Command Prompt tool.
Step 1: Open the command prompt on your computer.
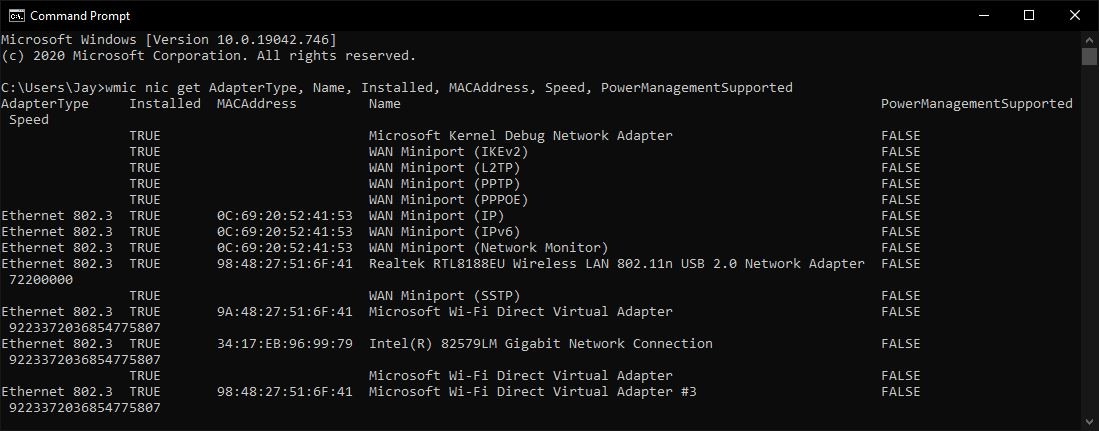
Step 2: In the command prompt, enter the following command:
wmic nic get AdapterType, Name, Installed, MACAddress, Speed, PowerManagementSupported

Once you hit the enter key, it will give you information about network devices you have, including the MAC Address, supported speed, and name as shown in Device Manager.
