The Windows 10 operating system allows you to have multiple user accounts on the system. You are also allowed to make changes to the user profile — from changing name, password, and even the account type.
If you want to change the name of your account, the process is quite easy but not everyone will find it straightforward to go through it. Worry not, as we have got you covered for this process.
In this guide, we will show you a step-by-step process on how you can change your account’s name in the Windows 10 operating system. Do note that this guide is applicable for the local accounts on the system and not the Microsoft-linked accounts.
How to change account name in Windows 10
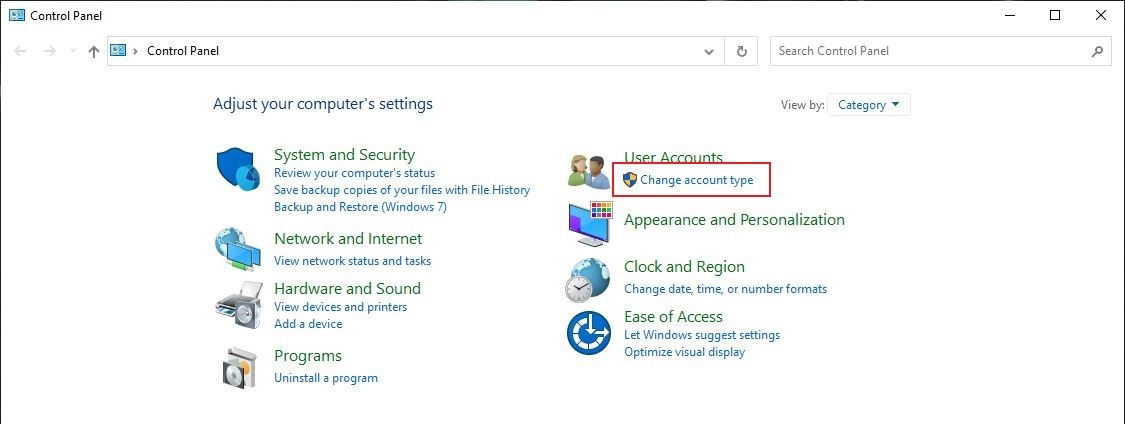
Step 1: Open Control Panel on your Windows 10 computer.
Step 2: Under the “User Accounts” section, click on the “Change account type” link.

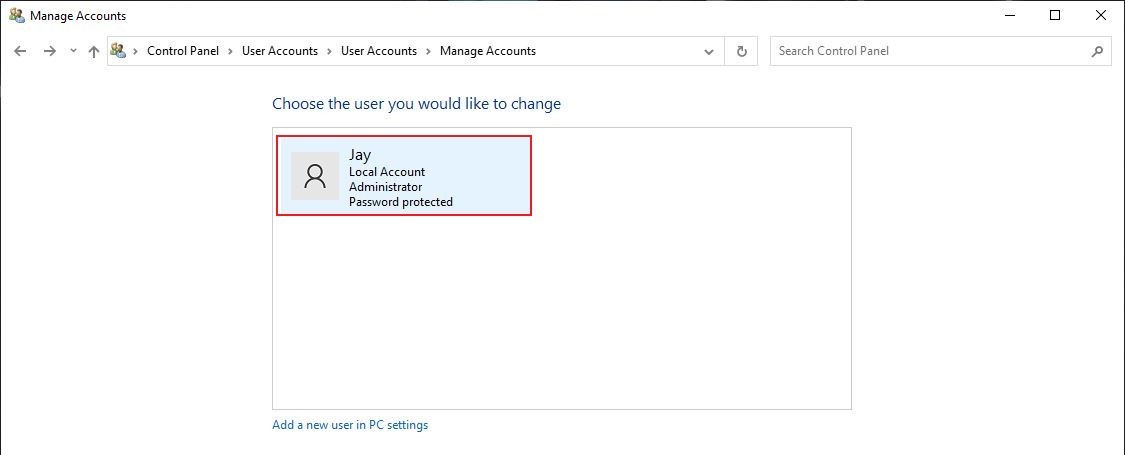
Step 3: Now, click on the account that you want to change the name of.

Step 4: In the next screen, click on the “change the account name” option.

Step 5: Enter your new account name and then click on the “Change Name” button.

That’s it. Now, whenever you see the account name, either when logging into the windows or logging out, you will notice the new account name.
There are a few other ways of changing the account name on your Windows 10 computer but this is probably the easiest and straightforward way. However, we will soon publish guides with other methods as well. Stay tuned!
