Windows 10 operating system comes with some powerful tools built-in, allowing users to customize the device as per their liking. One such tool is Local Group Policy Editor, which allows users to control advanced settings on the device.
In this guide, we will show you a step-by-step process on how you can prevent access to specified applications on your computer for the users. You can use it to block access to apps, run scripts, or making system changes.
How to block app access in Windows 10
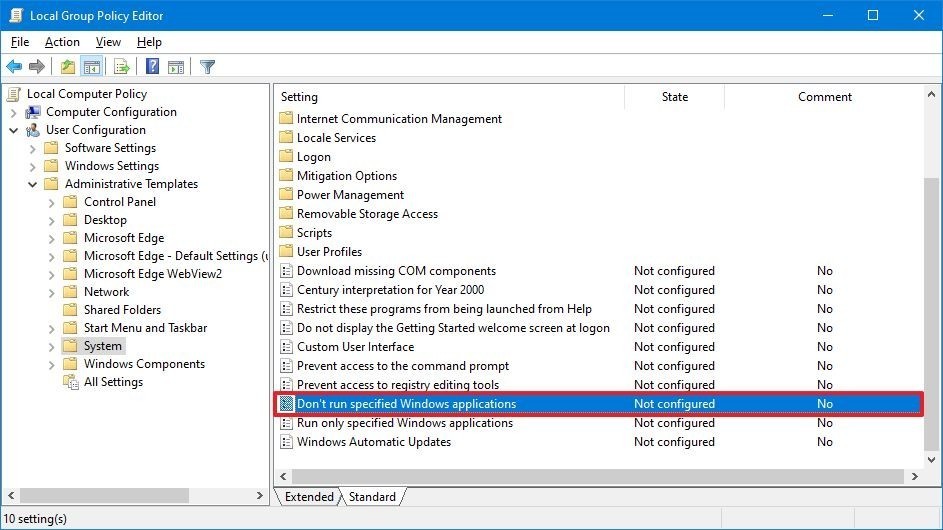
Step 1: Open the Local Group Policy Editor on your computer. For this, search for ‘gpedit’ in the Start menu and select the Local Group Policy Editor from the results.
Step 2: In the Group Policy editor window, browse the following path:
User Configuration > Administrative Templates > System

Step 3: Now, on the right-side, double-click on the “Don’t run specified Windows applications” policy.
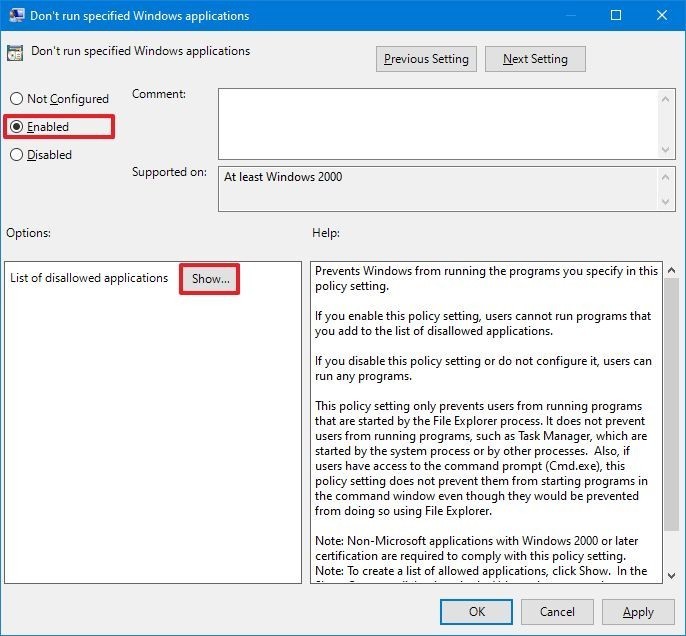
Step 4: In there, click on the “Enabled” option and then click the “Show” button.

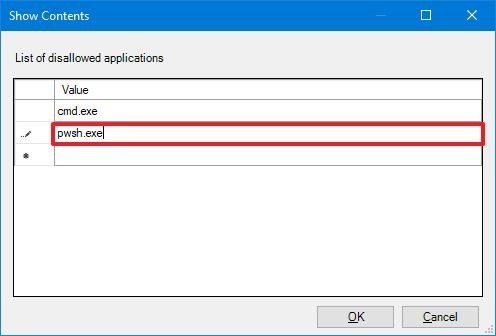
Step 5: Now, enter the name of the apps that you want to block. Make sure you enter the .exe after the file name.
Step 6: After adding the name of the apps, click the “Apply” button and then “Ok.”

That’s it. Once the process is completed, the apps you specified should no longer be accessible by users on the device. The settings should apply immediately, but you may need to restart the computer for the changes to take effect in some cases.
To reverse this change and allow access to the apps blocked, just follow the same step as mentioned above, and in Step 4, change “Enabled” to “Not Configured.” Once that is done, all the apps will be accessible.
