Microsoft’s Windows operating system comes with several features and functionality and allows users to customize the operating system as per their preferences. However, some of the settings options are buried deep inside the system and may be very time-consuming and irritating.
But, the system allows users to create a shortcut of almost anything. The user can also change settings related to the account through the User Account Control Settings. In this step-by-step guide, we will show you how to create a shortcut for the User Account Control Settings in Windows 10.
How To Create Shortcut Of User Account Control Settings In Windows
Step 1: Right-click anywhere in the blank area on your computer’s desktop and from the context menu, select New, and then select “Shortcut” from the sub-menu.
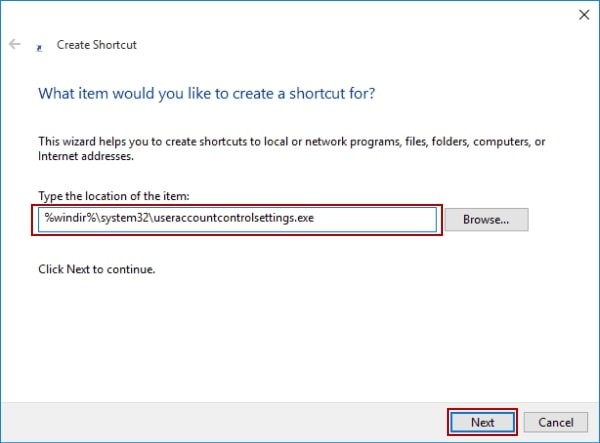
Step 2: In the Create Shortcut window that opens up, type the following in the box and then click the “Next” button:
%windir%\system32\useraccountcontrolsettings.exe

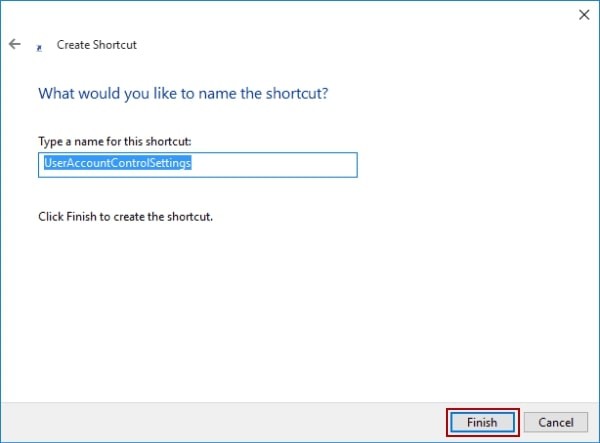
Step 3: In the next step, you will be asked to create a name for the newly configured shortcut and once that is done, click the “Finish” button.

That’s it. The shortcut for User Account Control Settings has now been created on the desktop. Doble-clicking the shortcut will now bring up the settings window, allowing to update preferences as per the user’s liking.
