Microsoft is offering Windows Hello feature with the Windows 10 operating system that keeps the device locked in a safe and easy way to safeguard it from unwanted people. Windows Hello also allows a passwordless sign-in.

It offers the following biometric authentication options to the users:
- Windows Hello Face – Used for facial recognition using internal/external webcam
- Windows Hello Fingerprint – Used for fingerprint recognition
- Windows Hello Pin – Numeric and Alphanumeric pin used for sign-in
Here is a step-by-step guide on how you can enable the Windows Hello feature on your Windows 10 computer.
How to set up and use Windows Hello
Step 1: Open the Settings application on your Windows 10 computer.
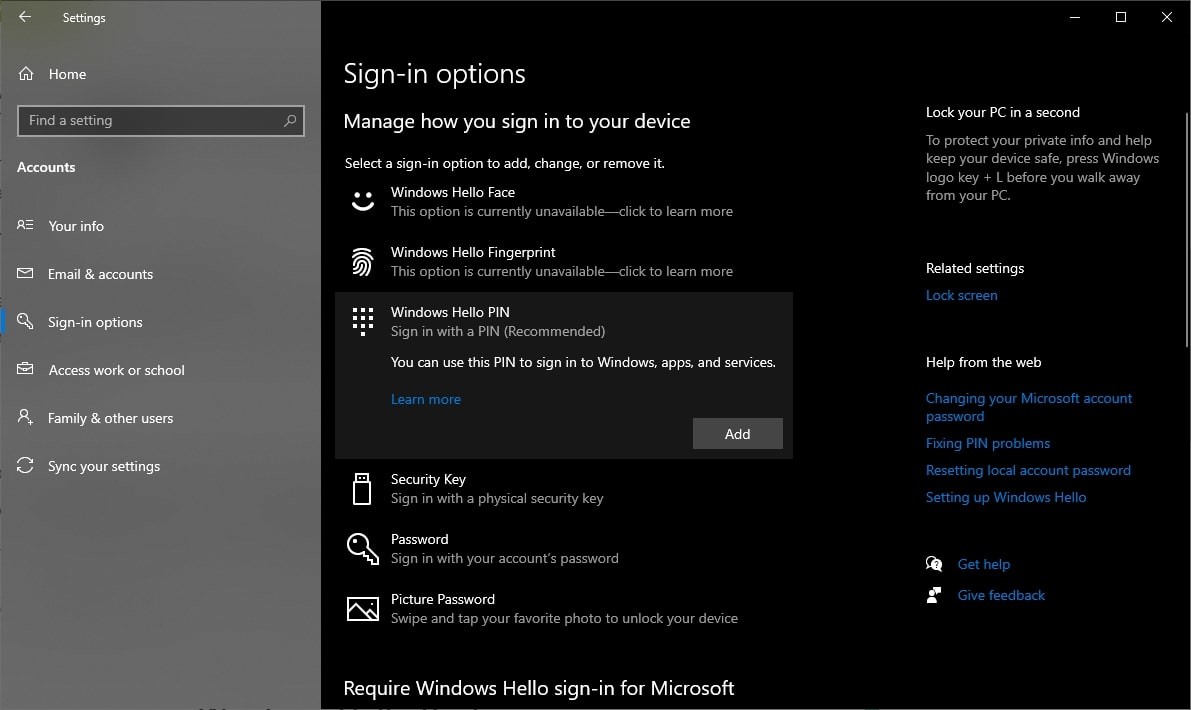
Step 2: In there, go to the “Accounts” section and click on “Sign-in options” from the left-hand side panel.
Step 3: Under Manage how you sign in to your device, there will be various Windows Hello options supported on the device.

Step 4: Now, click on Windows Hello PIN, then click on Add.
Do note that even for the use of the Face recognition and Fingerprint features, you’ll have to set up the PIN first.

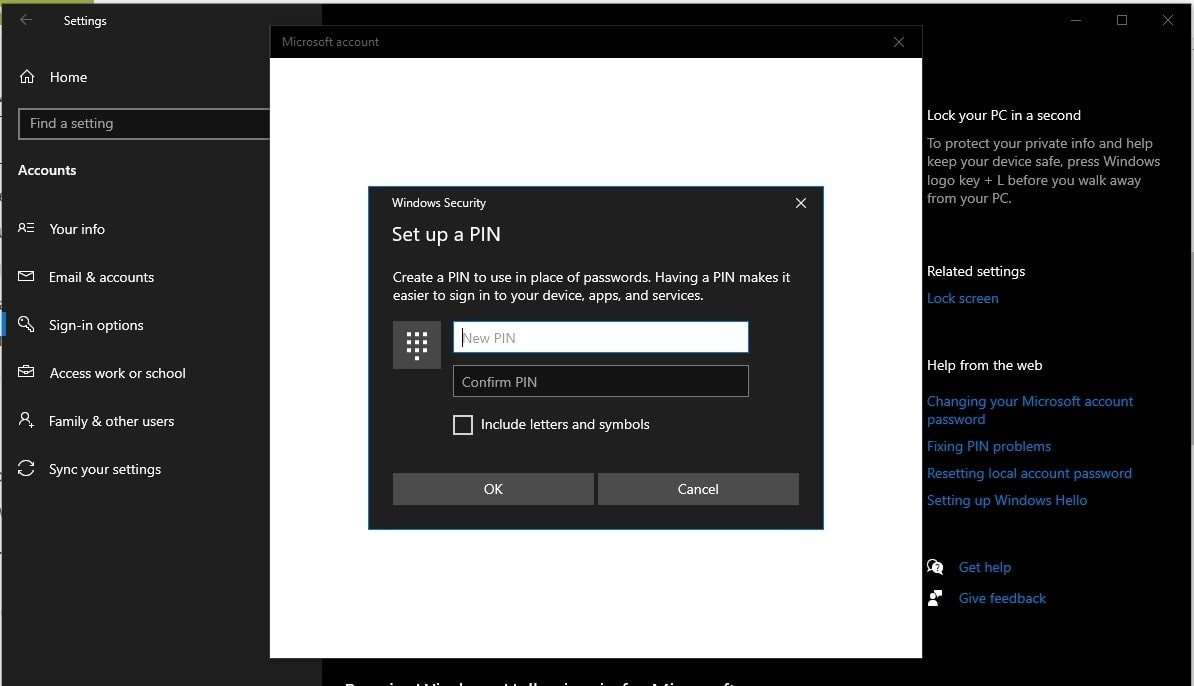
Step 5: Click on Next in the pop-up window and enter your Microsoft account password.
Step 6: After you enter the Windows Hello pin, click “Ok.”

Now, you can select to use Fingerprint or Face unlock, depending on the options available on your system.
That’s it. If you have followed all the above-mentioned steps, then you have successfully configured Windows Hello on your device.
Note that Windows Hello is now the new default security on Windows 10. Even if you are just using a pin to sign in to the device, you’re still using Windows Hello. You cannot download Windows Hello or delete it from the system.
