Microsoft Safety Scanner (MSERT) is a standalone tool on Windows 10 that scans, finds, and removes many malware types, including viruses, spyware, and unwanted software causing harm on the computer without having to install it on the device.
It is similar to the MSRT and works similarly to regular anti-malware software. But it is not a replacement for an antivirus solution since it does not offer real-time protection or automatic updates.
It only provides another way to scan and remove infections if you believe the device has been infected. Also, the Microsoft Safety Scanner is only valid for ten days. Once it expires, you need to download an updated version to make sure you are scanning the device with the latest security threats definitions and enhancements.
Here is a step-by-step process on how you can use this tool to scan for the infected files using the Command Prompt.
Using Microsoft Safety Scanner in Windows 10 with Command prompt
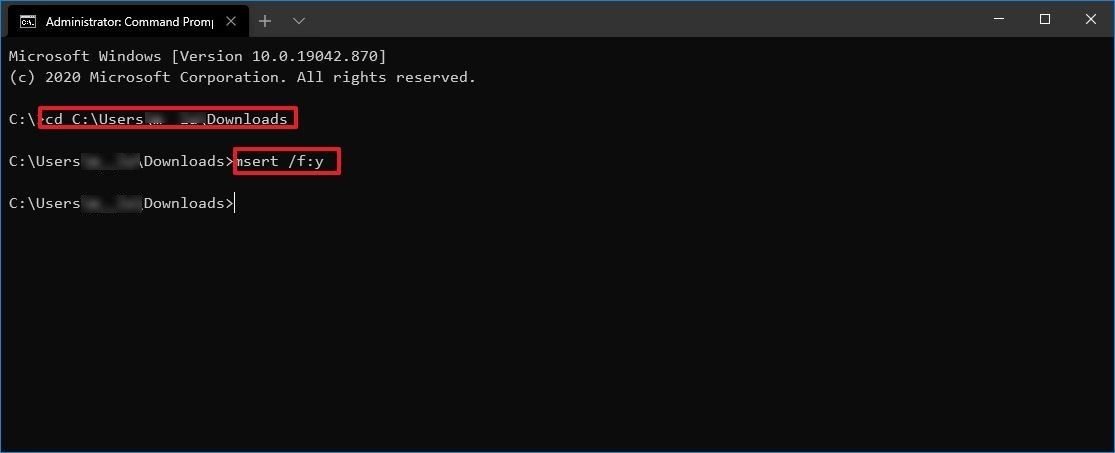
Step 1: Open Command Prompt as Administrator on your computer. For this, open Start and search for Command Prompt. In the search results, right-click on the app and then select “Run as Administrator.”
Step 2: In the Command Prompt, enter the following command:
cd C:\Users\username\Downloads
In the command, update the path with the location containing the “MSERT.exe” file.
Step 3: Now, type the following command to start a forced scan and press Enter:
msert /f

- Type the following command to do a full scan and automatically clean infected files:
msert /f:y - Type the following command to run a scan quietly:
msert /q - Type the following command to execute a full scan quietly:
msert /f /q
After these steps are completed, the tool will perform a scan on the computer to detect and delete any malware it may find.

