The Windows 11 operating system from Microsoft comes with themes that enables users to customize the look of the system. By default, there are five themes that come pre-installed on the computers running the Windows 11 OS, including the Light and Dark themes.
If you are among those users who likes to customize the interface on your computer, then the company also allows users to download more themes from the Microsoft Store. The theme can be easily changed by opening the Personalization Settings on the device and selecting the theme to use.
But, in addition to the default theme that the company includes with the operating system, there are a few more themes available on the Windows 11 operating system with the newer version rollout but they are hidden by default and needs to be enabled manually.
In this step-by-step guide, we will show you how to quickly and easily unlock the newly introduced hidden themes on your Windows 11 powered computer using the built-in Registry Editor tool.

How to unlock hidden themes in Windows 11
Step 1: Open the Registry Editor on your Windows 11 computer.
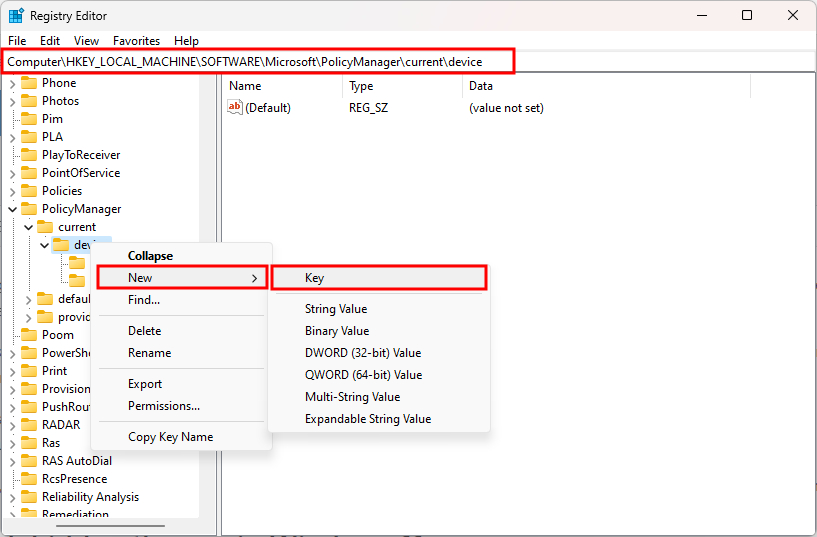
Step 2: When the application opens, go the following location:
HKEY_LOCAL_MACHINE\SOFTWARE\Microsoft\PolicyManager\current\device
Step 3: After that, right-click on the “Device” folder and then select New > Key

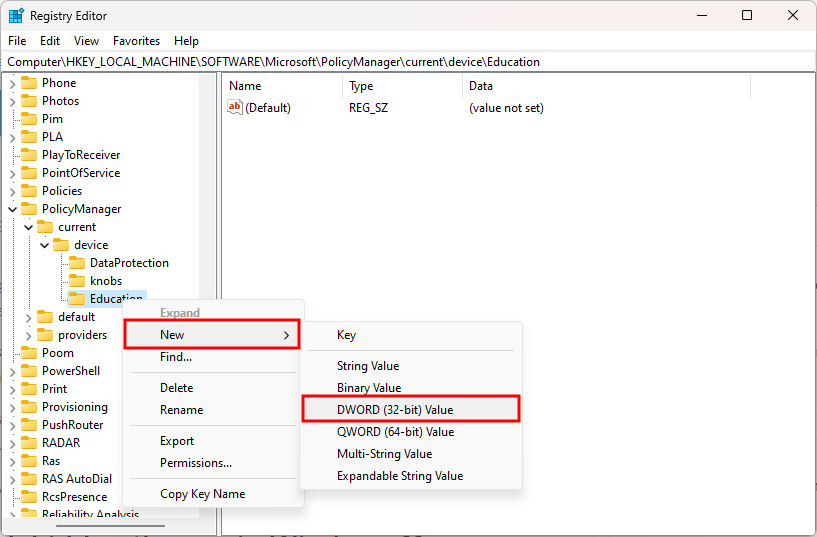
Step 4: Set “Education” as the name for the new folder and then right-click on it, following by selecting New > DWORD (32-bit) Value option.

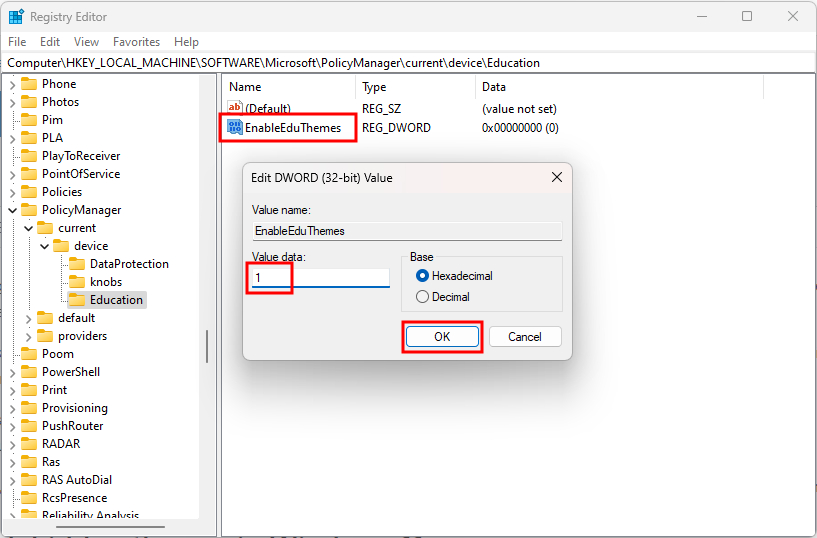
Step 5: Set “EnableEduThemes” as the name for the new key, double-click on it to open, and set its value to 1 and then press the Ok button.

That’s it. Once you have followed the above-mentioned step-by-step guide on your Windows 11 computer, restart your system for the changes to take effect. When the device boots again, you will see that the hidden themes on your computer are now available for you to use on the device.

