Microsoft has been expanding the capabilities of the Windows operating system and in a surprising yet welcome move, the Redmond-based technology giant added support for natively running the Android applications in devices powered by the Windows 11 operating system.
It’s not just a marketing gimmick as the company has made sure that the Android apps in the system can interact the same way UWP apps work.
While it is a welcome feature, not everyone wants to run Android applications on their computer and if you are among those, then you don’t need the Windows Subsystem for Android on your device. If you are looking for ways to get rid of it, then here is a step-by-step guide for the same.
How to uninstall Windows Subsystem for Android in Windows 11
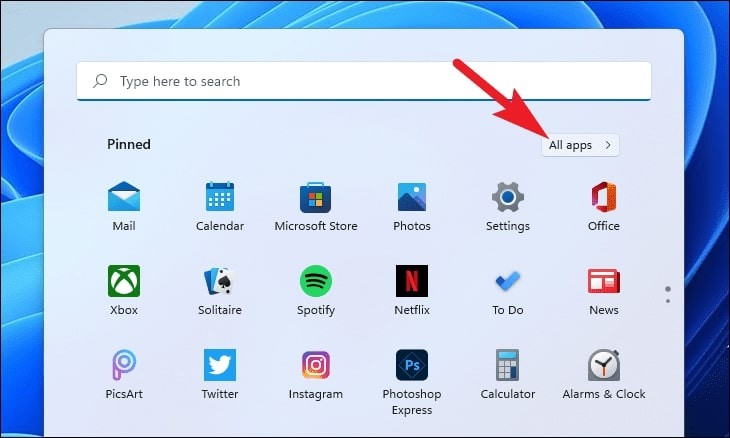
Step 1: Open the Start Menu and click on the “All Apps” button present on the top-right corner of the flyout.

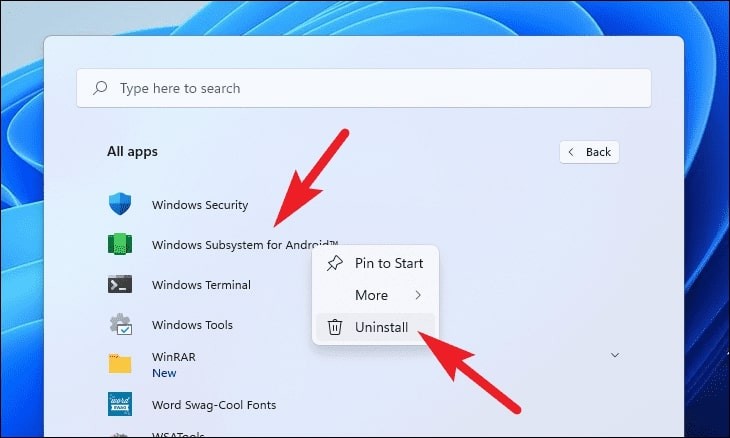
Step 2: Now, scroll down to locate the “Windows Subsystem for Android” option and right-click on it.

Step 3: When the context menu shows up, click on the “Uninstall” option.
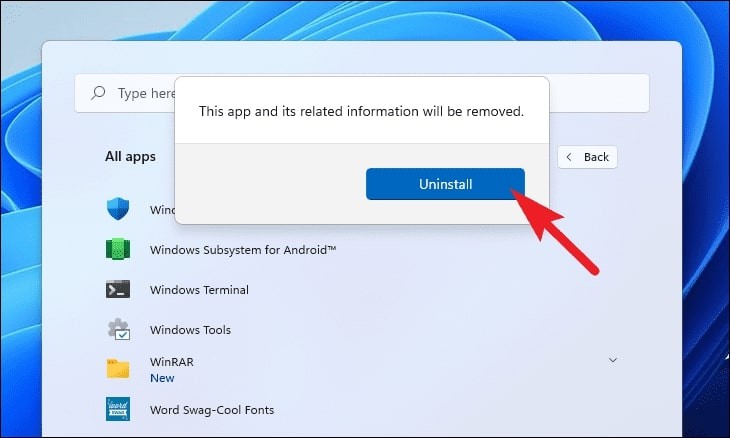
Step 4: On the prompt screen that appears, click on the “Uninstall” button.

That’s it. After completing all the steps mentioned in this guide, the Windows Subsystem for Android will be removed from your Windows 11 system.
The method that we have described here is the simplest one using the Start Menu. There are a few other ways as well, such as through the Settings app and through Windows Terminal, which we will cover in the coming days.
