The Find My service by Apple is quite an important one, which helps to track the misplaced or stolen iPhone or any other Apple device. With iOS 13, the company merged the Find My iPhone and Find My Friends into a single application.
It’s a good idea to enable Find My service, just in case you lost your device. However, once the service is enabled, it prevents you from doing certain tasks. For instance, you cannot factory reset device is the Find My feature is enabled.
So, if you are planning to sell off your device and want to factory reset your iPhone before doing so, follow this step-by-step guide on how you can reset the device and disable Find My service.
Method 1
In this method, we will show you a step-by-step process on how you can disable Find My iPhone feature from the Settings app on your device.
Step 1: Open the Settings app on your iPhone.
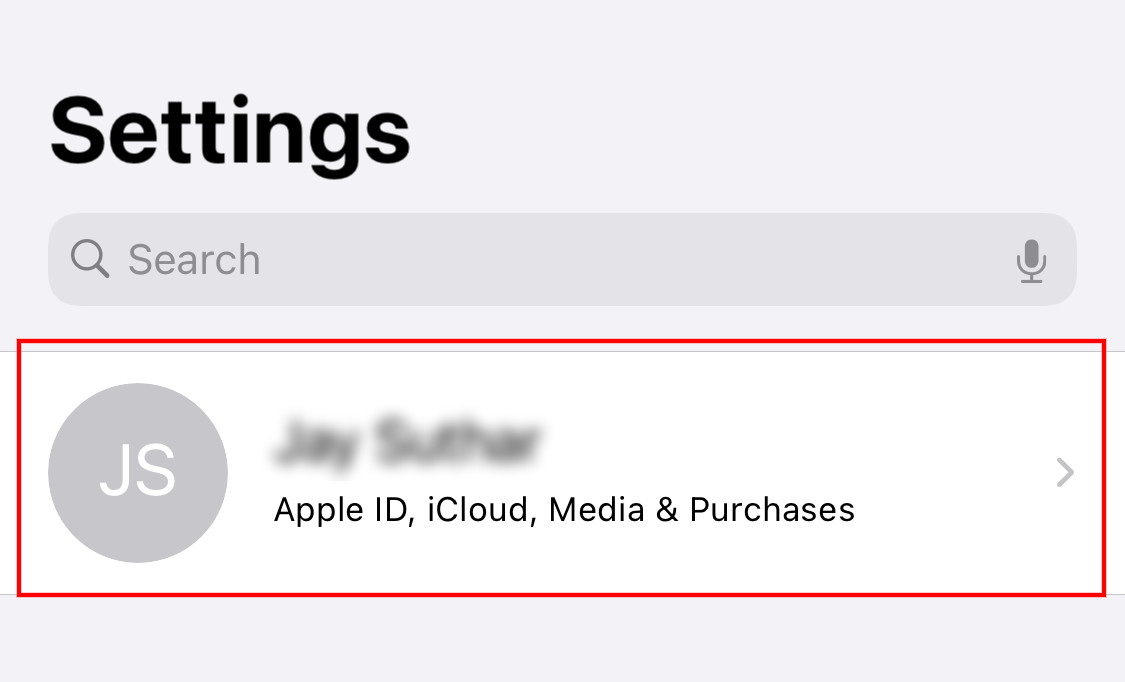
Step 2: In the Settings app, tap on the Apple ID banner with your name.

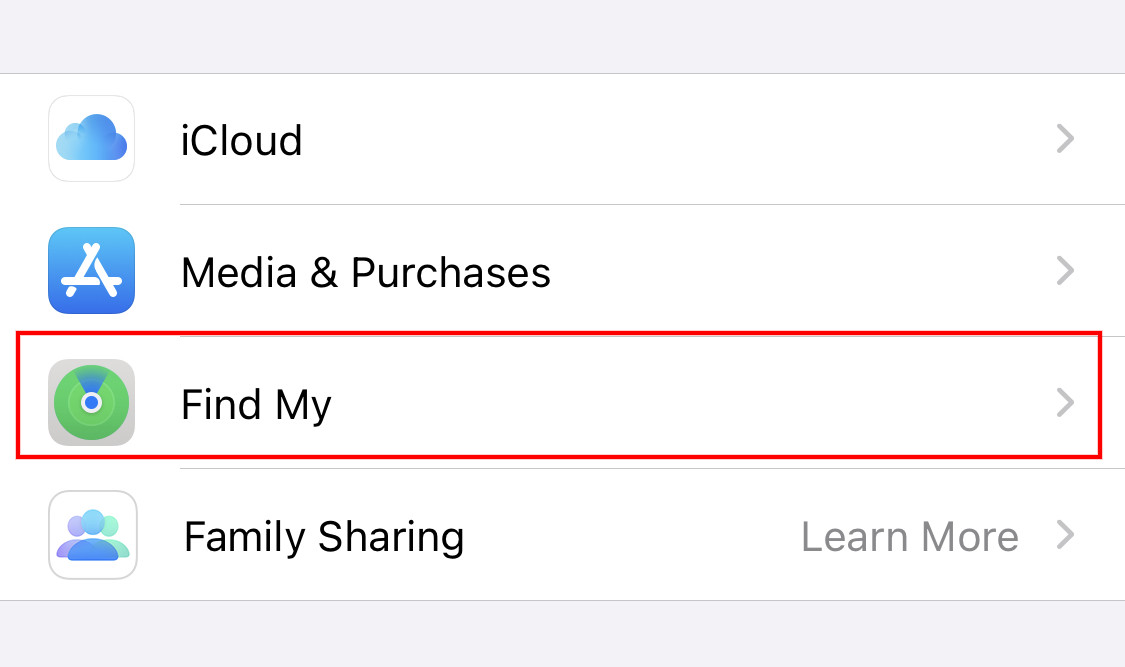
Step 3: Now scroll down and top on the Find My option on the screen.

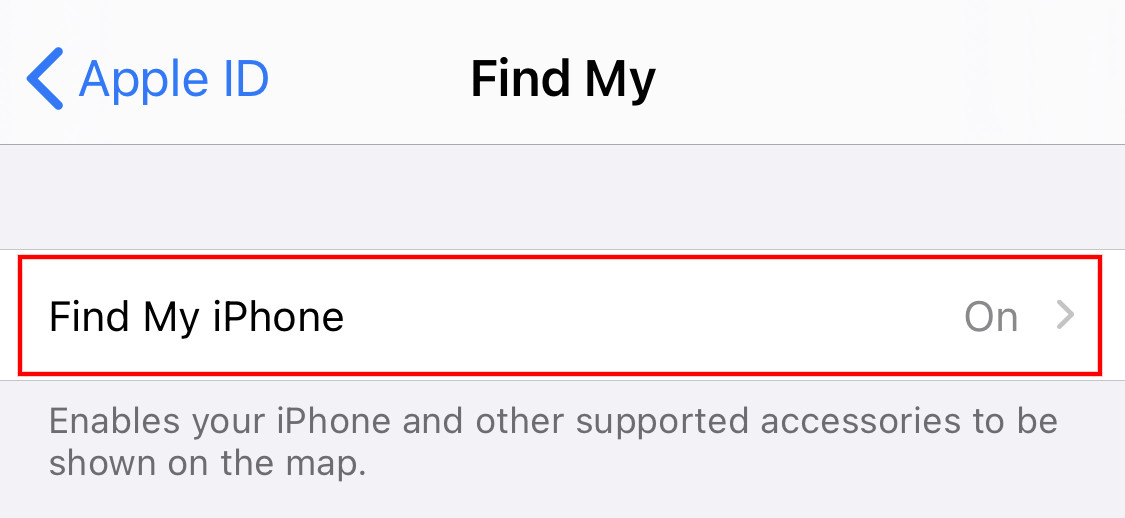
Step 4: In the Find My screen, you will see Find My iPhone. Tap on that.

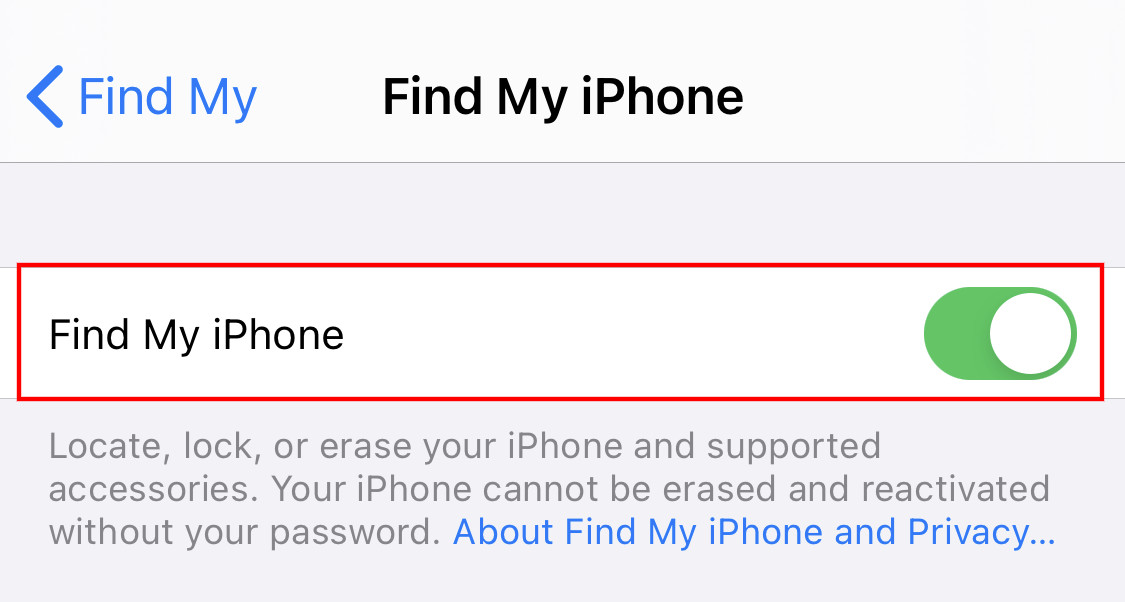
Step 5: To turn the feature on, toggle the option to the OFF position.

Step 6: Once you toggle it off, it will ask you to enter your Apple ID and Password to confirm the action.
That’s it. Find My iPhone feature has now been successfully disabled on your device.
You will now be able to factory reset your smartphone in case you want to sell it to someone else. To do so, just go to Settings > General > Reset > Erase All Content and Settings.
Method 2
In this method, we will make use of iCloud, which will remotely wipe data from your iPhone and allow you to delete the device from the Find My service related to your Apple account.
Step 1: Log-in to the iCloud using a browser.
Step 2: On the top, click the “All Devices” option and from the drop-down menu, select your iPhone.
Step 3: Now, as your device appears, click on the “Erase iPhone” option. You don’t need to enter a message or number if you are erasing data to sell off the device.
Step 4: Your iPhone will now be erased remotely and you will also get an email notification regarding the same.
Step 5: Now, after erasing data from iPhone, click on the link “Remove from Account” which will remove the iPhone form the Find My service.
You can also check out our other Windows guide to make your experience even better by customizing the operating system as per your needs. We have also covered quite a few guides related to macOS and Chromebook as well.

