When it comes to mobile photography, there are hardly any smartphones out there that can take better photos and videos than the iPhone. Apple’s “Shot on iPhone” campaign shows us what the iPhone camera is capable of and how users have been making the best use out of it. In addition to this, a lot of people also use an iPhone to make full feature films. All this becomes possible because of the features that the inbuilt Camera app comes with and how iPhone processes the images and videos.
Hence, in this guide, we’ve compiled 6 best Tips and Tricks that will help you to master the Camera App on your iPhone. Without waiting further, let’s get started.
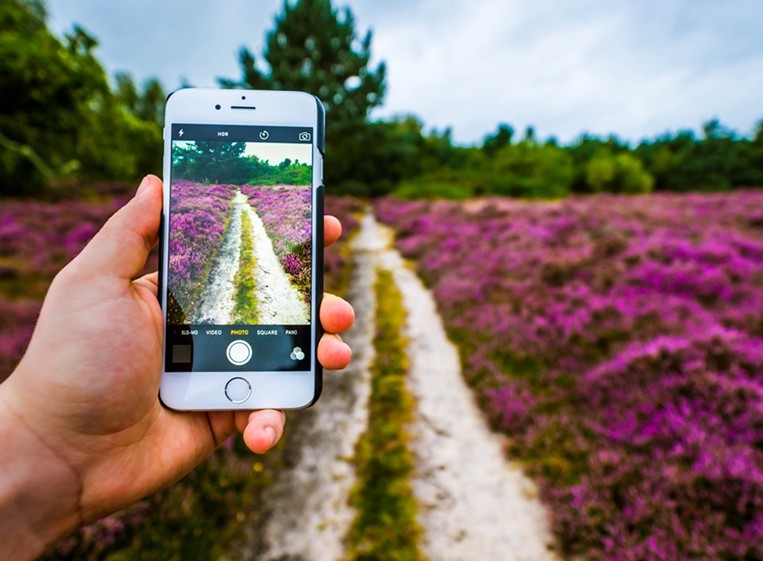
1. The Basics: Take a photo using the Camera App
Getting started with the basics, it is important to know the different methods that you can use to click a photo on your iPhone using the Camera App. It is also important to know how to bring up the Camera App quickly so you never miss a moment. Have a look at the steps below to see how it’s done.
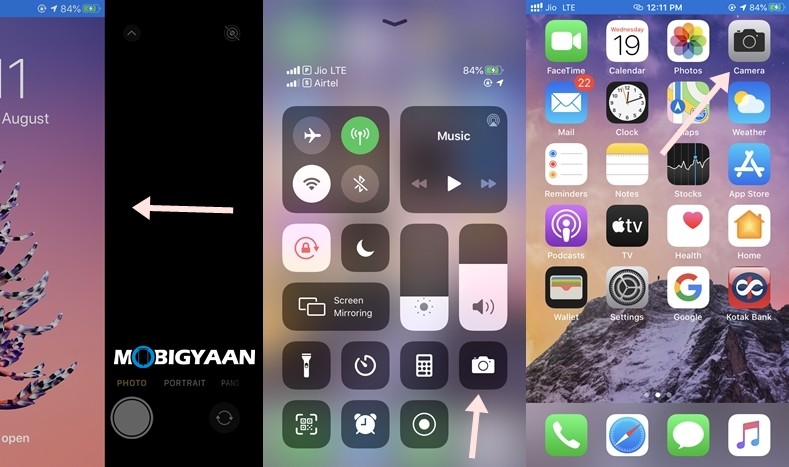
How to launch the Camera App on your iPhone:
Method 1: Swipe right from your lock screen to bring up the Camera App. This is the quickest method that you can use on an iPhone and it allows you to start shooting immediately.
Method 2: If you want to capture a moment when your iPhone is unlocked then the lock screen method can get time-consuming. However, you can bring up your Control Center and tap on the Camera icon to bring up the Camera App quickly.
Method 3: Tap on the Camera App and directly from your iPhone home screen. This is the standard method which is used by a lot of people to launch Camera on their iPhone.
Have a look at the screenshots below to see how it’s done.
How to take photos using the Camera App:
Method 1: Open your Camera app and press the shutter button to take a photo. This is the standard method and this can be used when you are shooting other people or objects.
Method 2: Open your Camera app and press the Volume Up button to capture a photo. This is a less known method and you can use this when you are taking selfies without a selfie stick.
2. Use the Burst Mode for taking multiple Photos quickly
Burst Mode allows you to take multiple shots at once so you can choose the best one for you. This feature can come in handy when you are shooting something that’s moving at a fast speed. To use Burst Mode on your iPhone all you have to do is:
For iPhone 11 Series and iPhone SE 2020:
- Tap on your Shutter Button and swipe it to the left to take photos in Burst Mode. Release the shutter once done and tap on the image thumbnail from the bottom left corner to select the images that you want to keep.
For iPhone XS, XR, and the older iPhone releases:
- Bring up the Camera app on your iPhone and hold your shutter button to take photos in burst mode. Click on the thumbnail, select the best images, and delete the rest.
3. Turn on Camera Grid for Better Composition
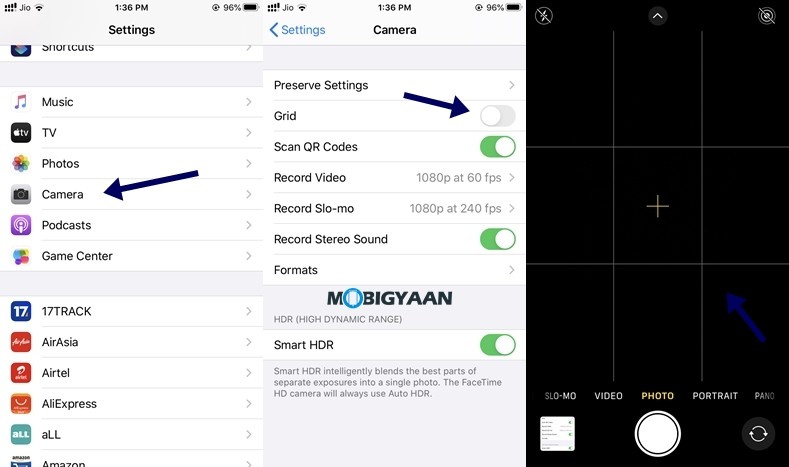
If you want a better composition in your photos turning on Gridlines in your Camera app becomes important. The rule of thirds plays an important role when it comes to composition and to use that better, you should have grid lines turned on in your iPhone’s Camera App. To turn on Gridlines all you have to do is:
Step 1: Open Settings and scroll down to your Camera settings.
Step 2: Toggle the Grid button to turn on Grid in your Camera App.
Have a look at the image below to see how it’s done.
 4. Set a Timer in the Camera App
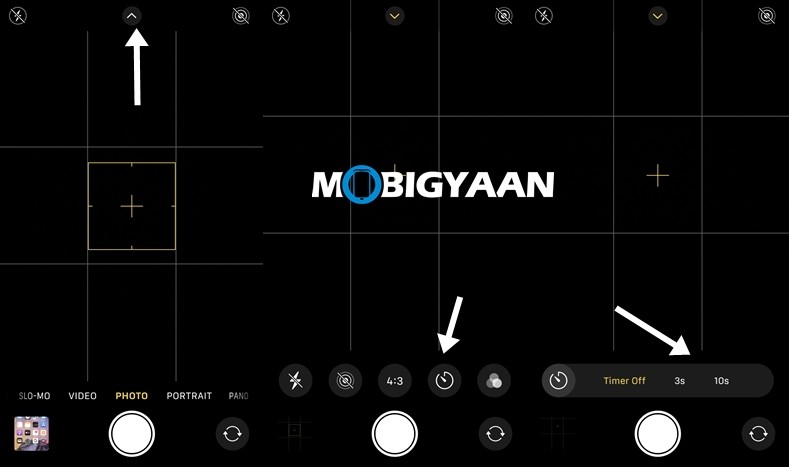
If you are taking self-portraits than having a timer in your Camera app becomes important. The inbuilt Camera App on the iPhone allows you to choose from two-time durations before the photo gets captured. When compared with the other camera apps, the options available in the timer section are less but it gets the job done. To set a timer in your Camera App all you have to do is:
For iPhone 11 Series and iPhone SE 2020:
- Open your Camera app and tap on the arrow from the top of your screen. Pressing it will bring up a new menu. Tap on the “Timer” icon and choose between 3 seconds or 10 seconds as your time duration before the photo gets clicked.
For iPhone XS, XR, and earlier models:
- Just follow the same steps as above skipping the arrow part and you’ll have timer activated on your iPhone.
 5. Make use of Filters
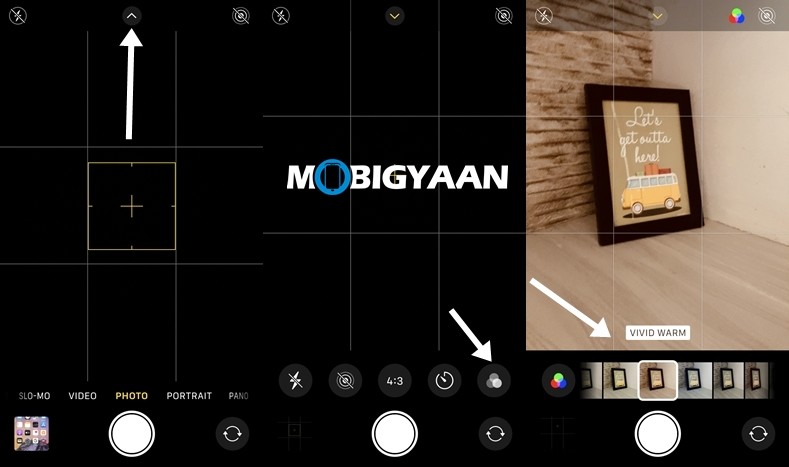
Normal Images can be boring and hence to make your photos more visually appealing using Filters becomes important. Filters make changes to the overall color tones in your image and make them look better when compared with the original ones. iPhone offers 10 filters that you can use while taking your image and as these are live filters it allows you to see the effect in real-time. To apply filters while taking an image all you have to do is:
Step 1: Bring up the Camera App on your iPhone and tap on the arrow from above.
Step 2: Tap on the Filters button to bring up the available filters.
Step 3: Select the filter that goes best with your image and click the photo.
6. Make use of Portrait Mode and Lightning effects
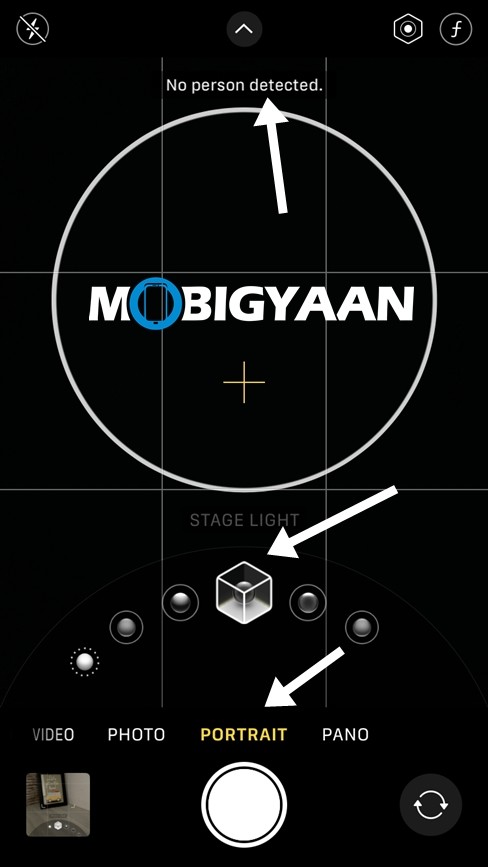
The Portrait mode in iPhone allows you to blur your background while taking a photo and along with that it also offers some lightning effects that make your photo look professional. To use Portrait Mode on your iPhone all you have to do is:
Step 1: Open the Camera App on your iPhone and switch to Portrait Mode.
Step 2: Choose the lightning effect that goes best with your image and take a photo.
It is to be noted that the iPhone SE 2020 and other iPhones which were released before iPhone 11 only support Portrait Mode for capturing human subjects.
That’s all, folks! For more updates on the latest smartphones and tech, follow us on our social media profiles.

