Recently, the South Korean giant, Samsung officially launched the Galaxy Note10 and Note10+ smartphones in the Indian market. Both the smartphones are powered by a Samsung Exynos 9825 chipset and run on Android 9.0 Pie with Samsung One UI.
While everyone knows that Samsung One UI comes with a lot of cool features, there are hardly any people who know all the methods to take Screenshots on the Samsung Galaxy Note 10 and Note10+ that runs on One UI. Hence in this guide, we are going to show you the Top 4 Methods to take Screenshots on the Samsung Galaxy Note and Note 10+. Read on!
Method 1: Take Screenshots with the Palm Swipe Feature on Note 10 series
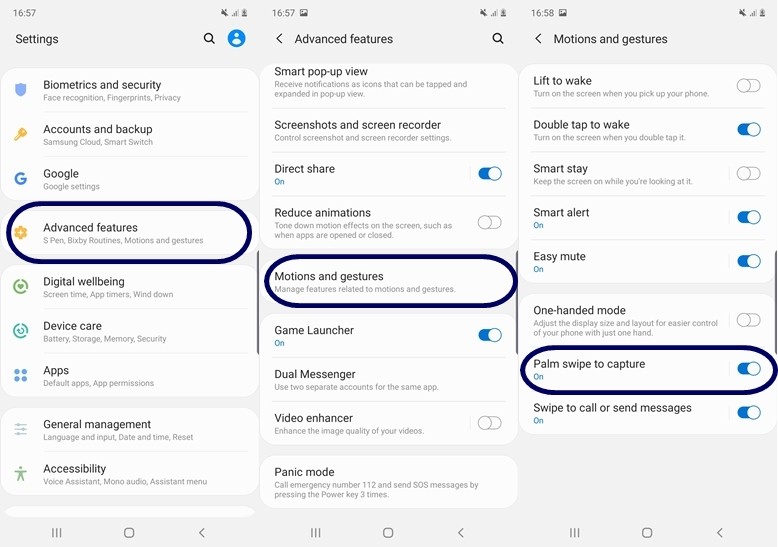
The first method to take screenshots on the Samsung Galaxy Note 10 series is with the “Palm swipe to capture” feature. With this feature present on the smartphone, you just have to swipe the side of your palm on the screen and the device will automatically take a screenshot. You can swipe it from right to left or left to right in both the cases the device takes quick screenshots. To enable Plam swipe to capture on the Samsung Galaxy Note 10 series all you have to do is:
- Go to Settings -> Advanced Features -> Motions and Gestures -> and turn on Palm swipe to capture.
Method 2: Take Screenshots with Smart Select
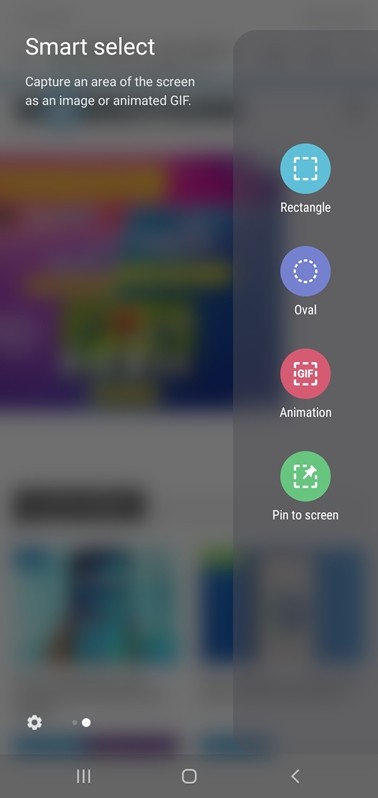
The Smart Select feature on the Note 10 series comes in handy when you want to capture something in a particular shape or if you want to capture a specific part of the screen. For using this feature on the Note 10 series “Edge Panels” should be enabled. Below we’ve shown you how to enable Edge panels and Smart select on the Samsung Galaxy Note 10 series.
Enabling Edge Panels on Note 10 series:
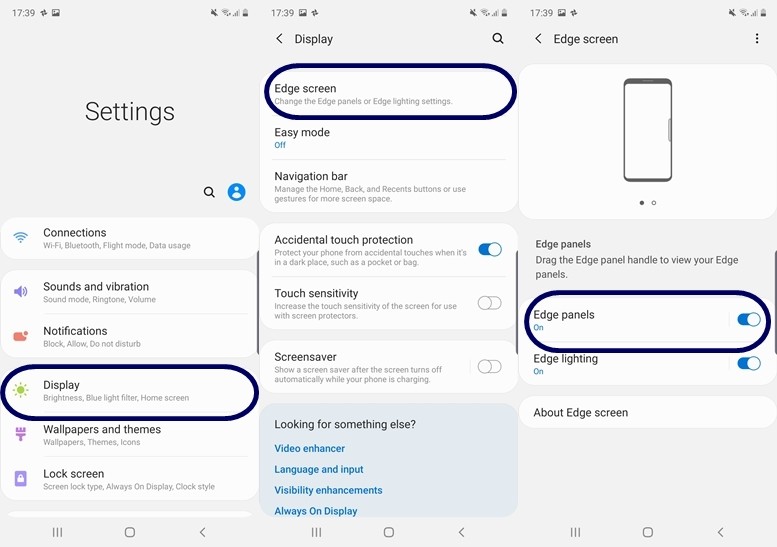
To enable Edge Panels on your Samsung Galaxy Note 10 or Note10+ all you have to do is:
- Go to Settings -> Display -> Edge screen -> Turn on Edge panels.
Enabling Smart Select on Note 10 series:
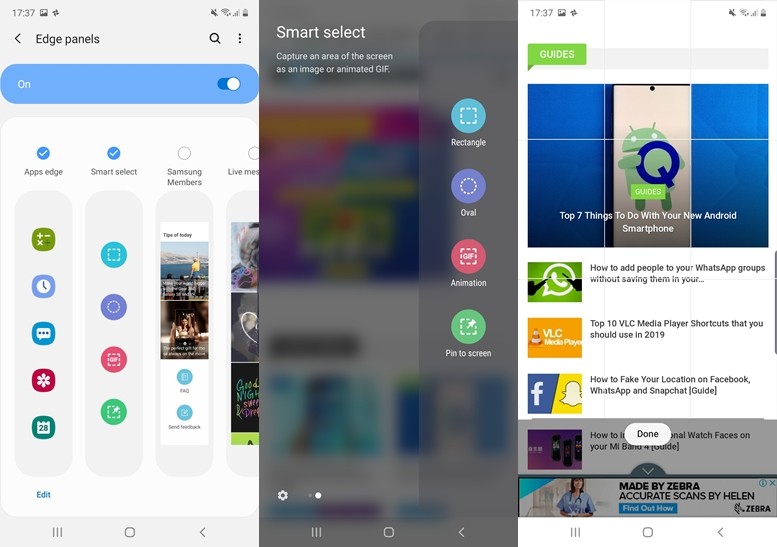 1) Open your Edge Panel and tap on Settings in the bottom left corner.
2) Tick the “Smart Select” option in the Edge Panels.
3) Navigate to the Smart Select Panel and select the shape in you want to take your screenshot.
4) Tap Done after selecting the Area and you are ready to go.
Method 3: Take Screenshots by Holding the Power and Volume Down Button
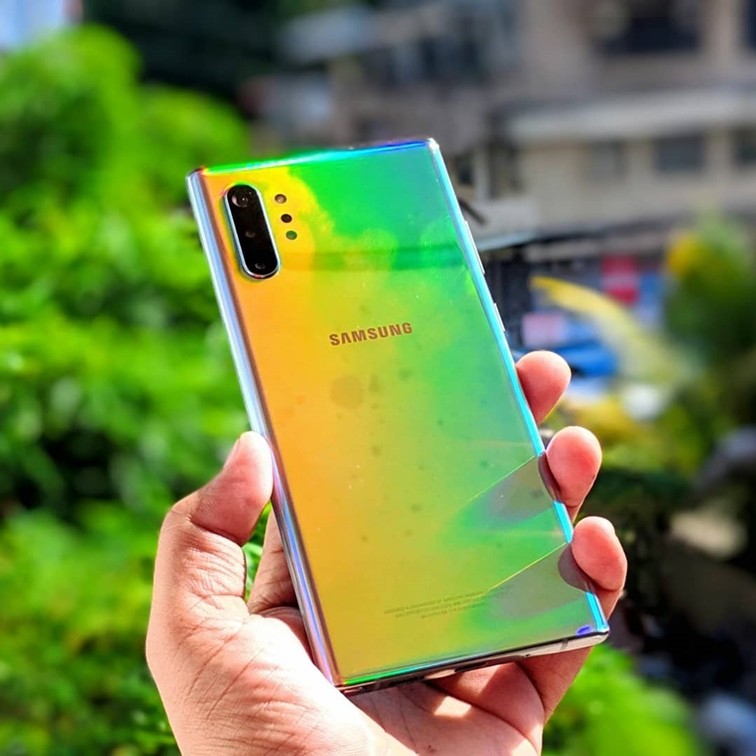
This method needs no Introduction. Available on all the major Android smartphones, this is the old classic way to take a screenshot on your device. Simply press the Volume Down + Power button together and your Note 10 will automatically take a screenshot.
Method 4- Take Screenshots with the Smart Capture Feature on Galaxy Note 10 Series
I am sure you must have seen those screenshots that capture the entire webpage or feed in a single image. If you were wondering if you can do that on your Note 10 series, the answer is yes. With the Smart capture feature on the Galaxy Note 10 series, you can capture your entire screen till the end which means that this will allow you take screenshots of Online Articles, Instagram and Facebook feed, conversations and so much more. Everything in a single image. Sounds cool right?
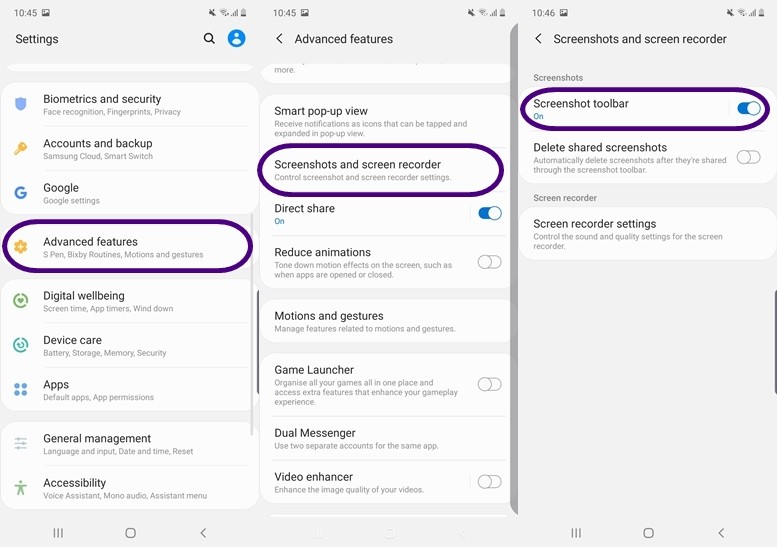
To use the Smart Capture feature on Galaxy Note 10 series you’ll have to enable the screenshot toolbar first. To do that:
- Go to Settings -> Advanced Features -> Screenshots and screen recorder -> turn on Screenshot Toolbar
Taking screenshots with Smart Capture:
1) Take a normal screenshot by swiping your palm on your screen or pressing the Volume Down + Power button.
2) When the screenshot toolbar comes on your screen press the button which points downwards. Keep pressing it and it will scroll down on your screen.
3) When you are done, release the button and you’ll get the screenshot in your Gallery.
Wrapping Up:
That’s all for this guide. Which method will you use to take a screenshot on your Note 10? Let us know in the comments below and for more Guides like this make sure you check out our “Guides” section by clicking here.
