In 2017, along with the introduction of the iPhone X, Apple also unveiled its new authentication technology – Face ID. You just glance on your iPhone and if your face matches the one stored in the device, the iPhone unlocks.
While the Face ID is a secure system, nothing can be trusted blindly. So, what if you are in a situation where someone else if trying to access your iPhone using? Someone may try to spoof Face ID to unlock your phone when it is locked. Or what if you don’t want the law-enforcement officer to access your device?
In the United States, law enforcement agencies cannot legally compel you to give your passcode or type it in yourself. But the same is not applicable for Face ID.
Well, there’s a way to temporarily disable Face ID when you are in a situation where you don’t want Face ID enabled. In this guide, we are showing you three different method you can use to temporarily disable Face ID on your iPhone.
Once the Face ID is disabled, you will need to enter the passcode to unlock your iPhone and use it. So make sure you remember it before using this method.
Method 1
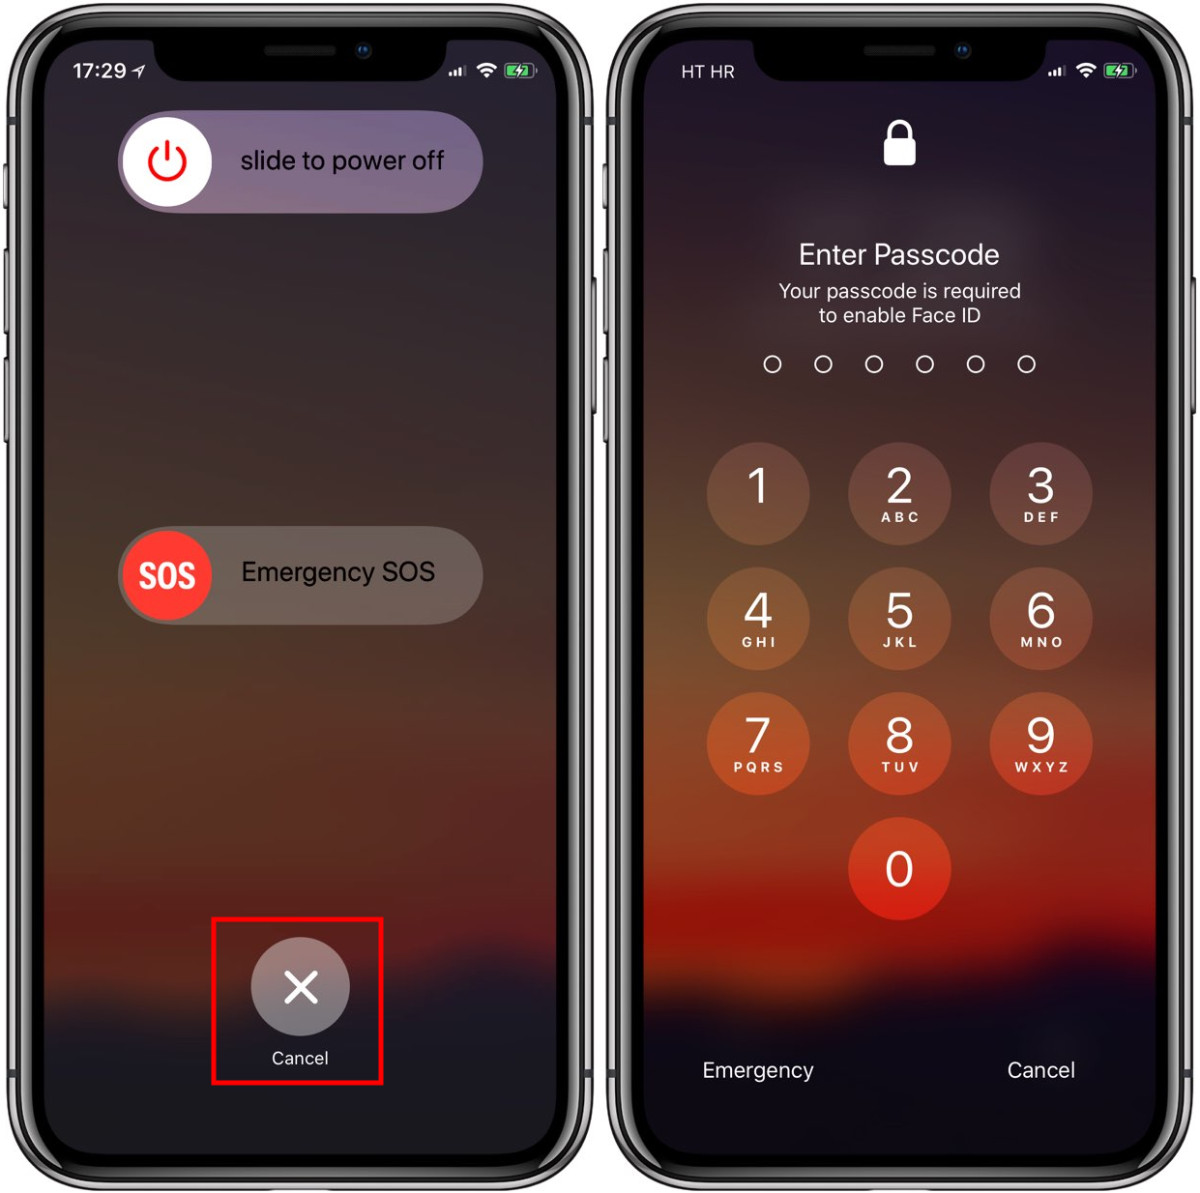
This is a hands-in method. Just keep pressing the side button of your iPhone and then press either the Volume Up or Volume Down keys. You will now be presented with a screen which will show you options of Emergency services and powering the phone off.

If you just click on the “Cancel” button, you will be headed back to the Lock Screen. However, the Face ID feature won’t work. To make it work, you will first have to unlock your device using passcode.
Method 2
This is a hands-off method which makes use of Siri. When your phone is locked, just say “Hey Siri, whose phone is this?”. Now Siri will respond saying the iPhone owner’s name and will also show the contact card.
The step also disables the Face unlock feature on the device. Now, you will need to enter the passcode to access the phone.
Method 3
The Method 1 and Method 2 described above shows how you can disable Face ID when the iPhone is with you. But what if the iPhone is not with you or if you have lost it? Well, there’s nothing to worry as Face ID feature gets disabled after five unsuccessful attempts.

However, if you want to make sure that your device is secure, you can disable Face ID using Find My application using another other Apple device that is registered with the same account owner.
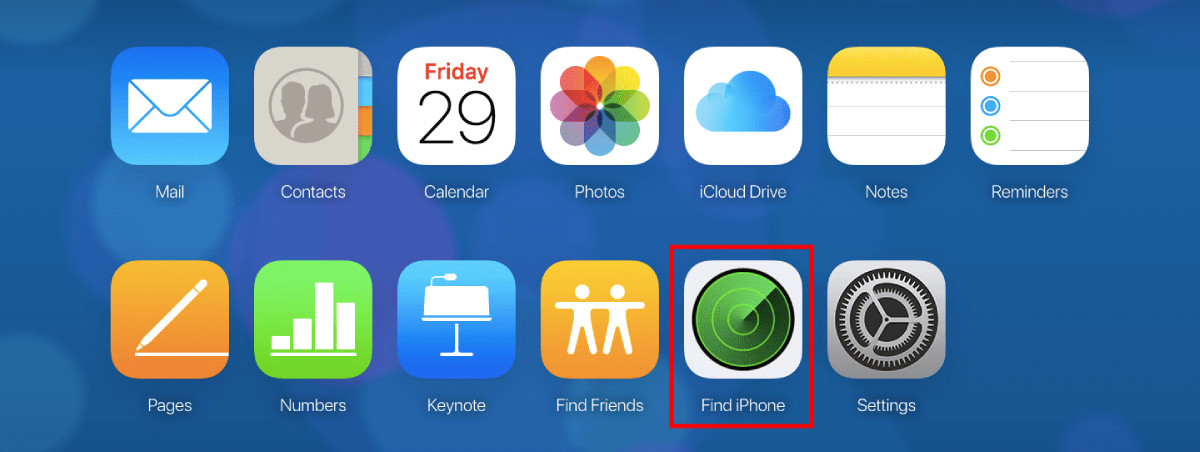
You can also disable Face ID on your iPhone using other devices enrolled into the Family Sharing plan. There’s yet another way to disable Face ID remotely and that is through logging in to the iCloud account from any browser and clicking on “Find iPhone” icon.
Permanently Disable Face ID
If you are looking for a way to disable Face ID feature on your iPhone permanently, follow this step-by-step process.
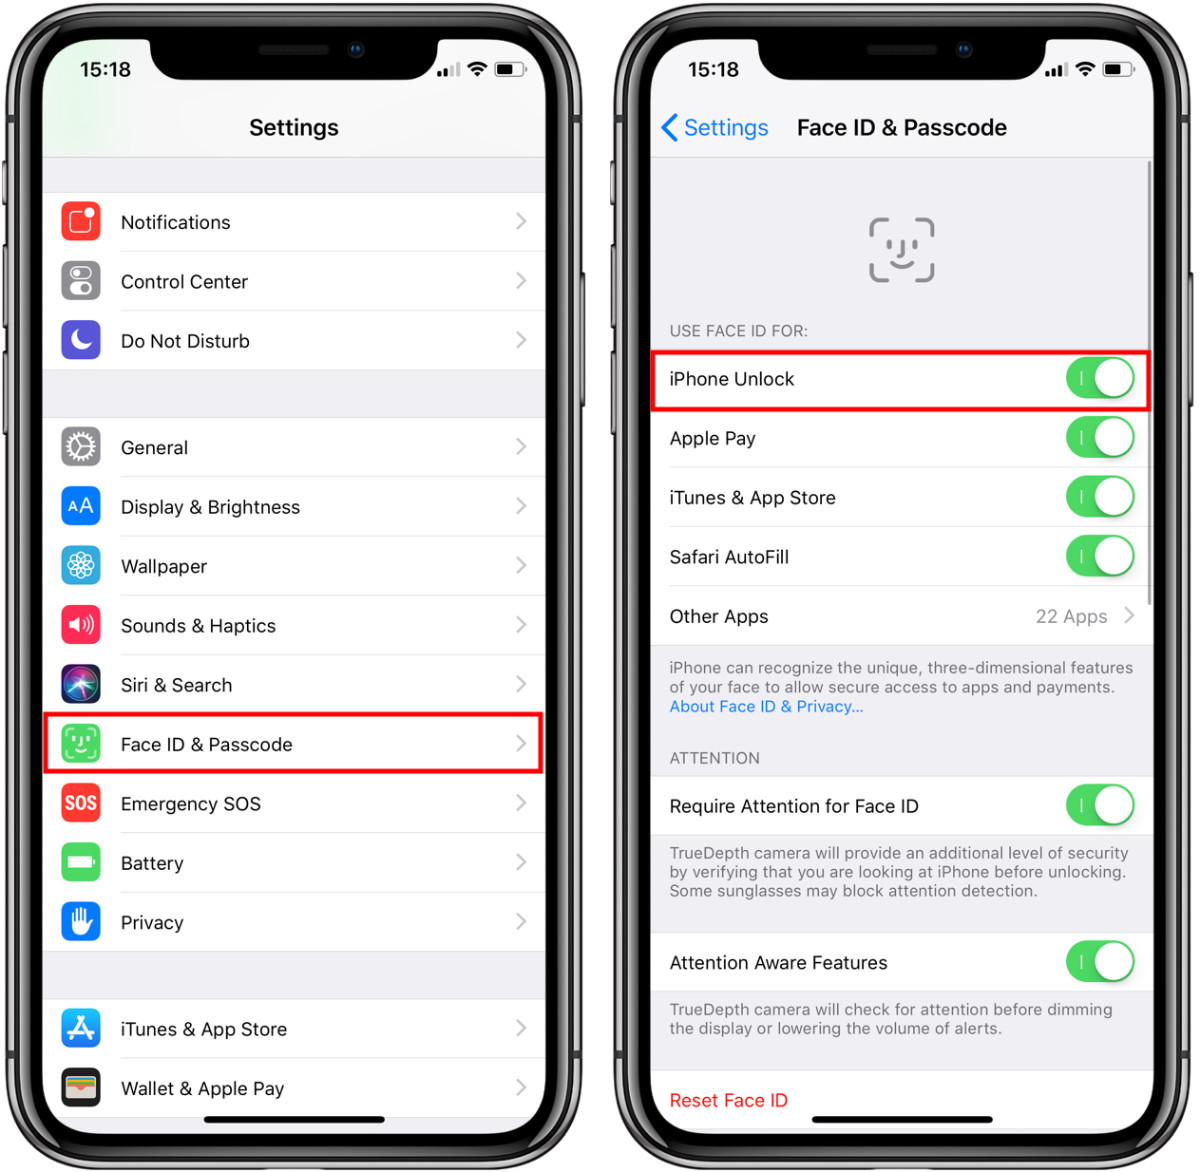
- Go the Settings app on your iPhone
- Scroll down and tap on “Face ID & Passcode”
- You’ll now be asked to enter your password. Do so.
- Now, toggle off the first option that says “iPhone Unlock”
- That’s it. Face ID is now disabled.

You can also check out our detailed guide on disabling Face ID on iPad and iPhone.
We’ve written a lot of guides related to Windows 10, macOS, Android, iOS, Chromebooks, among others. So, make sure to check out our Guides section for more of such helpful guides and tips.

