Last year, Google revamped the Sharing menu on Chrome for Android and with the release of the new Chrome 91, the company has introduced a new feature in the Sharing menu that enables users to take screenshots of the webpage.
Once a user clicks on the Screenshot option, the app takes a screenshot of the entire webpage including the address bar on the top. The app then shows three options at the bottom of the screen, namely Crop, Text, and Draw.

In this step-by-step guide, we will show you how you can use the newly added tool in the Google Chrome web browser to take screenshots on your Android smartphone.
How To Take Screenshot In Chrome On Android
Step 1: Open the Chrome web browser on your Android smartphone and go to the webpage that you want to take a screenshot of.
Step 2: When the page opens, tap and hold anywhere on the screen or on the address bar and then tap on the share icon to open the Share menu.
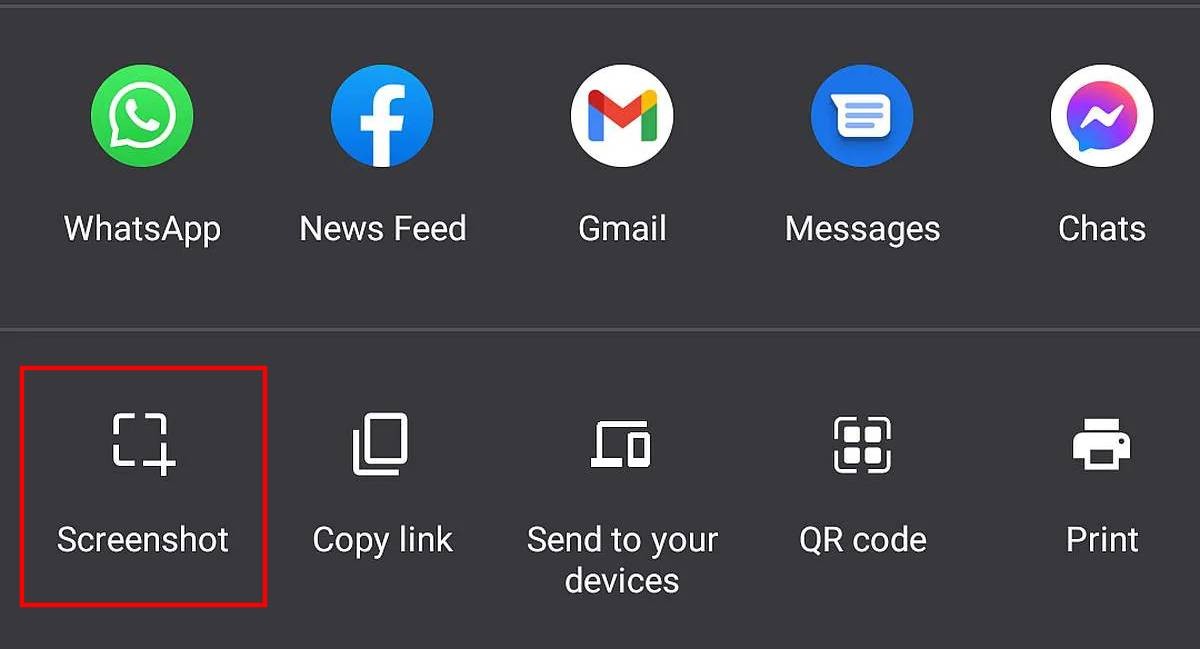
Step 3: In the Share menu, you will see a “screenshot” option in the second row of the menu, just below the list of social media apps.

Step 4: You will now see a screen with three options at the bottom — Crop, Text, and Draw. You can select any of them if you need to. Or else, just click the “Next” option at the top-right corner.
Step 5: Now, you will get options to Share the screenshot, Save to device, or Delete. Select the “Save to the device only” option to save the screenshot on your phone.
That’s it. The screenshot of the webpage is now stored on your smartphone if you choose to save it to the device. Once it is saved, you can also use the share menu to share it with others or delete it.

![How to lock apps with fingerprints on Redmi and Mi smartphones [MIUI 12 Guide] 3 Xiaomi Mi 11X Review](https://www.mobigyaan.com/wp-content/uploads/2021/05/Xiaomi-Mi-11X-Design-Review-11.jpg)