When you start your Sony PlayStation 5 (PS5) gaming console, the microphone on the DualSesne controller is automatically turned on. This means that if you forget to turn it off, then your audio will be transmitted in multiplayer games.
If you want to avoid such situations where you are accidentally transmitting audio from your side, then you can change the default status of the mic on the DualSense controller. In this step-by-step guide, we will show how you can put the controller’s microphone on mute by default instead of the On state.

How to put DualSense Controller Mic on Mute by default
Step 1: On the home screen of the Sony PlayStation 5, click on the cog or gear-shaped icon to open the “Settings” menu.
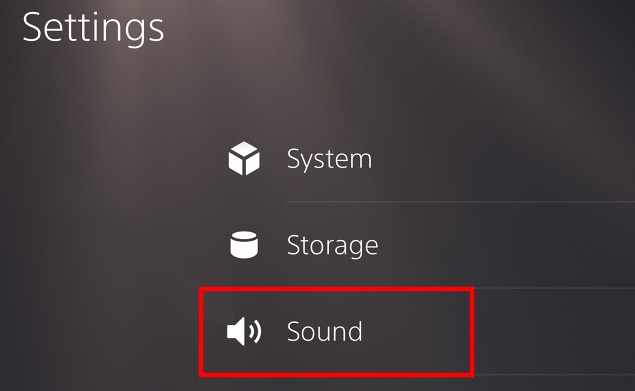
Step 2: In the Settings menu, scroll down and then select the “Sound” option.

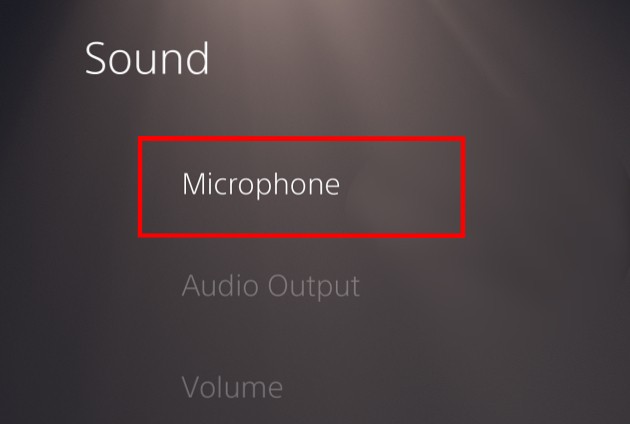
Step 3: Now, from the left-side menu, select the “Microphone” option.

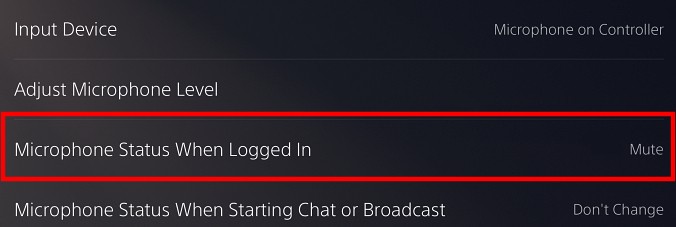
Step 4: Select the option that reads “Microphone Status When Logged In” and change its value from “On” to “Mute.”

That’s it. Now, the status of the microphone on your DualSense controller will be Mute by default instead of being turned On. To ensure that the settings are working properly, you can confirm that there’s a solid orange-colored light on the Mute button when you start the PlayStation 5. To enable the microphone, just click on the mute button, and the orange light will be turned off, confirming that the mic is now working.
