In Microsoft’s Windows 11 operating system, the taskbar plays an important role, allowing users to quickly switch between the application and having a quick access option for useful system features and functions.
When using a dual-display or a multi-monitor setup for your Windows 11-powered computer, then you must have seen that the taskbar is only appearing on one display. While most users are satisfied with the user experience of these default settings, there are some who prefer to customize this setting.
Here is a step-by-step guide on showing the taskbar on all the monitors that are connected to the computer running the latest Windows 11 operating system.
How to show taskbar on all monitors in Windows 11
Step 1: Open the Settings application on your Windows 11 computer. For this, open the Start Menu and click on the Settings app or search for the application and click on it from the search results. Alternatively, you can also press the Windows + I keys on the keyboard to open the app.
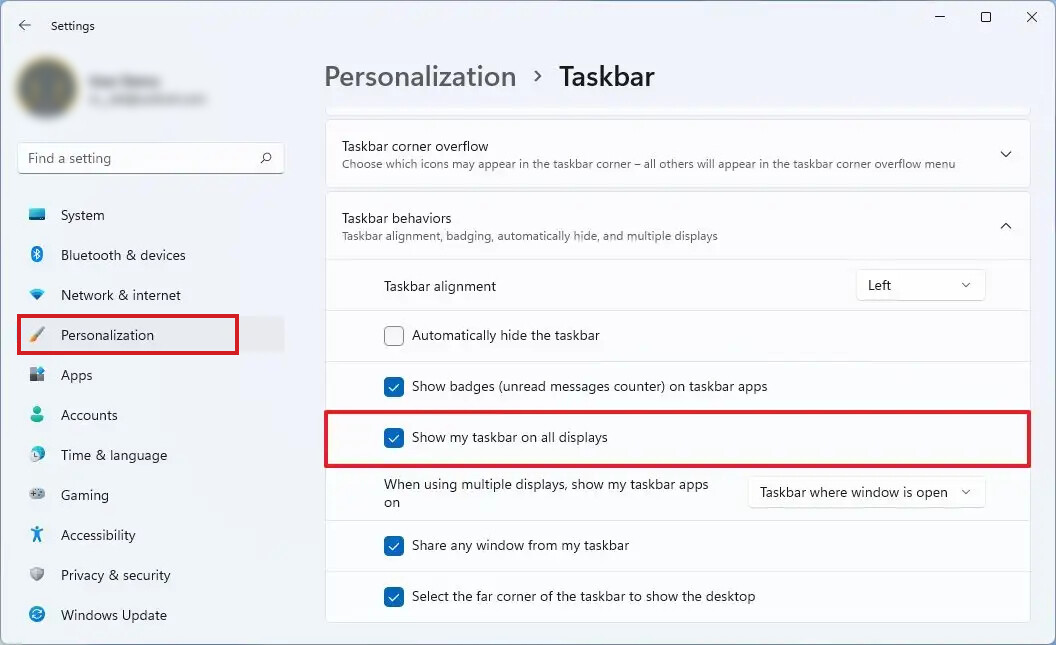
Step 2: When the Settings app opens, click on the “Personalization” option from the left sidebar.
Step 3: After that, click on the “Taskbar” option and then select the “Taskbar behaviors” settings.
Step 4: Under the Taskbar Behaviours settings, tick the checkbox for the “Show my taskbar on all displays” option.

That’s it. Once you have followed the above-mentioned step-by-step guide on your computer, the taskbar will be visible on all the screens connected to your system. The taskbar will show up automatically once you make the changes described above, without the need of changing display settings.
