Windows 10 offers a Guest account feature which can be used by anyone that doesn’t have their own account set up on the computer. The Guest account in Windows operating system has limited access to settings but allows them to run apps that are already installed and access the internet.
If you want to secure the Guest account with a password, then here is a step-by-step guide on how you can do so. While there are a few different ways to do this, we are covering a GUI method using Computer Management. It is for those who are not comfortable with the command prompt and PowerShell.
How to set Guest account password in Windows 10
Step 1: Open the “Computer Management” application on your Windows 10 system. For this, just search for computer management in the Start menu and click on the first result.
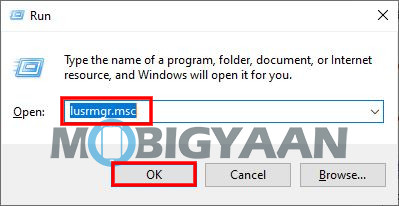
Alternatively, you can also press Windows + R keys and type “lusrmgr.msc” and then click on Ok to open the app.
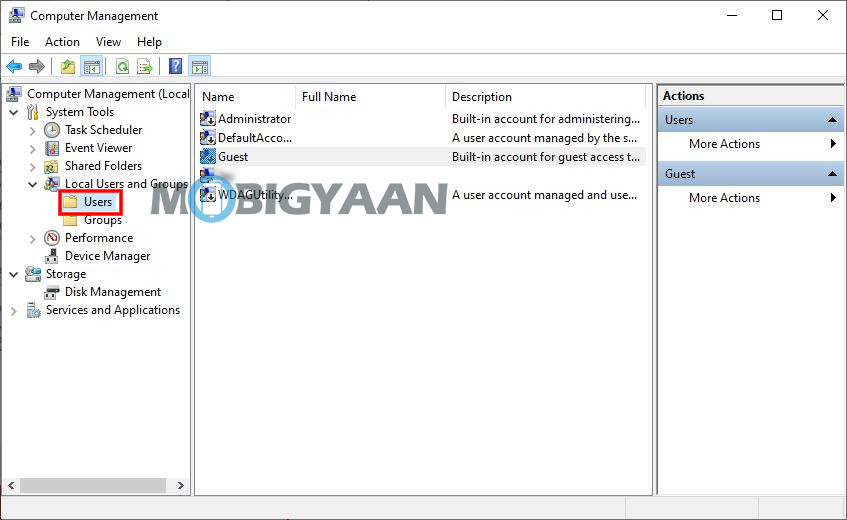
Step 2: In Computer Management, click on the “Local Users and Groups” in the left-hand side menu, and from its child categories, click on “Users.”
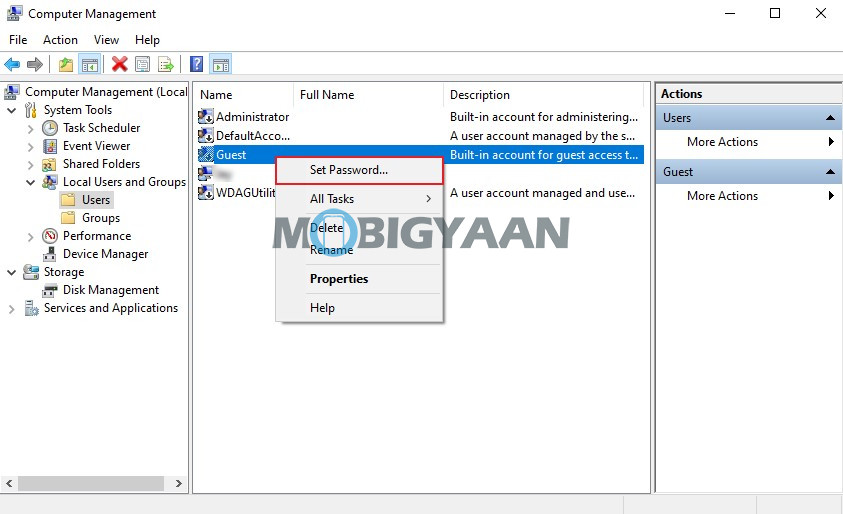
Step 3: On the right-side portion, right-click on the “Guest” account and from the context menu, click on the “Set password” option.
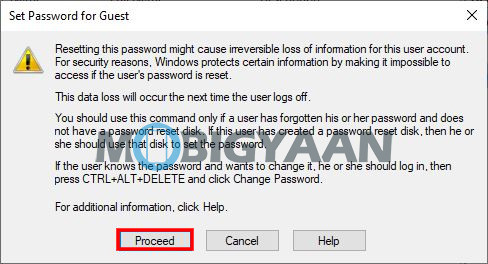
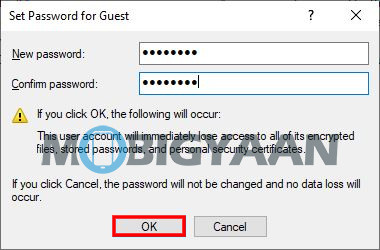
Step 4: If you see a warning dialog, click on Proceed. You will now be asked to set a new password for the Guest account. Once done, click on the “Ok” button.
That’s it. Now, whenever someone tries to log into the computer using the Guest account, they will be asked to enter the password.

