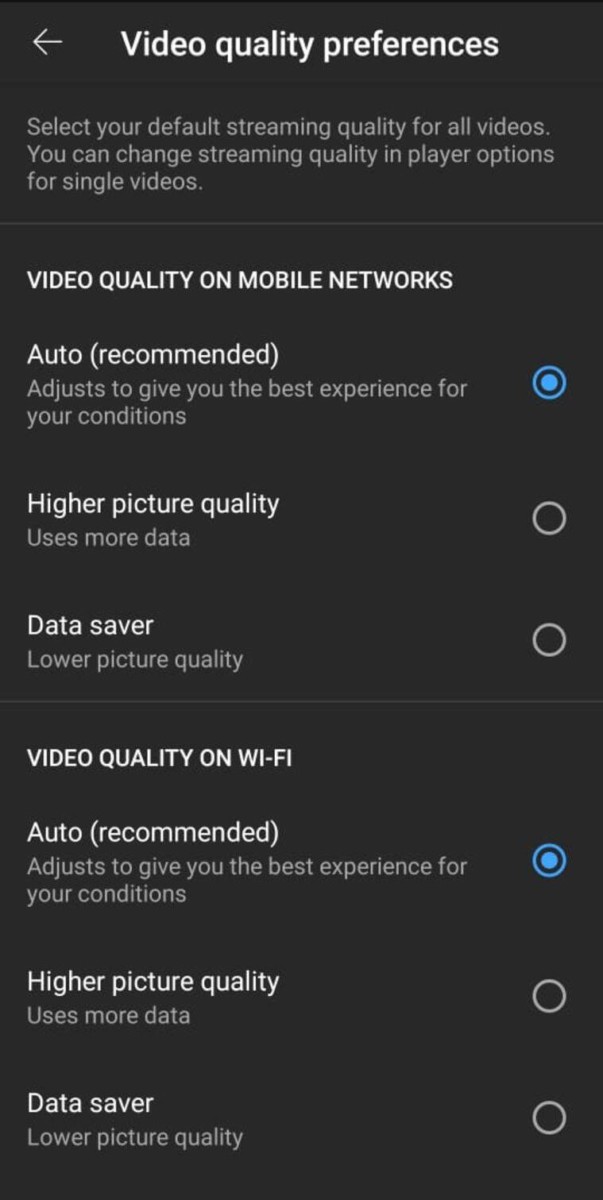
In the new update for Youtube mobile application, Google is allowing users to change the default video playback resolution but instead of numbers, they will be able to choose the quality type.
While the default settings remain set to Auto, changing the settings to High Picture Quality or Data Saver will change the way the video plays as per the user’s settings. In this step-by-step guide, we will show you how to change the default video playback quality preference on your phone.

Change default video playback quality for YouTube
Step 1: Open the YouTube application on your smartphone.
Step 2: In the app, go to the Settings and scroll down to “Video Quality Preferences.”
Step 3: Now, you will be presented with two options to change the default video playback quality based on the data usage type — Wi-Fi and Mobile Network.

Step 4: Change the option from “Auto” to whatever you like. You will get two options to choose from — High Picture Quality or Data Saver.
Google has described the three video playback quality as below:
- Auto: Changes to give you the best experience for your conditions.
- Higher picture quality: Uses more data so videos may take longer to start or may buffer more often.
- Data saver: Lower picture quality, but videos may start faster.
Currently, the YouTube app allows users to select either of those two options as a default video quality for playback — High Picture Quality or Data Saver. There’s no way to select a certain video quality such as 720p, 1080p, or 4K as default. The settings are set for Auto by default which adjusts the video quality according to the network.

