Windows 10, being a powerful operating system, comes packed with several advanced features that might not be needed for regular users on a day-to-day basis. However, some of them can be used to make your life easier.
One of such feature is Task Scheduling. To learn how scheduling tasks work on Windows 10, we will covering a system task creation process of shutting down your computer automatically.
While we have covered a detailed step-by-step process of scheduling a task on Windows 10 OS for shutting down the computer, we have also mentioned a much much and easier way to schedule auto shutdown.
Using Run command
Step 1: First of all, open the Run dialog on your computer. To do so, just press the Windows + R keys on your keyboard.
Step 2: Now, in the windows that opens, just enter the following command:
shutdown –s –t 600
Once you have put that text in the input field, just click on Ok or press Enter key.
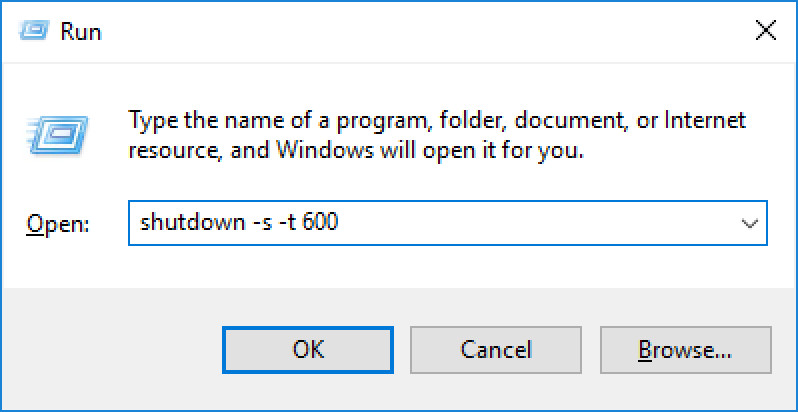
You can also enter the same command in the Command Prompt and Windows PowerShell as well.
In this command, the 600 represents the number of seconds. Here, the computer will automatically shut down after 600 seconds or 10 minutes. You can change the number in the command as per your choice.
Using Task Scheduler
Task Scheduler is a powerful tool that comes built-in Windows 10. You can use this tool to schedule several different types of tasks, but for the purpose of this guide, we will be creating a basic task to shutdown computer at a specified time.
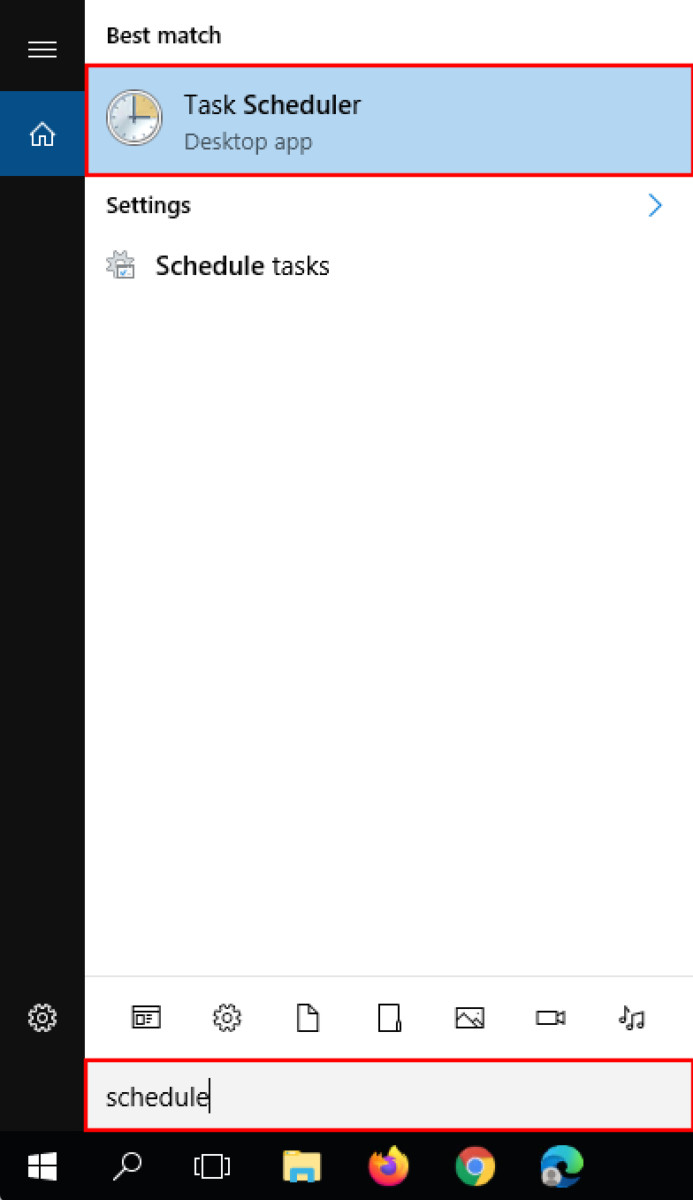
Step 1: Open the Task Scheduler application on your computer. You can do so by going to the Start Menu, typing “schedule” and clicking on “Task Scheduler.”
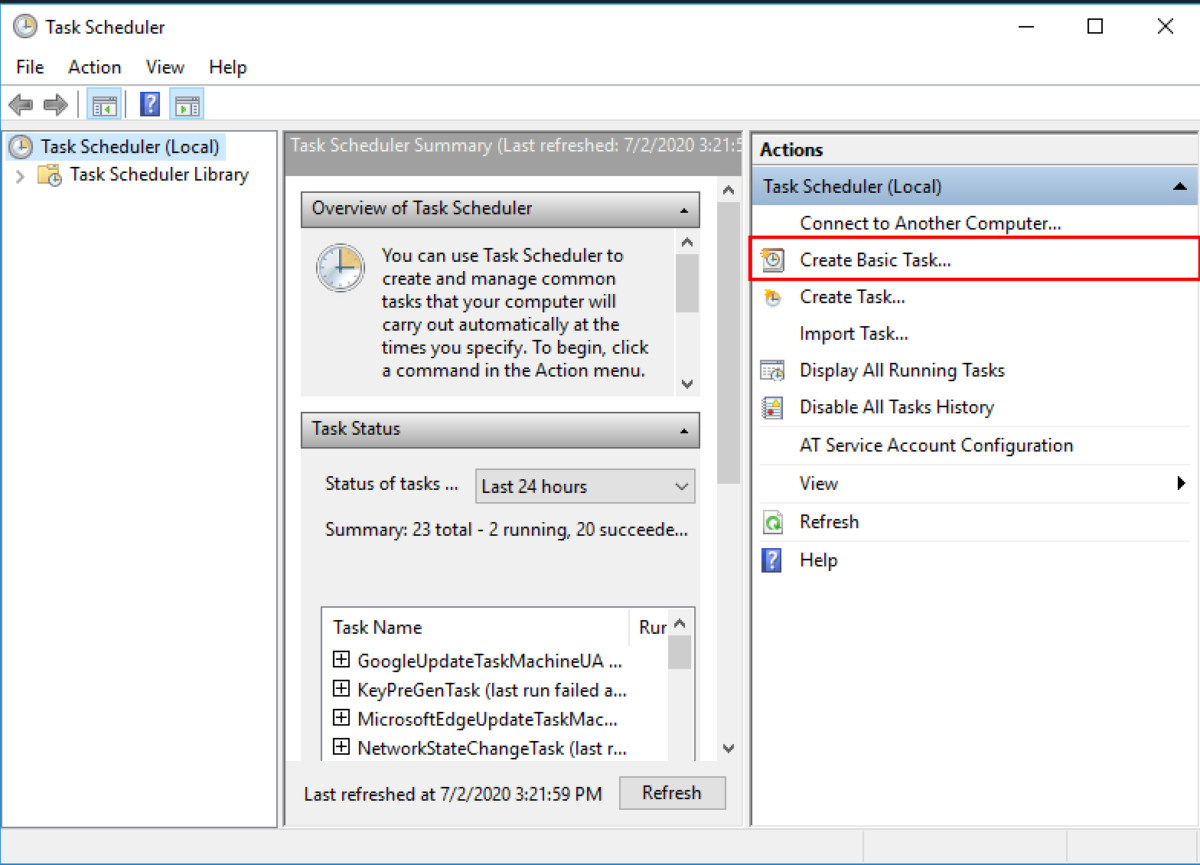
Step 2: Now, in the Task Scheduler, click on “Create Basic Task” from the right sidebar.
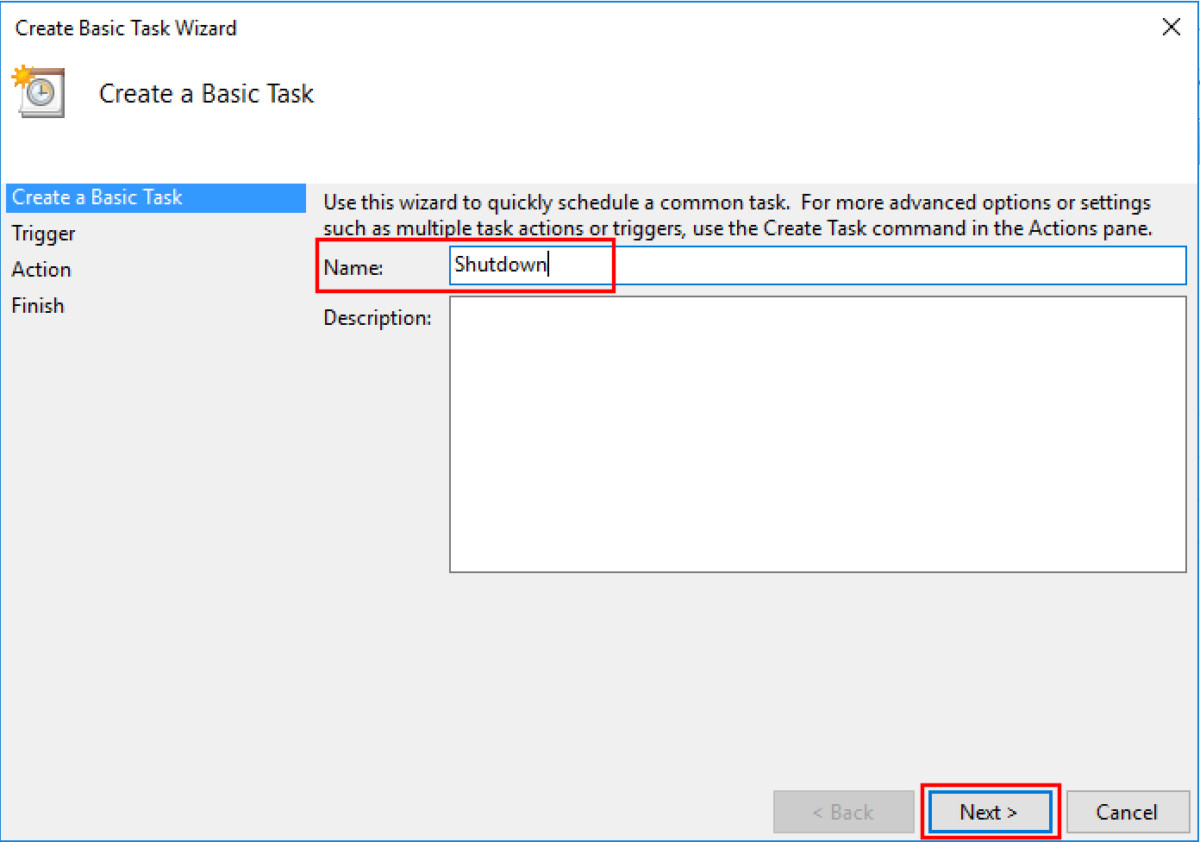
Step 3: Once you click to create a new task, a new window will open. In the “Name” section, enter the name of the task and click “Next”. We will go ahead with the name of the task as “Shutdown”.
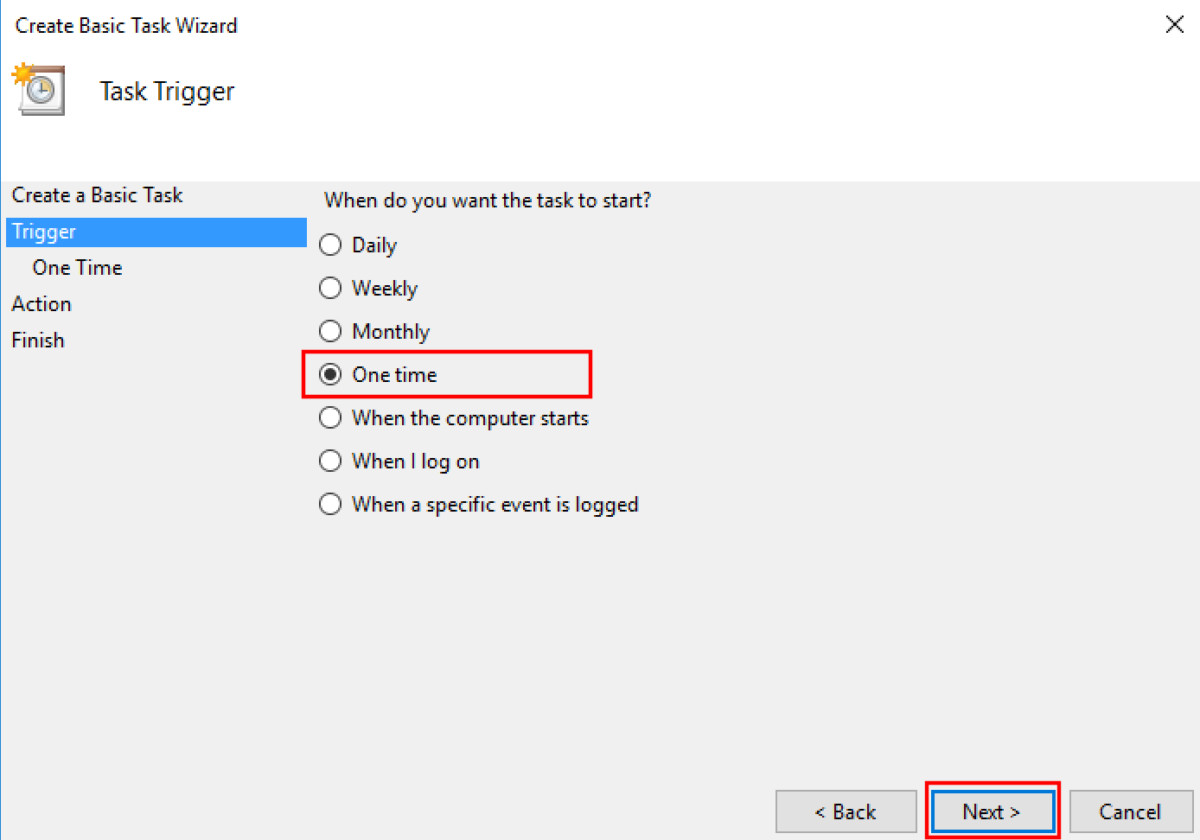
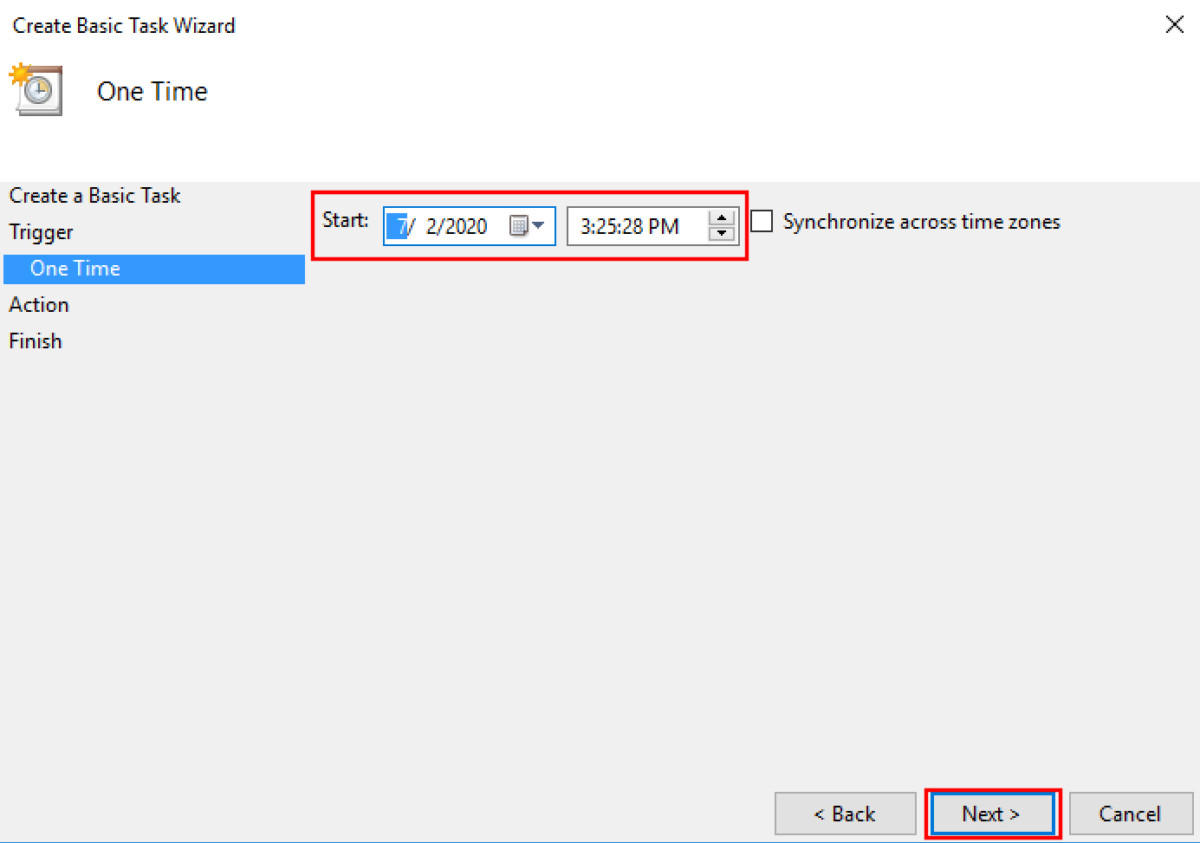
Step 4: You will now be asked to assign trigger. For our purpose, we will select “One Time”. Click “Next” and then select the date and time for the action to trigger at.
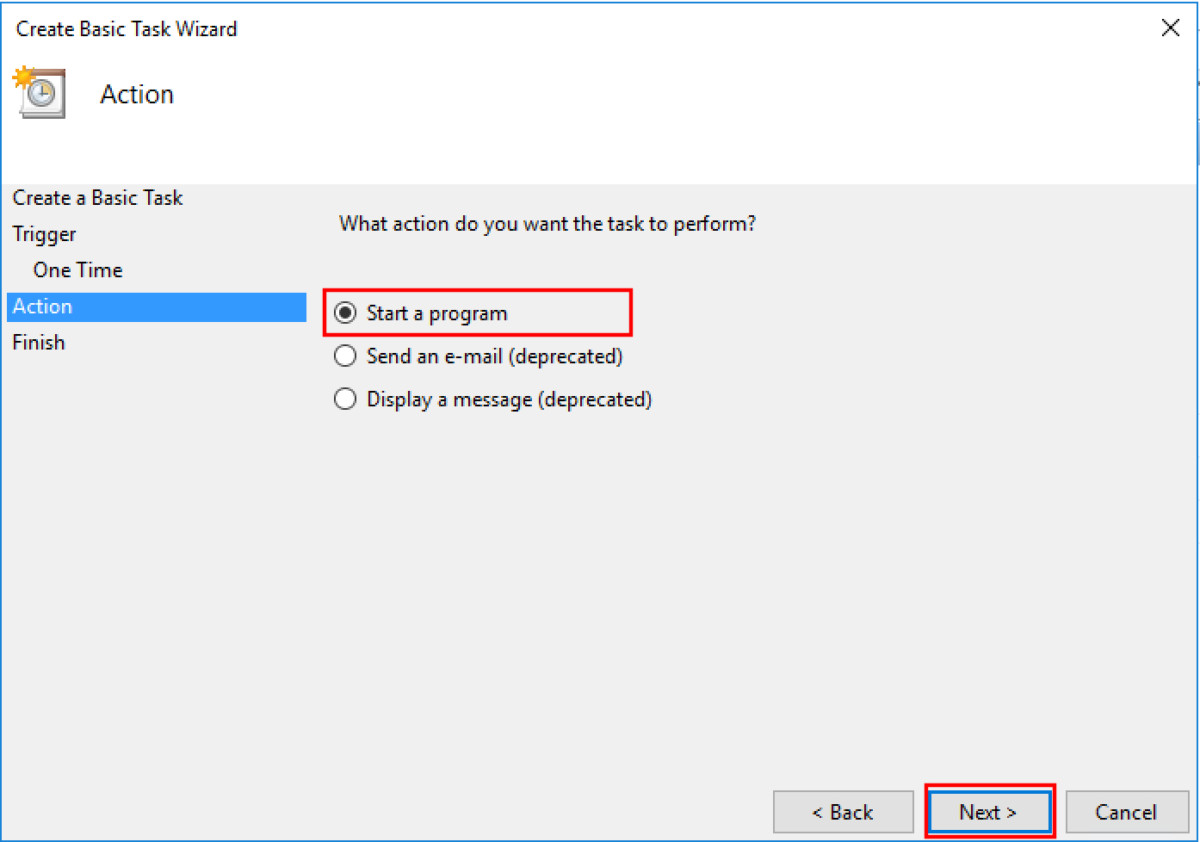
Step 5: In the next step, you will have to select Action as “Start a program” and click on the Next button.
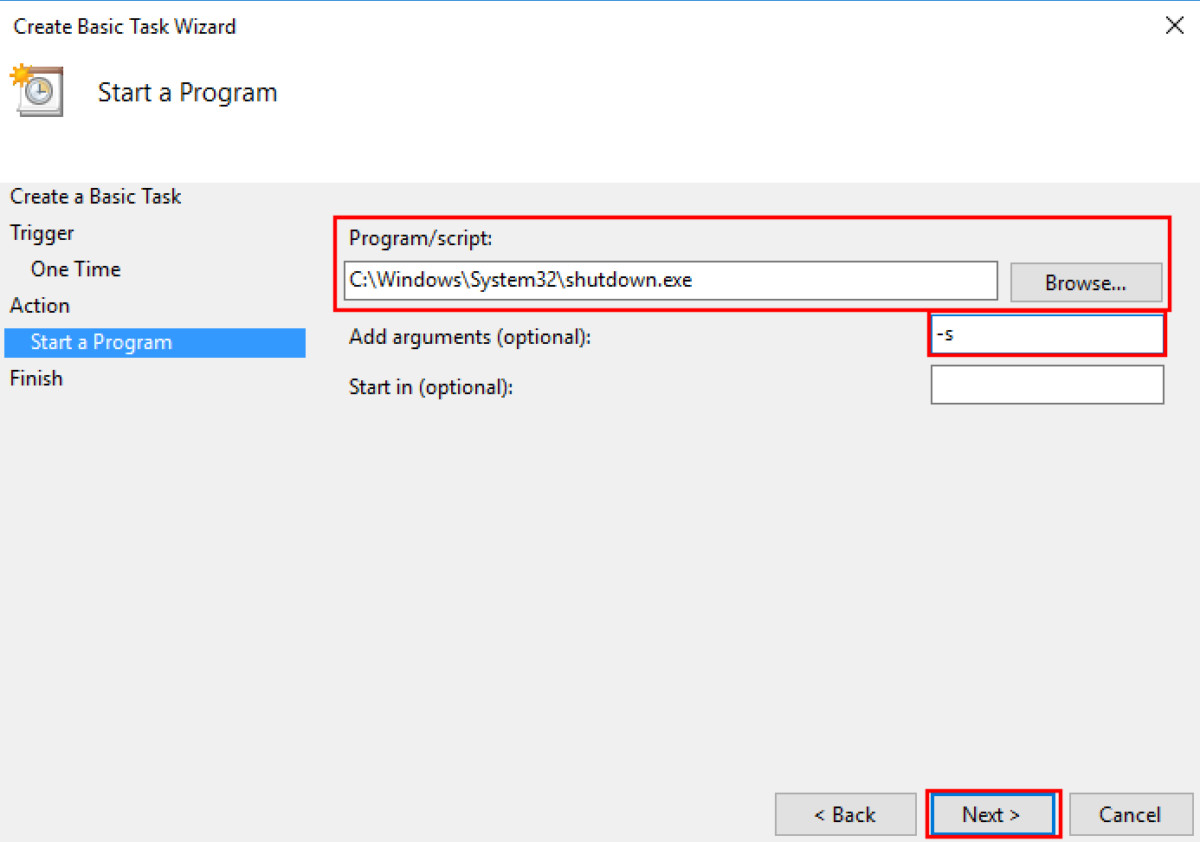
Step 6: You will now have to provide path to the program. Click on the “Browse” button and go to “C:\Windows\System32\” and select the file “shutdown.exe”
Step 7: In the same screen, just below the path, there’s a field to Add Argument. In that, input the text “-s” and then click “Next” button and then “Finish” on the next screen.
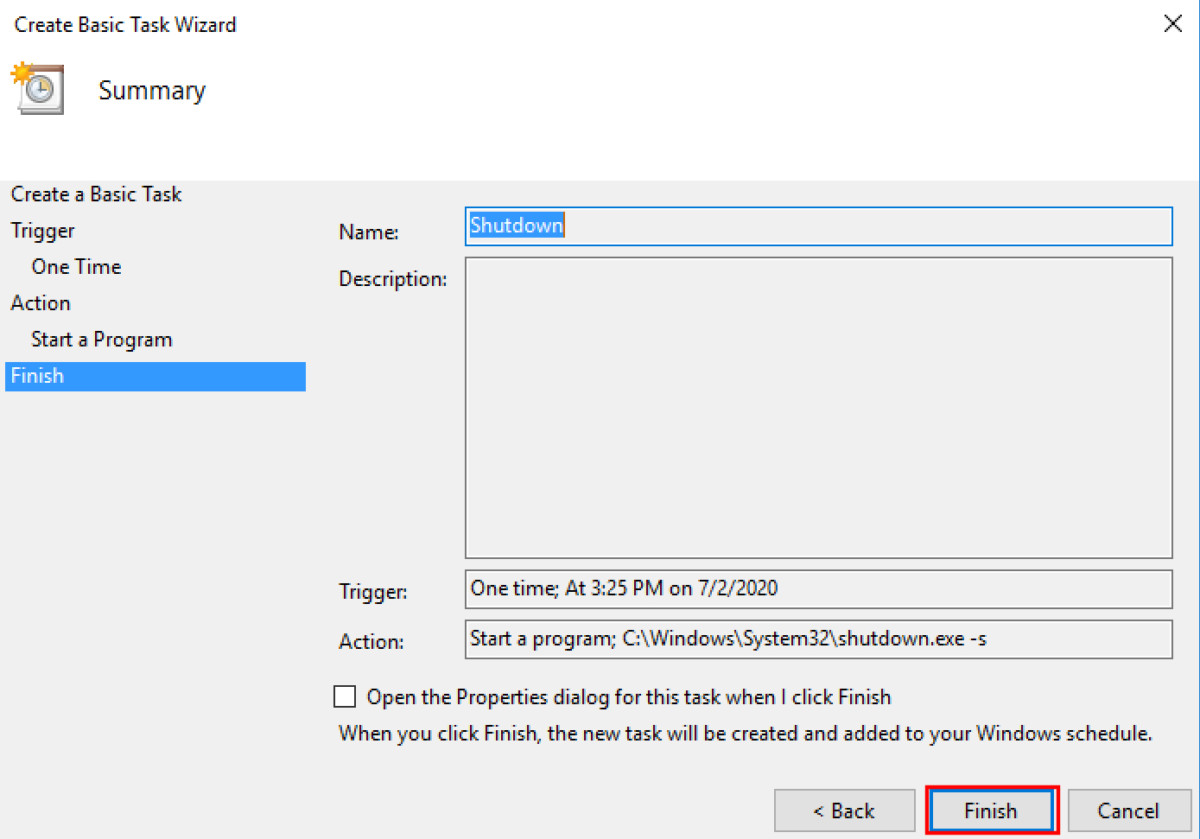
That’s it. The task has now been created and your Windows 10 computer will automatically get shut down on the day you mentioned and at the time you specified.
We have written a lot of guides related to Windows 10, macOS, Android, iOS, Chromebooks, among others. So, make sure to check out our Guides section for more of such helpful guides and tips.

