Windows 10 operating system comes with a pretty good security tool pre-installed in the form of Windows Defender so that users do not need to purchase separate antivirus software. When the Windows Defender is activated on your computer, it automatically scans and removes threats from the system.
In this guide, we’ll show you how you can find out the list of threats detected by the Windows Defenders application on your computer and what action has been taken by the software. Follow this step-by-step guide to find out how.
How to check threat history in Windows Defender
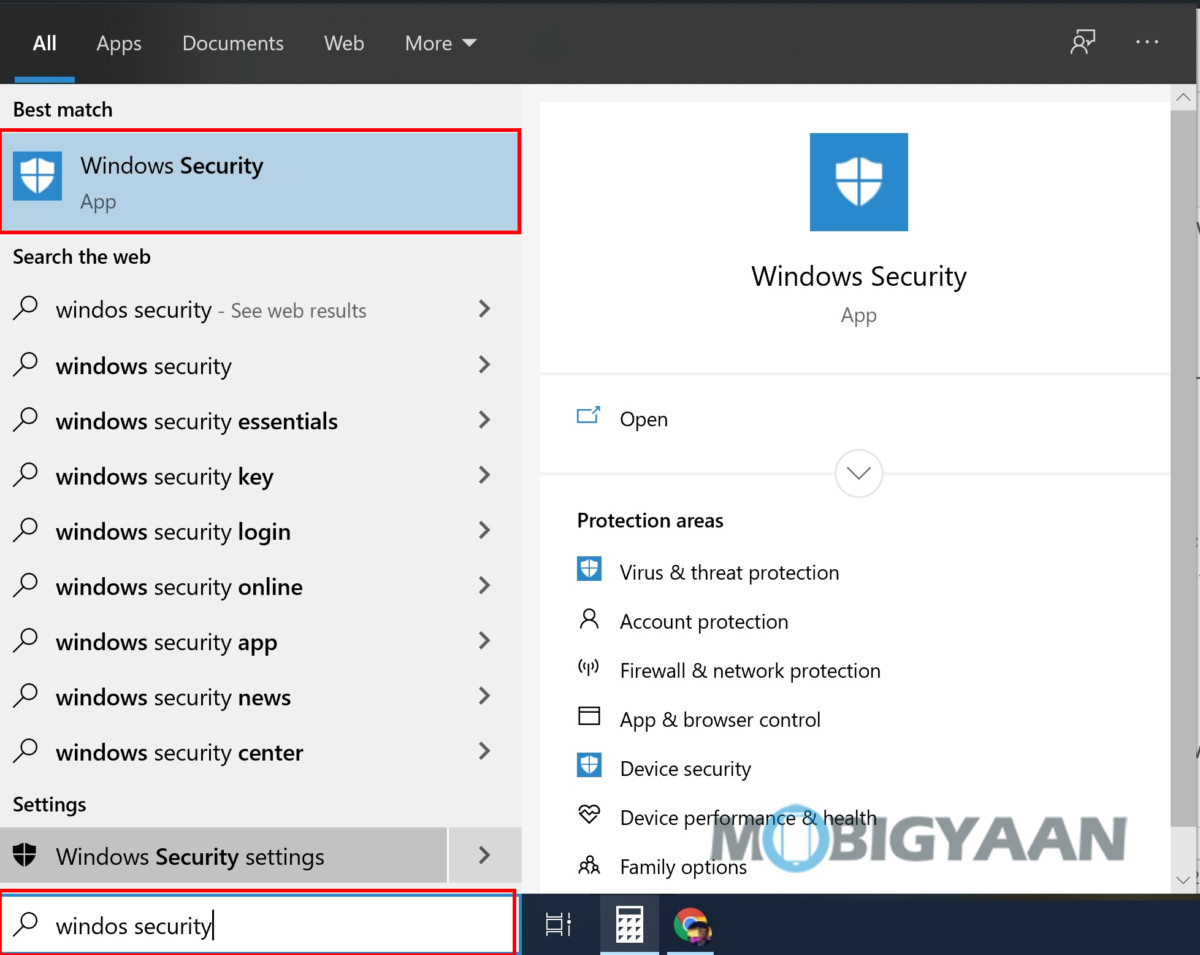
Step 1: First of all, open the Start menu and type “Windows Security.” From the search results, select the “Windows Security” app.

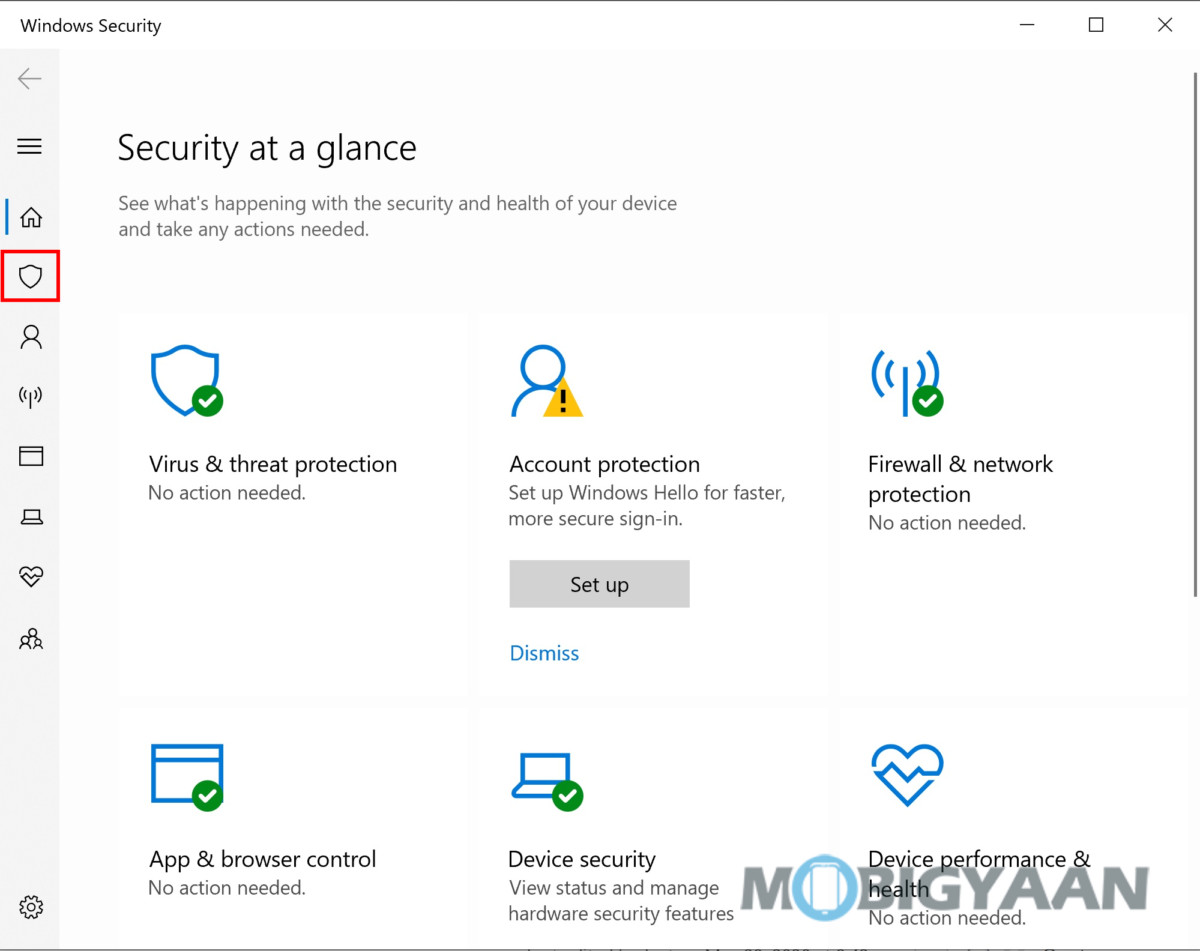
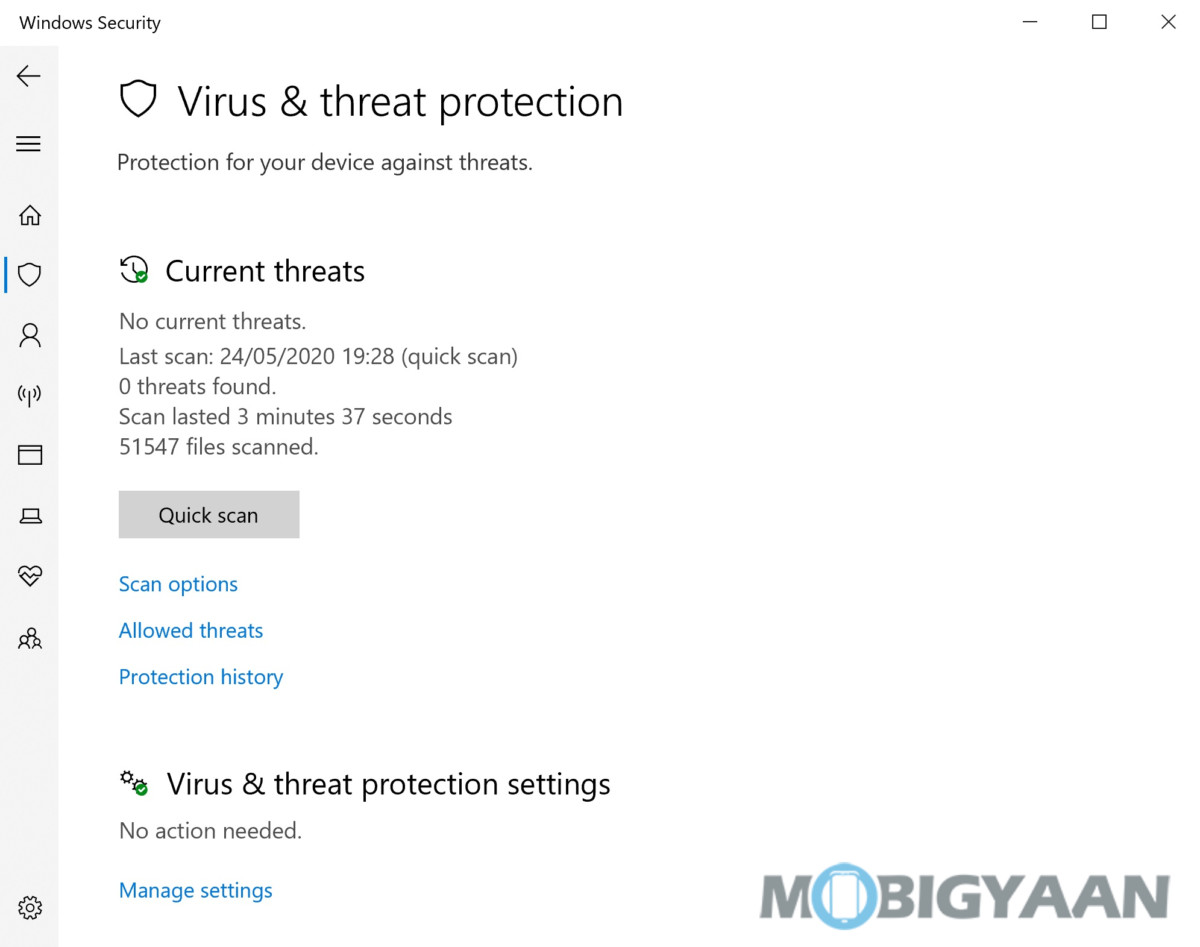
Step 2: In the software, from the left-pane menu, select “Virus & Threat Protection.” Now, click on “Protection History.” If you are on an older version of Windows 10, the same option will be visible as “Threat History”.

Step 3: The “Protection History” screen will now show you the list of threats found by the Windows Defender software on your system.

Step 4: You can click on the threat to find out more information about the same. You can also click the “Filter” button to narrow down the results of the specific-type of threats. If you do not see any threats listed, then it’s a good thing as it indicates that your system is safe and free from any threats.

