The Windows operating system is one of the most used computer OS in the market, and with such a large userbase, it usually is a primary target when it comes to threats and attacks. But, Microsoft has been offering a built-in tool named Windows Defender to protect the system from threats, viruses, and malware.
For those who are unaware, malware is a term used to identify any malicious program or file that intends to infect a system or a server. Malware is usually designed with protections and firewalls in mind, and thus it needs dedicated tools designed to identify and remove them from infected systems.
Thankfully, the newly released Windows 11 operating system comes with Windows Defender, an in-build security tool by Microsoft. It is quite useful and capable of identifying and dealing with viruses.
In this step-by-step guide, we will show you how you can scan for malware on your Windows 11 computer using Microsoft’s own Windows Defender security tool.
How to scan for Malware using Windows Defender in Windows 11
Step 1: Open the Settings application on your Windows 11 computer.
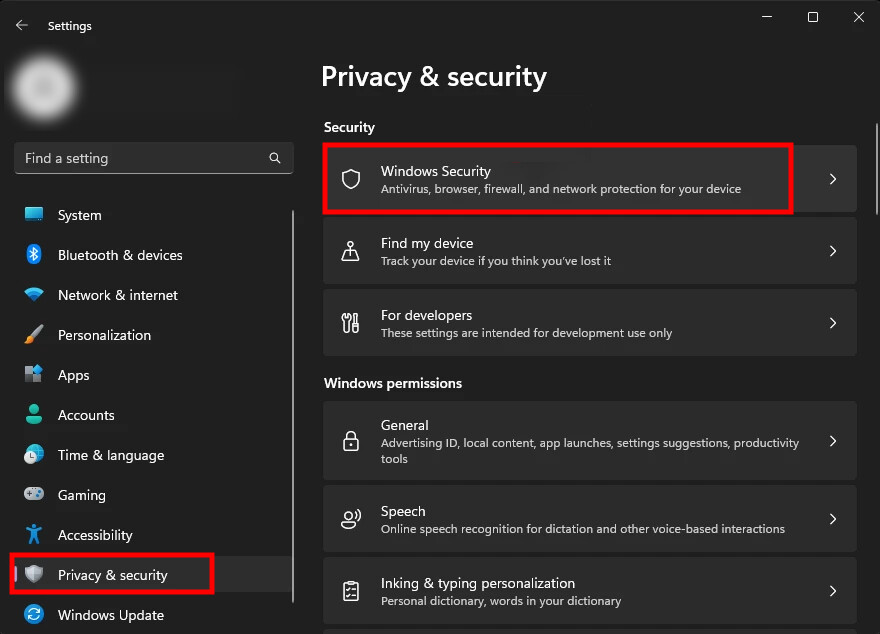
Step 2: When the app opens, click on the “Privacy & Security” option from the left sidebar.

Step 3: After that, click on “Windows Security” and then click on the “Open Windows Security” button.
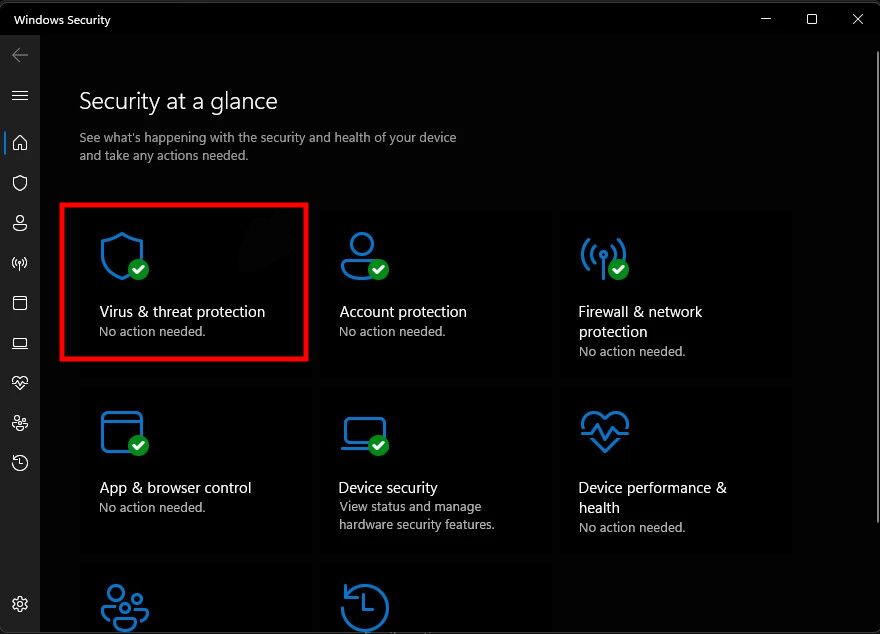
Step 4: When the Windows Security app opens, click on the “Virus & threat protection” option.

Step 5: On the Virus & threat protection page, click on the “Scan options” link.
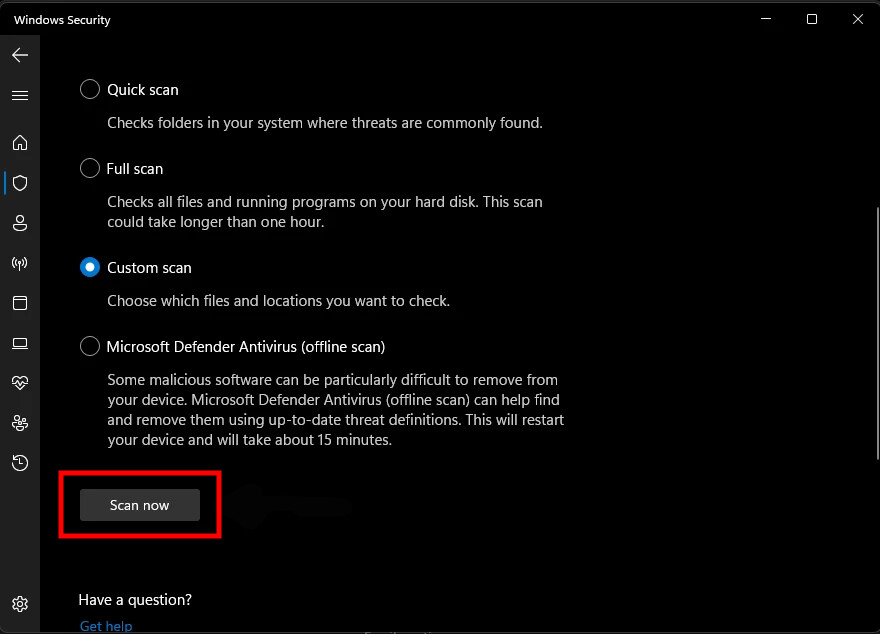
Step 6: Select the type of scan you want to perform on your computer and then click on the “Scan now” button.

That’s it. Once you have followed the above-mentioned step-by-step guide, then your computer will start scanning the system for malware and other security threats based on the scan type that you selected. When the scanning process is going on, you can continue to use your computer. The program will scan for issues in the background and will show a notification on the screen after the scanning is completed.

