Microsoft offers a Settings app in Windows 10 which comes in handy to customize the operating system and have your custom settings depending on your requirements. However, it may also not work as expected and malfunction. In such times, you can set it to the default settings.
There are several different ways available for resetting the Settings application on your computer such as from the start menu and using the Command Promot. But for this guide, we will be using the PowerShell tool.

How to reset Settings app in Windows 10
Before processing further, verify that the version of your Windows 10 supports resetting the Settings app using PowerShell. This is only supported in Windows 10 build 20175 or newer. Here is a step-by-step guide to verifying the support for this process on your computer and if does support this, then how to use the feature.
Step 1: Press Windows + R keys on your keyboard to open the Run window. There, type “winver” and hit the Enter key. It will open About Windows which will have information about the version of Windows 10 your system is running. If the build version is 20175 or newer, then continue to the next step.
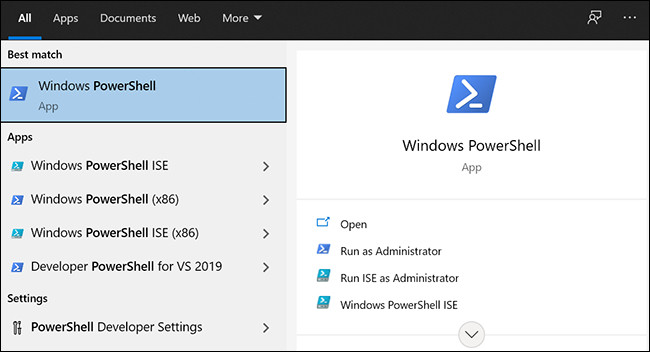
Step 2: Open the PowerShell app on your Windows 10 computer. For this, open the Start menu and search for PowerShell.
From the results, right-click on the app and select the “Run as Administrator” option. Or select the “Run as Administrator” option on the right-side pane in the search results.

Step 3: Now, copy the following command and paste it in the PowerShell window, and then click Enter to run it.
Get-AppxPackage *windows.immersivecontrolpanel* | Reset-AppxPackage

That’s it. You have now successfully reset the Settings app. This removes all the custom settings and brings them back to their default values. This also fix bugs and other problems that are caused by your custom settings.

