Windows 10 allows users to modify some settings based on their likings through the Settings panel. However, for the most advanced users, there’s a tool called Local Group Policy Editor that allows users to modify virtually all settings on Windows OS.
We have already covered lots of guides on enabling or disabling various features and functions in the Windows 10 operating system using the Local Group Policy Editor. But, if you have been experiencing any issues or just want to reset those modified policies to the default settings, here is a step-by-step guide for the same.

Reset Local Group Policy Settings in Windows
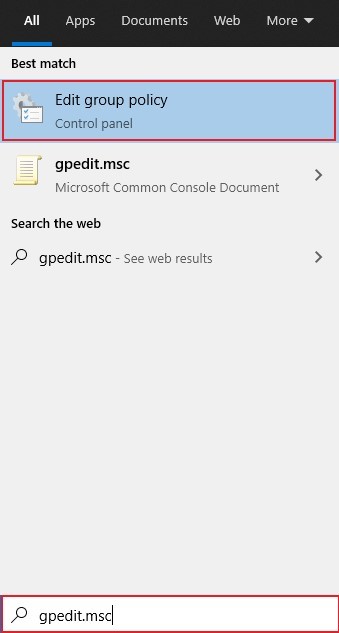
Step 1: First of all, open the Local Group Policy Editor on your computer. For this, search for “gpedit.msc” in the Start menu and click on the “Edit Group Policy” app.

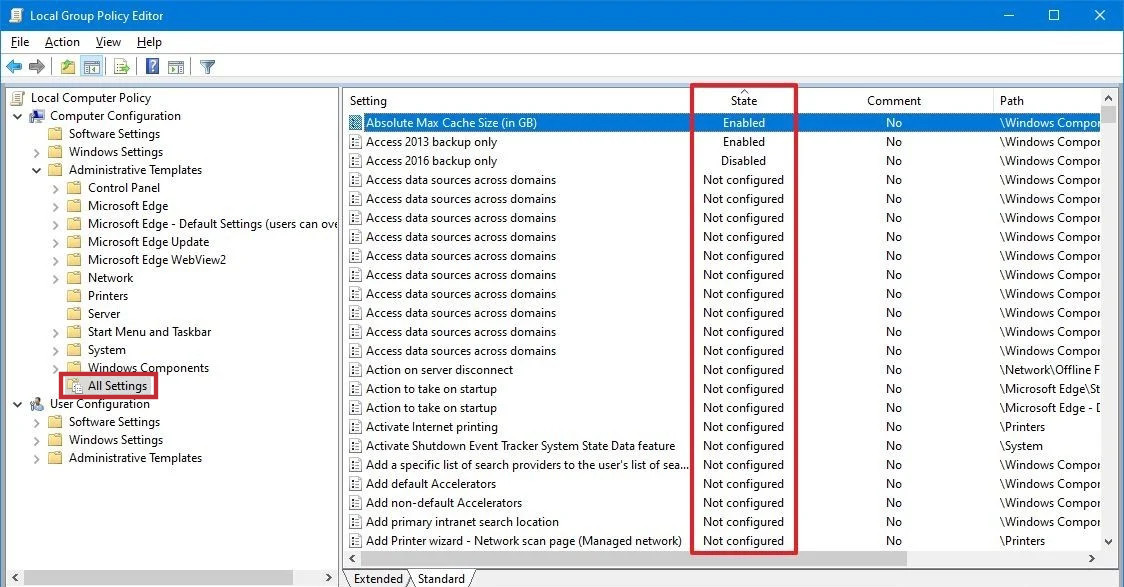
Step 2: In the Local Group Policy Editor, navigate to the following location:
Computer Configuration > Administrative Templates > All Settings
Step 3: Now, click the “State” column header which will sort all the settings based on their status — Enabled or Disabled.

Step 4: Double-click on the policies that you have modified and then select the “Not configured” option and then click the “Ok” button.
Do note that you will have to repeat Step 4 for all the policies that you have modified or the policies which you want to reset to the default configuration.

