Microsoft allows users to install Windows 10 operating system on the computer without the product key as a trial version. However, it disables certain features on the system and adds a watermark at the bottom right corner that reads “Activate Windows – Go to settings to activate windows.”
It disables features like Windows Defender which takes care of the security on the device, as well as blocks users from customizing the operating system and installing security updates, among others.

If your system isn’t activated, then you must be seeing that Activate Windows watermark on the computer, which is annoying. In this guide, we will show you how to remove the Activate Windows watermark on a non-activated Windows 10 computer.
How to Remove Activate Windows watermark
Step 1: Open Registry Editor on your Windows 10 computer. To do so, open the Start menu and search for the term “regedit” and click on the Registry Editor from the search results to open the application.

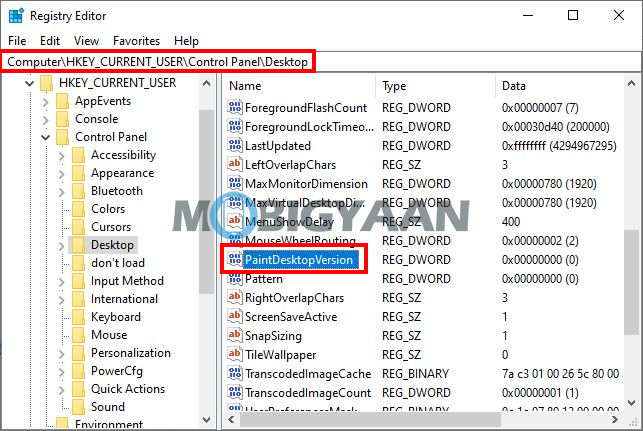
Step 2: In the Registry Editor, go to the following location:
HKEY_CURRENT_USER\Control Panel\Desktop
Step 3: Now, in the right pane of the “Desktop” folder, double-click on the “PaintDesktopVersion” key.

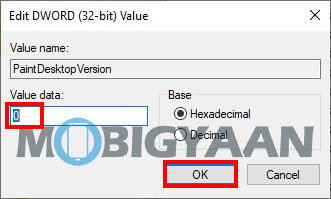
Step 4: Just change the value from ‘1’ to ‘0’ and click OK.

Step5: Finally, restart your computer for the changes to take effect.
Once your Windows 10 computer restarts, you will notice that the “Activate Windows – Go to settings to activate windows” water is no longer visible.
