In the Windows operating system from Microsoft, there’s a directory named Quick Access present in the File Explorer application. As the name indicates, this section is there to present a list of the recently or frequently opened files and folders. Along with that, it also gives easy access to important folders on the device, such as Desktop, Download, Documents, and more.
The feature was first introduced in the Windows 10 OS and is also present in the newly launched Windows 11 operating system. In the previous versions of Windows, the same feature was called Favourite.
If the Quick Access feature is enabled on your computer but you don’t find it useful, then you can disable it. Here is a step-by-step guide for removing the Quick Access directory from the File Explorer on your Windows 11 computer.
How to remove Quick Access from File Explorer in Windows 11
Step 1: Open up the Registry Editor tool on your computer. For this, you can click on the Start Menu, search for “regedit” and then click on the tool from the search results.
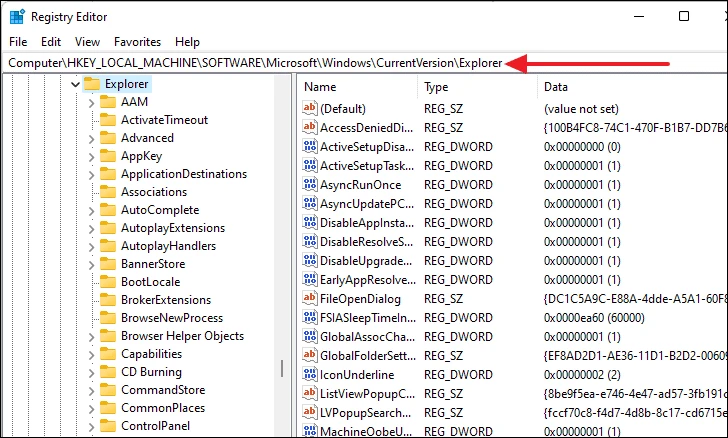
Step 2: When the Registry Editor window appears, go to the following location:
Computer\HKEY_LOCAL_MACHINE\SOFTWARE\Microsoft\Windows\CurrentVersion\Explorer

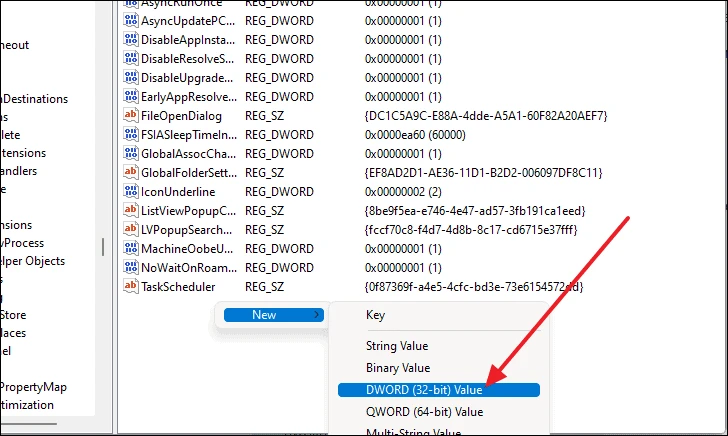
Step 3: Now, on the right panel, right-click over any blank space, select “New” and then select “DWORD (32-bit) Value” to create a new string.

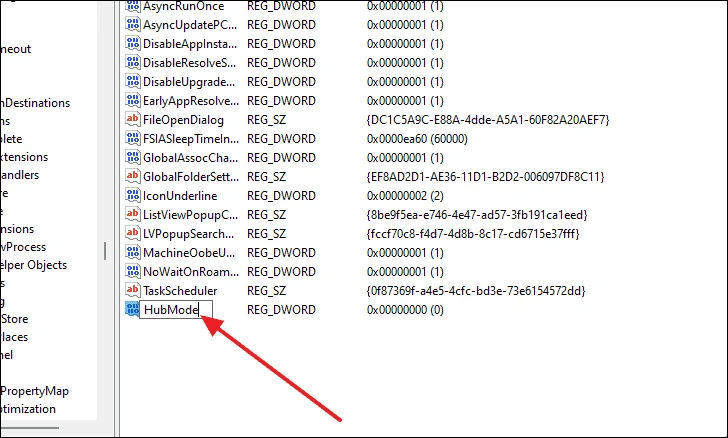
Step 4: Once the new string is created, make sure to keep “‘HubMode” as its name.

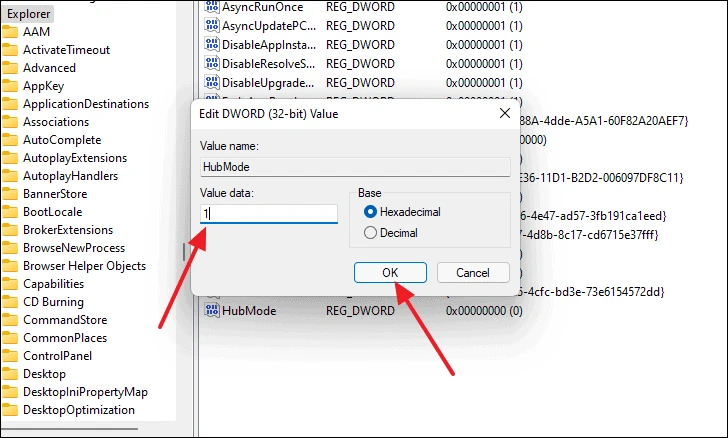
Step 5: Double-click on the “HubMode” string and when the new window appears, set the “Value data” to “1” and then click on the “Ok” button.

That’s it. You can now restart your computer for the newly made changes to take effect. Once the computer boots up again, you will notice that the Quick Access feature in the File Explorer application has been removed. If you want to bring the feature back, all you have to do is follow the same steps and remove the newly created string.
