Microsoft’s Windows 11 operating system comes with several security features and one of them is user authentication. There are several different ways the user can secure the account in Windows 11, such as passwords, PIN, fingerprint recognition, facial recognition, among others.
The company is offering a feature named Windows Hello which takes care of the user authentication with biometric and Personal Identification Number (PIN) authentication. It allows users to replace the traditional password with a more secure and easy-to-use method of authentication, including facial recognition, fingerprint, and PIN.
In this step-by-step guide, we will show you how to remove the fingerprint recognition method configured on your Windows 11 computer and keep using other forms of authentication, such as passwords or PINs.

How to remove Windows Hello fingerprint recognition in Windows 11
Step 1: Open the Settings application on your computer. For this, you can either open the Start Menu and click on the Settings app icon or press the Windows + I keys on the keyboard.
Step 2: When the Settings app opens, click on the “Accounts” option.
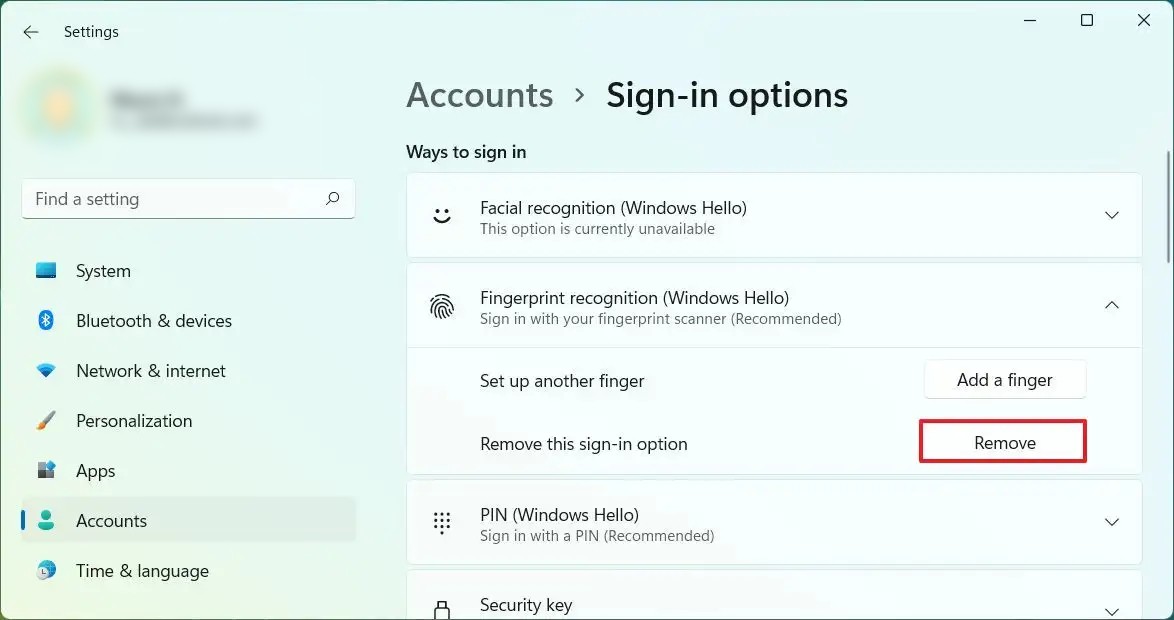
Step 3: After that, click on the “Sign-in” option from the right side of the window.
Step 4: Under the “Ways to sign in” section, select the “Fingerprint recognition” option.
Step 5: Click on the “Remove” button next to the “Remove this sign-in option” in the Fingerprint recognition section.

Step 6: Click the Remove button again, then confirm the account password, and then click the “Ok” button.
That’s it. Once you have followed the above-mentioned steps, you have successfully removed the fingerprint recognition on your system running the Windows 11 operating system. You can now continue using the traditional password or facial recognition or a PIN, based on what other security feature you have configured on your computer.
