The Windows 11 operating system from Microsoft has a good management tools and it’s also a bit earlier to manage drives on the computer powered by the Windows 11 OS. It automatically assigns a drive letter to every storage device that is connected to the computer, including internal drives, USB drives, DVD or Blu-ray devices, and mapped network drives. This is done to register the logical volume and present them to the users in File Explorer or any other app.
While the system automatically assigns a drive letter, there’s a way for the users to change the drive letter or if the user wants, then completely remove it. This may be done for whatever reason, including to keep the drive hidden or if the device messed up and assigned a drive letter to the hidden boot partitions.
There are several different ways to remove a drive letter from a storage device on the Windows 11 operating system, but for this guide, we will be focusing on the simplest method of them all, using the Settings application.
In this step-by-step guide, we will show you how to quickly and easily remove a drive letter in the Windows 11 operating system using the built-in Settings app.
How to remove drive letter in Windows 11
Step 1: Open the Settings application on your computer.
Step 2: When the app opens, select the “System” option from the left sidebar.
Step 3: Under the System Settings page, select the “Storage” option.
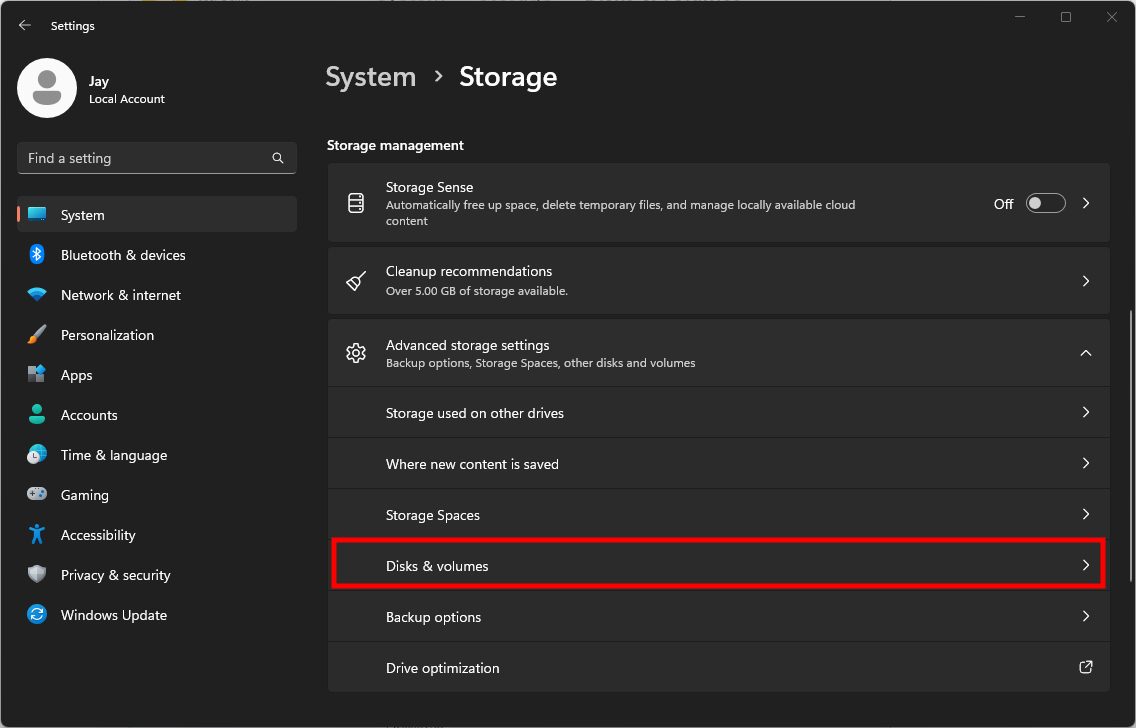
Step 4: In there, under the Storage Management section, click the “Advanced storage settings” option.

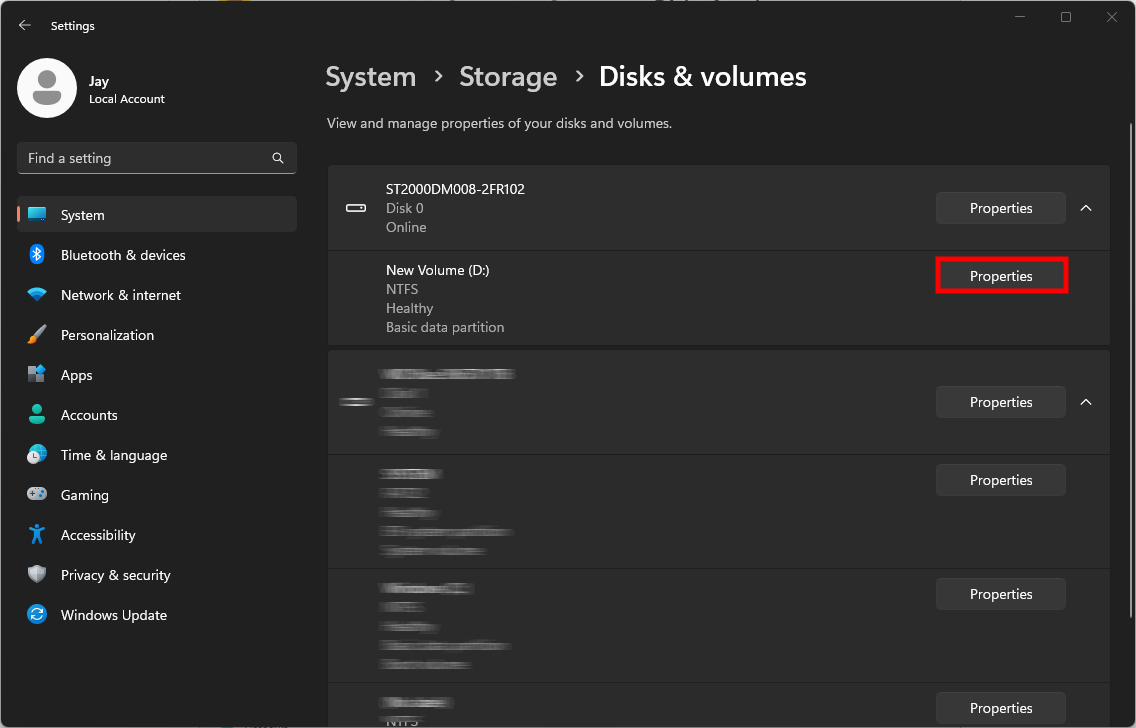
Step 5: Click on “Disks & Volumes” and select the drive with the volume with the letter to remove.

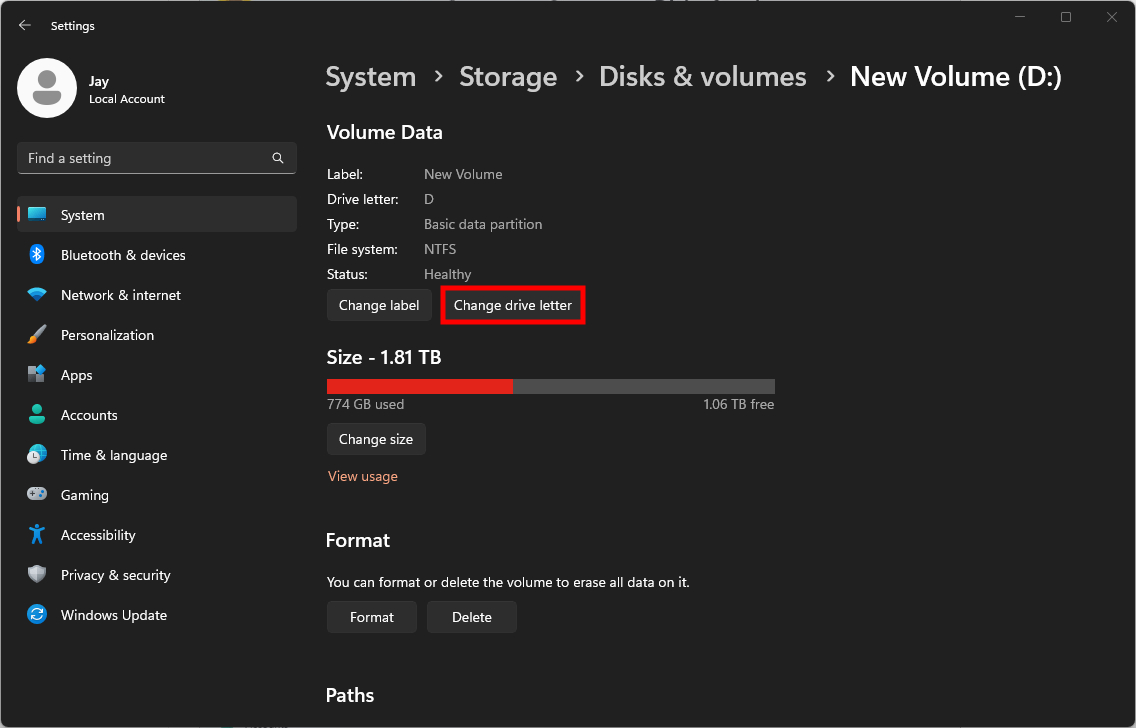
Step 6: Select the volume and click the “Properties” button and click the “Change drive letter” button.

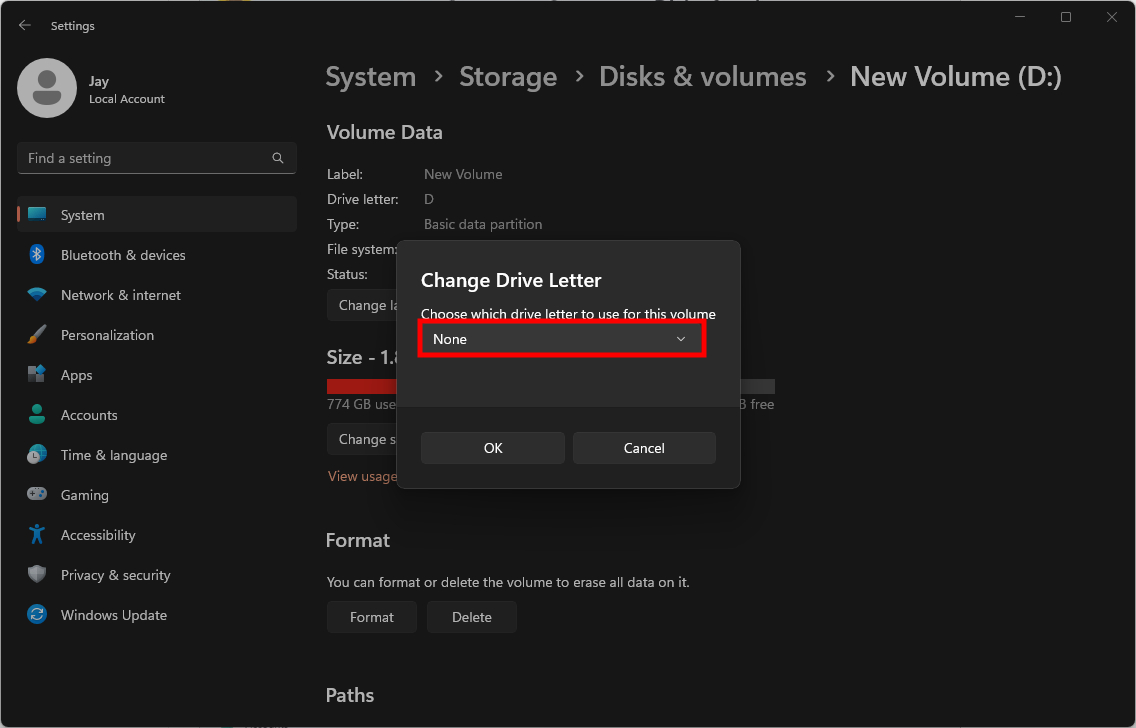
Step 7: Then, select the “None” option to remove the drive letter and click the “Ok” button.

That’s it. Once you have followed the above-mentioned step-by-step guide, then the drive letter has been removed from the selected drive on your Windows 11-powered computer.

