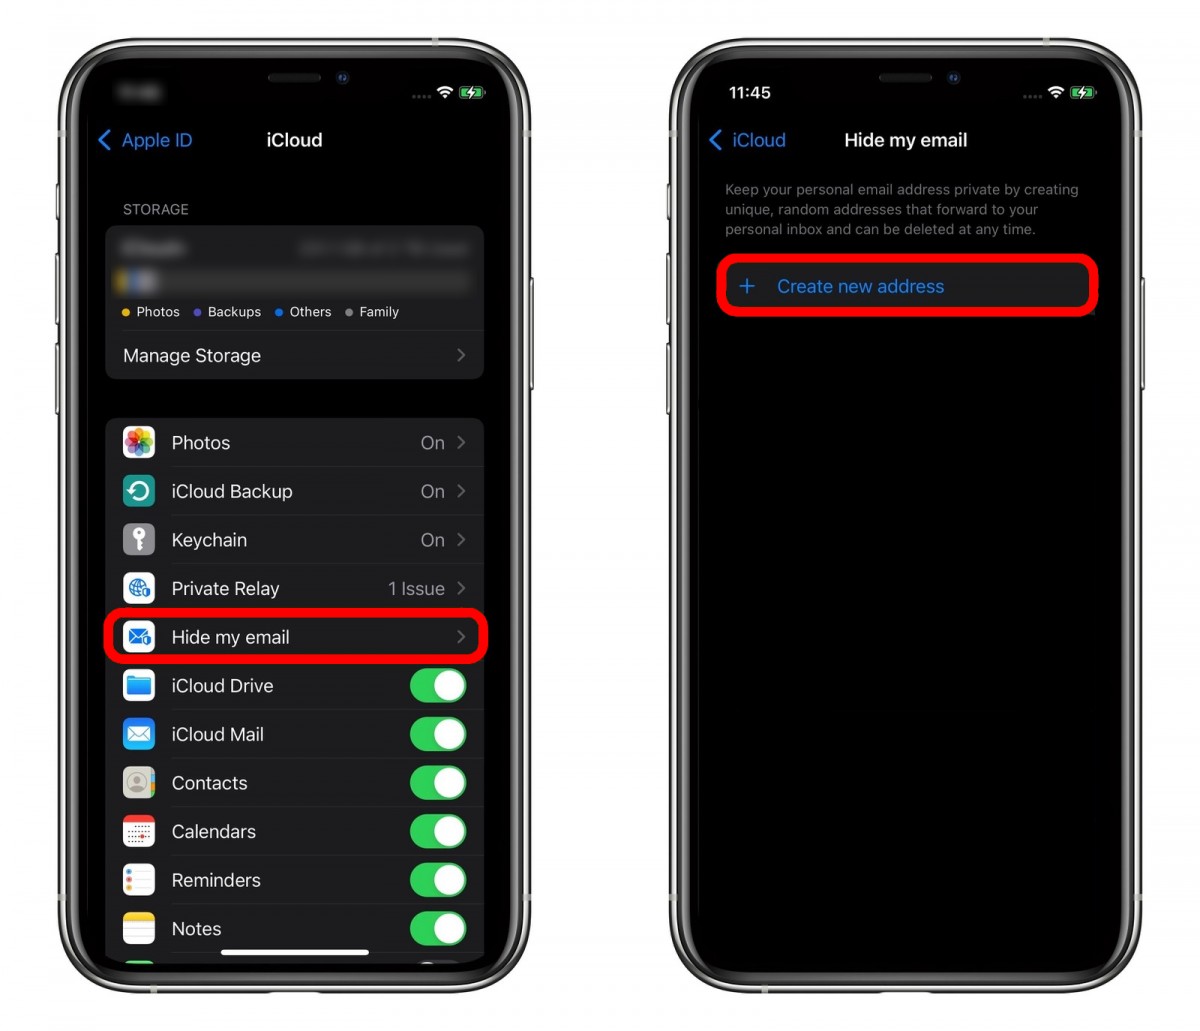
If you are using an Apple iPhone running the latest iOS 15, then there’s a handy feature named Hide My Email that as the name indicates, hides your actual email address when registering or subscribing for a service or product.
Using Hide My Email, you can create unique and random email addresses that forward emails to your personal email address, thus keeping your actual email address hidden from the service providers.
In this step-by-step guide, we will show you how to create a new private email address using the Hide My Email feature.
How to create a private email address in iOS 15
Step 1: Open the Settings application on your Apple iPhone or iPad.
Step 2: In the Settings app, tap on your Apple ID at the top of the main settings menu.
Step 3: Now, from the list of all the options, select the iCloud option.
Step 4: Select ‘Hide My Email’ and then click on the ‘Create new address’ option.

Step 5: Your private email address will now be created. To label it, click on the “Continue” button or you can also make a note about it.
Step 6: Tap the’ Next’ button and then tap on the Done option.
That’s it. The new email address has now been created which you can now use whenever you need to share your email address but are afraid of spam. So whenever an email is sent to your private address, it will automatically be forwarded to your email address associated with iCloud.

