In the Windows 11 operating system, the company is offering a Microsoft Defender antivirus program pre-installed. The program can scan, detect, and remove malware from the device without the need for installing any third-party security software. The program gets disabled when third-party antivirus software is installed on the device.
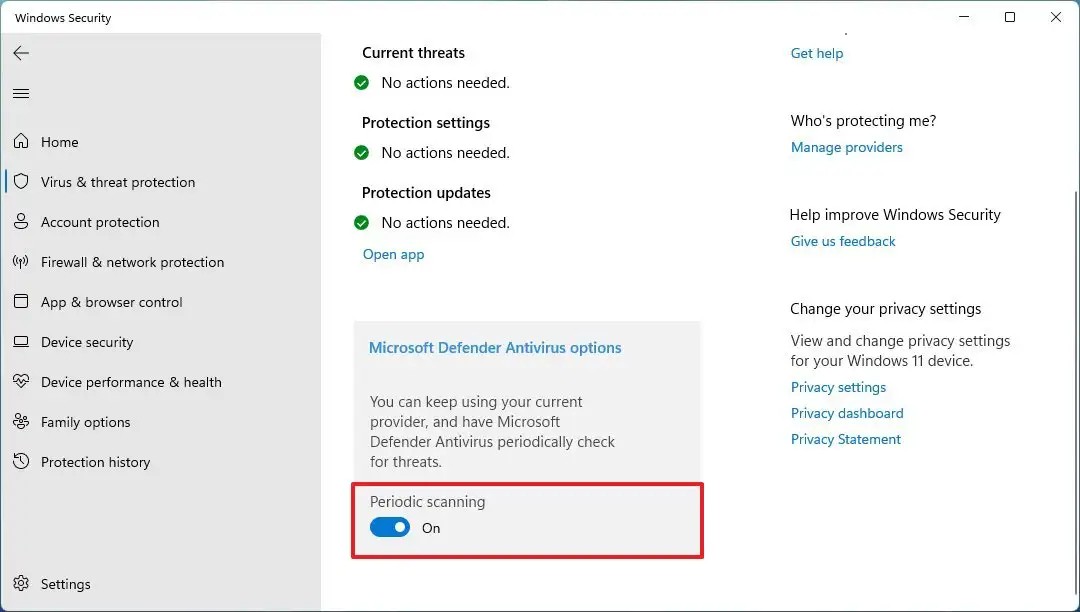
The Microsoft Defender Antivirus also includes a feature known as “periodic scanning” that periodically scans and removes threats that the antivirus software may have missed. The periodic scanning feature basically adds a second line of defense.
It’s noteworthy that when the periodic scanning feature is enabled, Microsoft Defender will remain disabled, but it’ll periodically scan for threats that the third-party program installed on the system may have missed. In this step-by-step guide, we will show you how to enable the periodic scanning feature in Microsoft Defender for a Windows 11-powered computer.
How to enable periodic scanning in Microsoft Defender
Step 1: Open the Windows Security application on your computer. For this, open the Start menu and search for Windows Security. From the search results, click on the app to open it.
Step 2: When the app opens on your computer, click on the “Virus & threat protection” from the left sidebar.
Step 3: After that, click on the “Microsoft Defender Antivirus options” settings on the right side of the window.
Step 4: Toggle the switch ON for the “Periodic scanning” option.

That’s it. Once you have completed all the steps mentioned above, the Windows 11 antivirus will use the “Automatic Maintenance” feature to make sure that it runs the scans at optimal times to minimize the impact on performance and battery life.
Do note that the Microsoft Defender Antivirus periodic scanning adds an extra layer of security to make the system more secure and it does not provide real-time protection when another antivirus solution is already installed on the device.
