If you are someone who is too much concerned about the privacy and doesn’t want Google Chrome to remember your browser history, there’s a way for you to do that — Incognito Mode. But you have to manually open the Incognito mode after you open the Chrome browser.
In this guide, we’ll show you a step by step process of how you can make Google Chrome open in Incognito Mode by default on Windows 10 operating system.
Incognito is a private browsing mode in which the browser doesn’t locally store the browsing history, cookies, site data or any other such information of user sessions. Every session data gets cleared when you close the Chrome windows.
How to automatically open Chrome in Incognito Mode every time in Windows 10
To make Chrome open in Incognito mode by default, we’ll be making some changes to the command line shortcut through which the browser launches. While it may sound difficult and complex, it’s actually not.
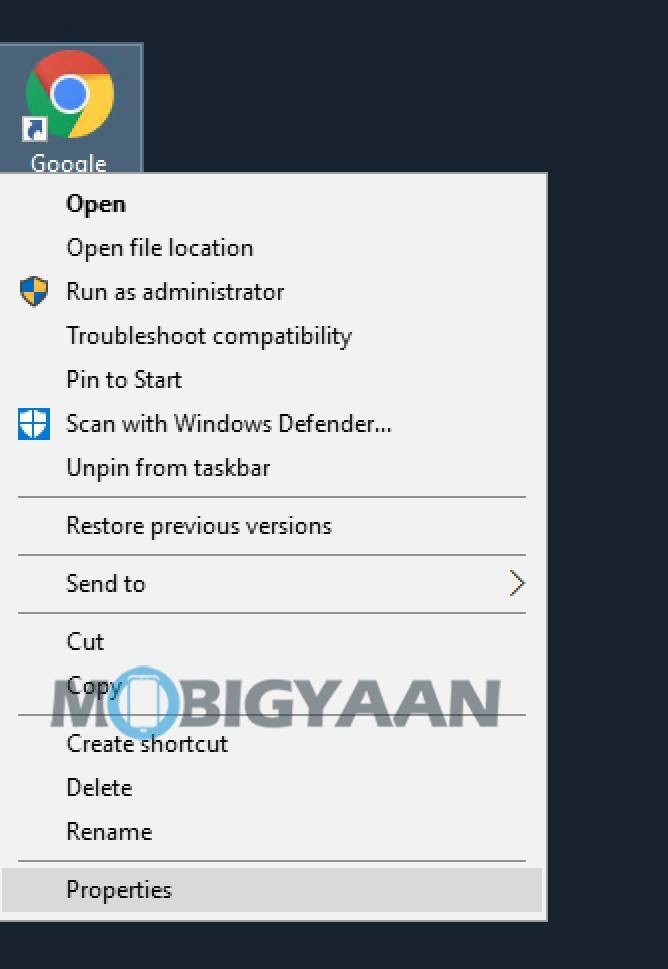
Step 1: First of all, you’ll need to locate the Chrome browser on your device. You can find it in the Start Menu or Desktop or on Taskbar. Once you find it, right-click on the icon.

Step 2: In the right-click context menu, click on the “Properties”.

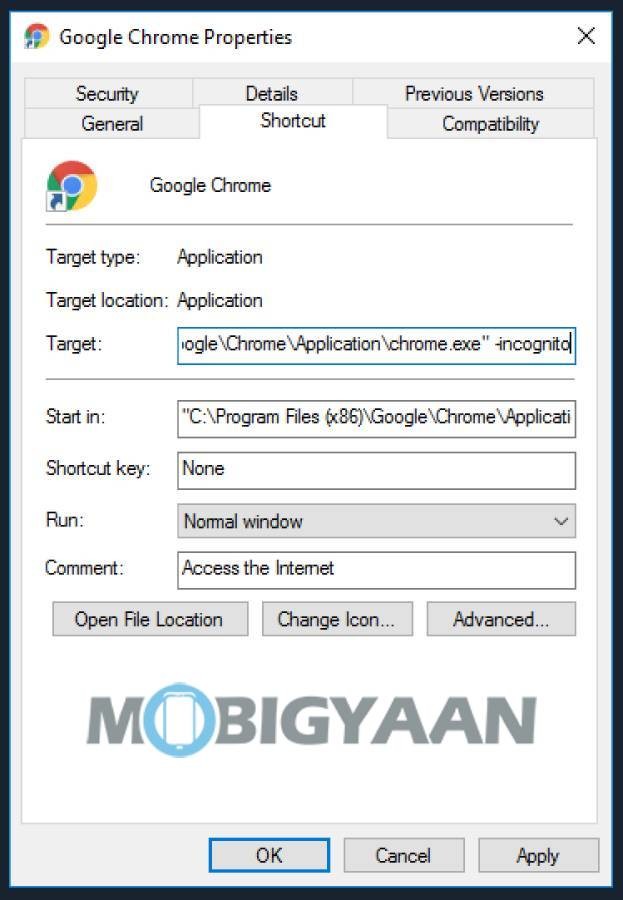
Step 3: A Properties window for the shortcut appears. In the “Shortcut” tab, locate the “Target” text field. Now, at the end of the line that reads “C:\Program Files (x86)\Google\Chrome\Application\chrome.exe.”, add this — “-incognito” without the quotation marks.

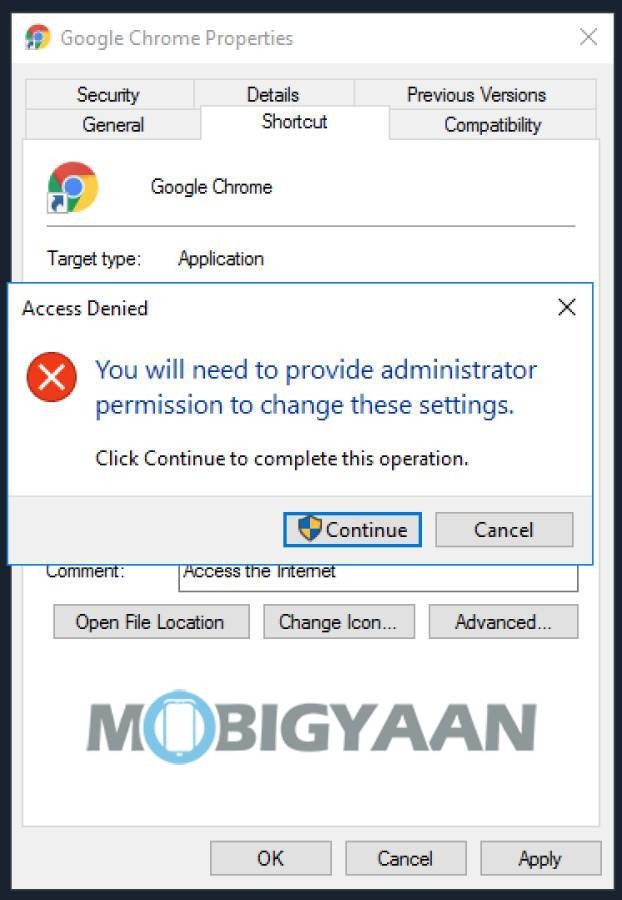
Step 4: After that, click on the “Apply” button. You might get a warning but just ignore that and click on “OK” or “Continue”.
Now, every time you open the Chrome browser using that shortcut, the browser will automatically open in the Incognito Mode.
If you want to disable this and open Chrome normally, just repeat the above steps and remove the “-incognito” and apply the changes.
You can also check out more guides related to Windows 10 and Chromebook.

