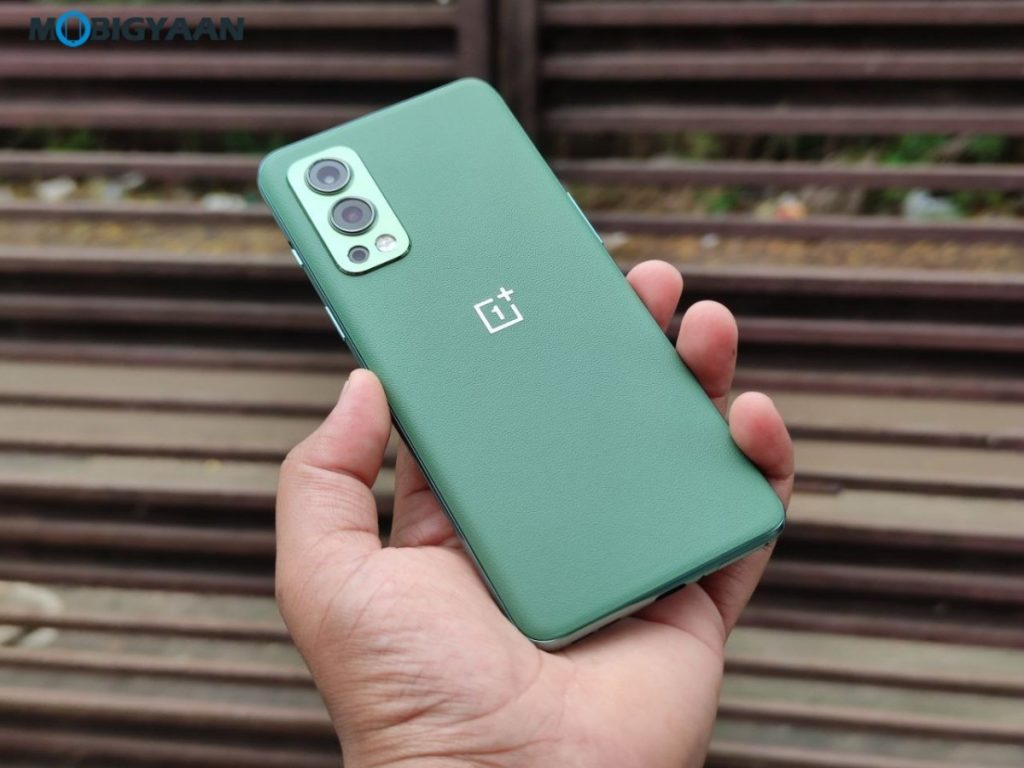
OnePlus Nord 2 5G is the latest OnePlus smartphone with features like faster processor MediaTek Dimensity 1200, 65W fast charging, newer cameras, and many more. Not only that, it runs on the OxygenOS 11.3 based on Android 11 loaded with numerous features from customizations to handy shortcuts and security features. Want to know? Take a look at the top OnePlus Nord 2 5G tips, tricks, quick shortcuts, and features that you should know.
1) Take Screenshots & Partial Screenshots Using 3-Finger Gesture
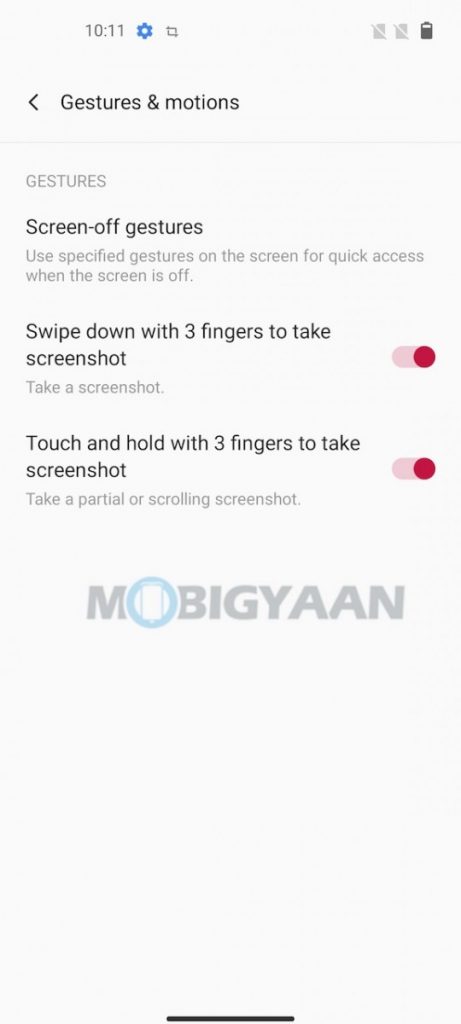
This is still new for many peeps, those who take screenshots using the same old power button and volume down key. Screenshots can also be taken using gesture-based shortcuts, the OnePlus Nord 2 5G offers a gesture shortcut that lets you take screenshots easily. By using three fingers, you can take the screenshot, all it needs is a simple swipe on the screen, no need to press any physical keys or a combination.
If you have just swiped your three fingers, then let me tell you, the screenshots can be taken in two ways with this three fingers gesture. The first is to swipe your three fingers from the top to the bottom on the screen to take the screenshot which is fast and efficient. Another is the partial screenshot, similarly, hold the three fingers before you swipe to the bottom to take the partial screenshot. Select the area of the screen and save the screenshot in partial screen.
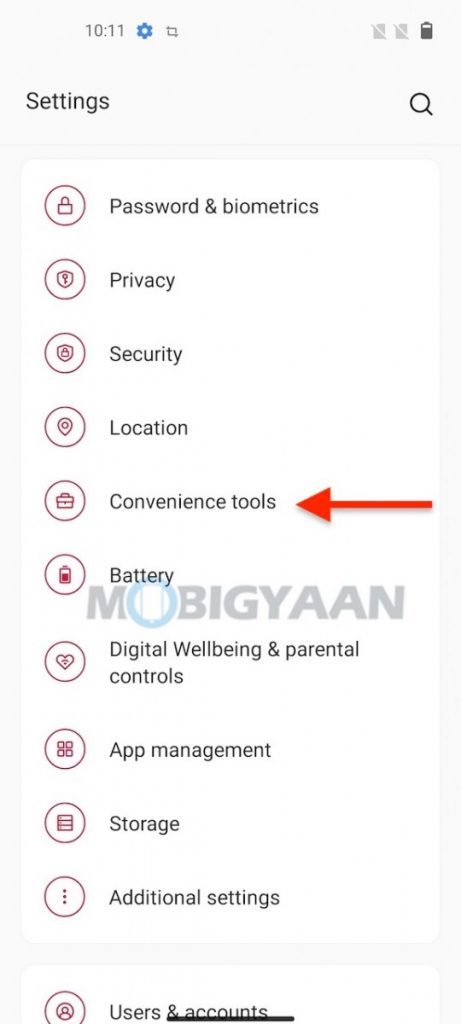
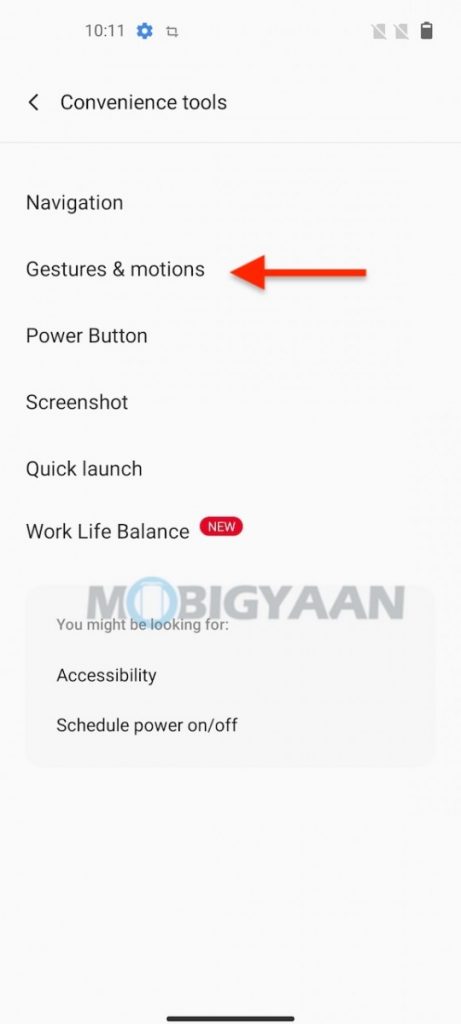
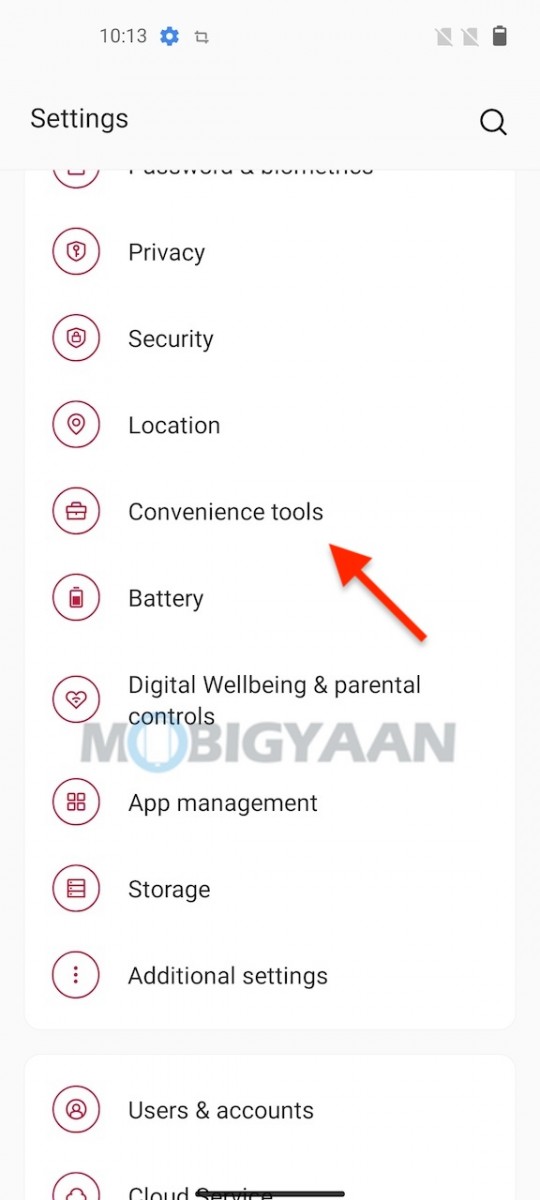
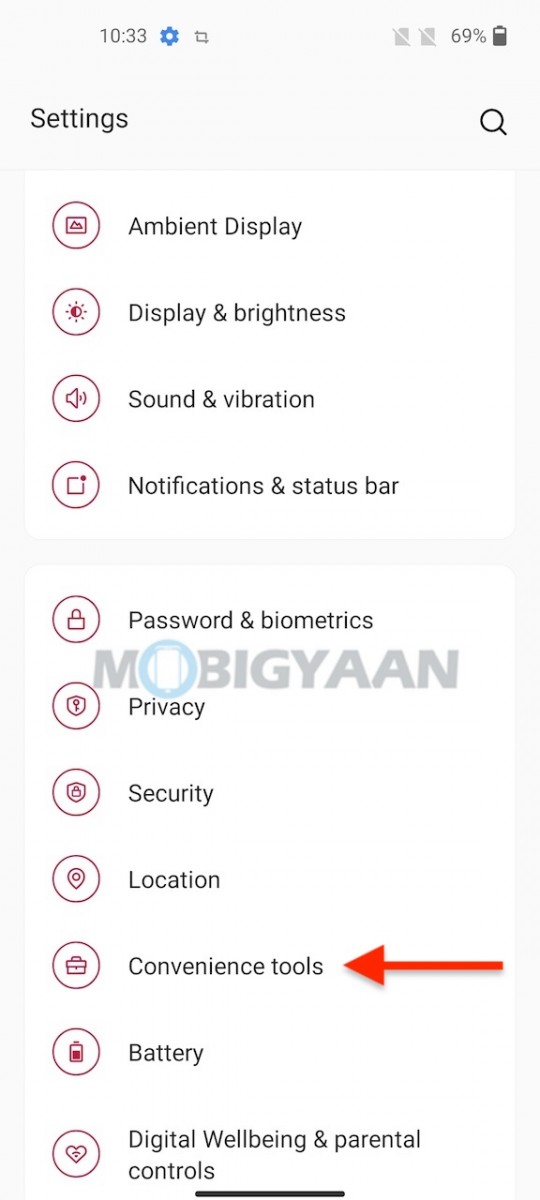
- If you are unable to do, enable three-finger gesture under Settings -> Convenience Tools -> Gestures & motions and turn on the slider for three fingers screenshot.
2) Quickly Launch Apps Using Fingerprint Scanner
Locking apps with fingerprints is one useful feature, but if you don’t know the Nord 2 5G also lets you open apps or launch tasks using the fingerprint scanner. With the fingerprint scanner, you can quickly launch the apps without unlocking the phone and interacting on the homescreen. By using its in-display fingerprint scanner, launch the apps you wish, all you need is a long press on the fingerprint scanner and choose the app to launch by swiping towards it.
If you haven’t registered any fingerprints, this feature won’t work. Register your fingerprints by going to the Settings-> Password & biometrics -> Add fingerprint to add your fingerprints on the phone.
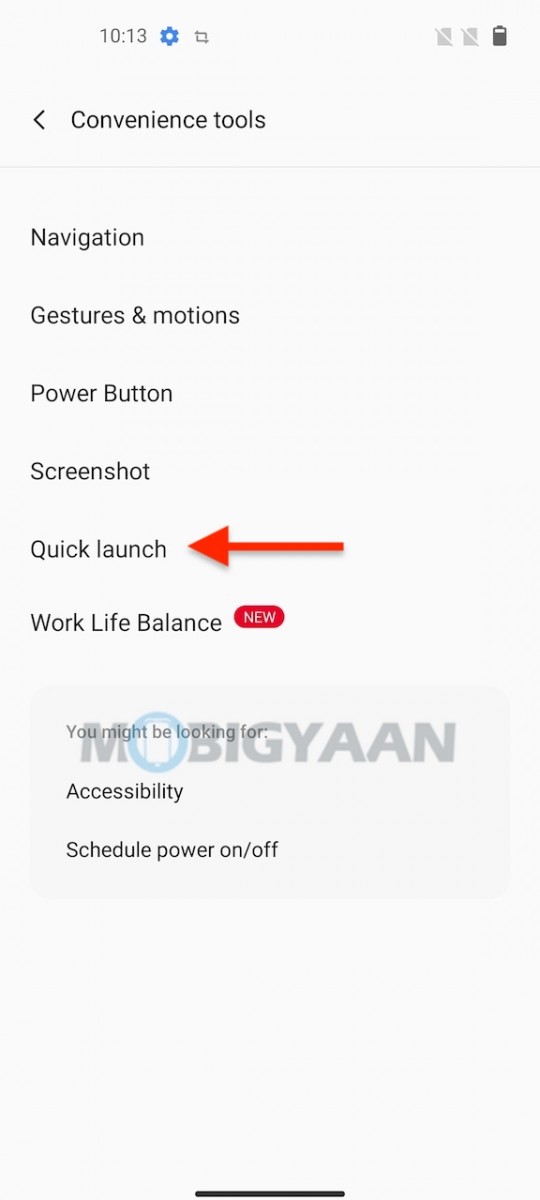
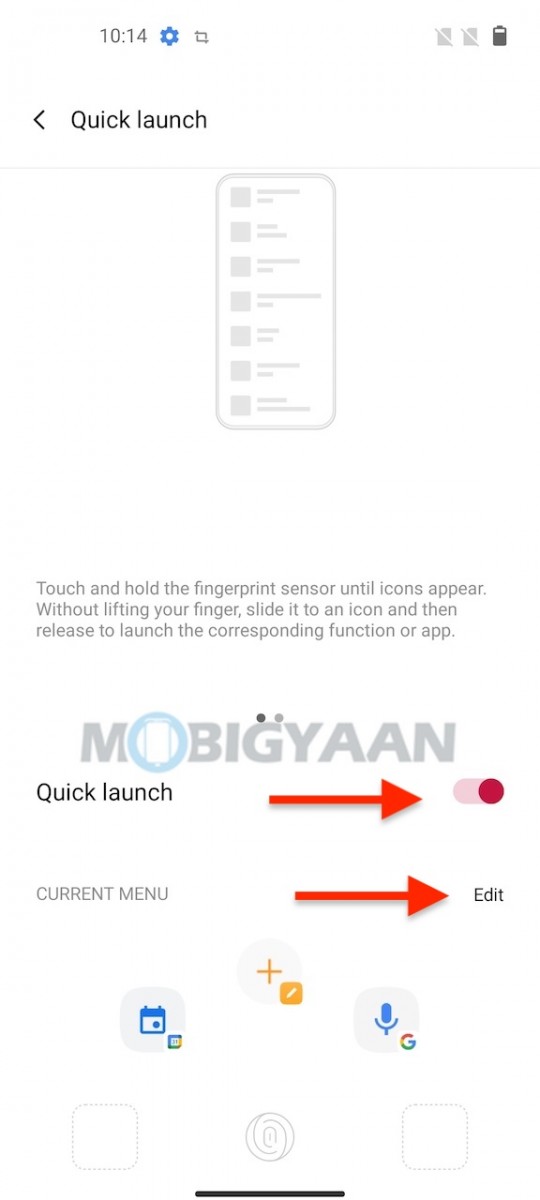
- Once done, activate the quick launch feature by heading towards Settings -> Convenience Tools -> Quick Launch and turn on the slider.
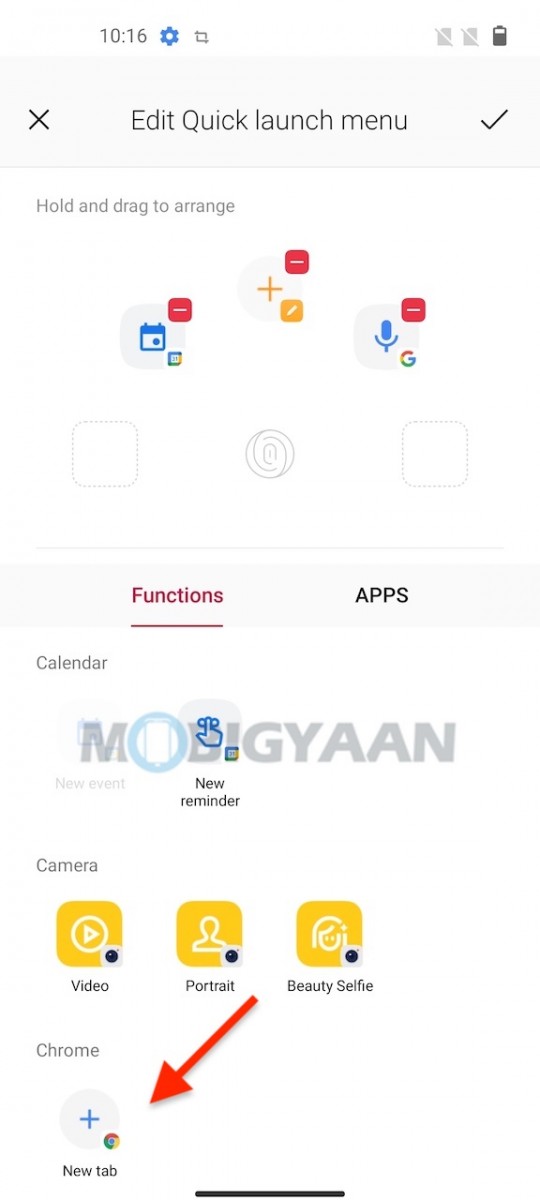
- Tap on Edit and choose the apps, tasks, or shortcuts you want to launch using the fingerprint scanner.
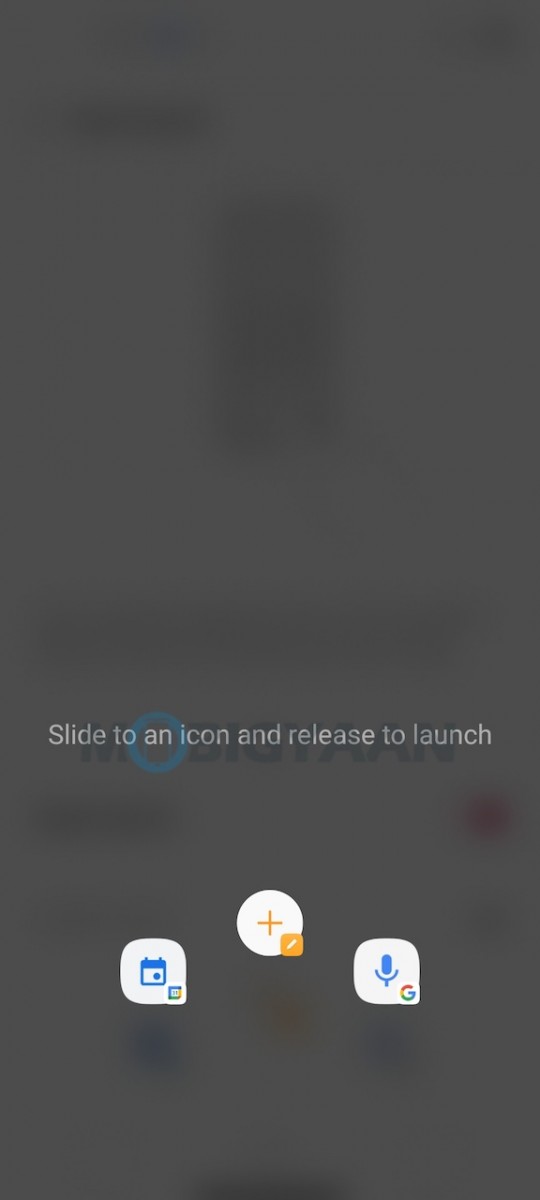
Now press and hold the fingerprint scanner when the phone is locked and you will see a list of available shortcuts. Swipe on the app/task and release the finger, this will instantly launch the app/task.
3) Lock & Secure Apps With Fingerprints
Moving towards its great security feature – the fingerprint locking system that enables you to lock the apps using your fingerprints. The in-display fingerprint scanner can also be used to lock individual apps on the phone aside from launching the apps or tasks. If you are using the fingerprint scanner to unlock the phone, try locking the apps and securing them with your fingerprints so that only you can have the access to those apps.
This feature doesn’t require you to download and install any third-party apps from the Google Play store, it comes built-in. If you are using any other apps or tools, you can remove them if you wish to and use the built-in feature.
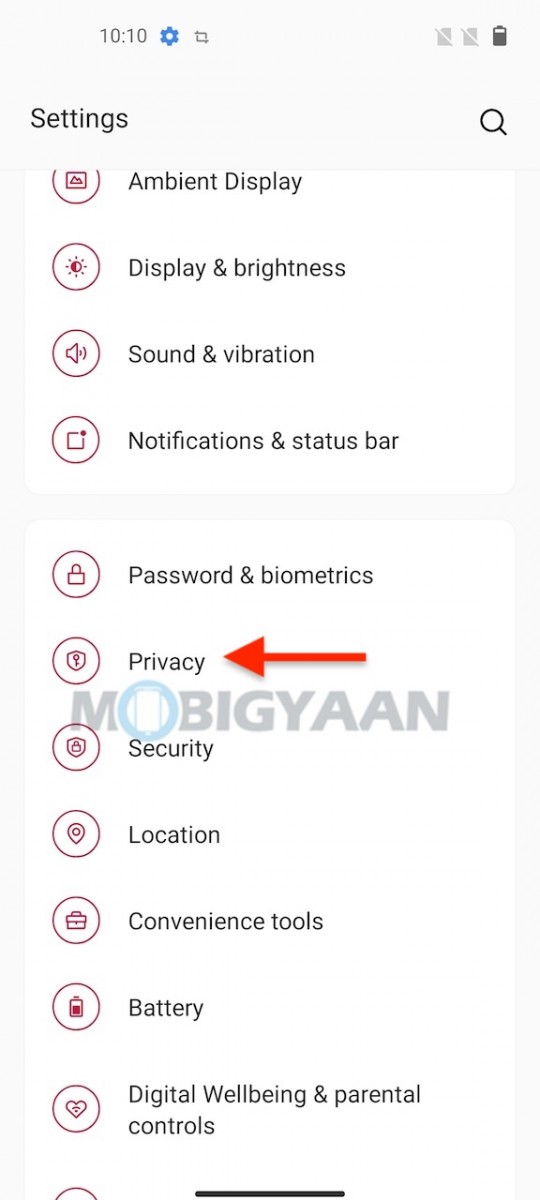
Before you lock the apps, register your fingerprints on the phone. Go to Settings -> Password & biometrics -> Add fingerprint to add a fingerprint. You can always add multiple fingerprints whenever you want, once added do the following.
- Launch the Settings on your phone.
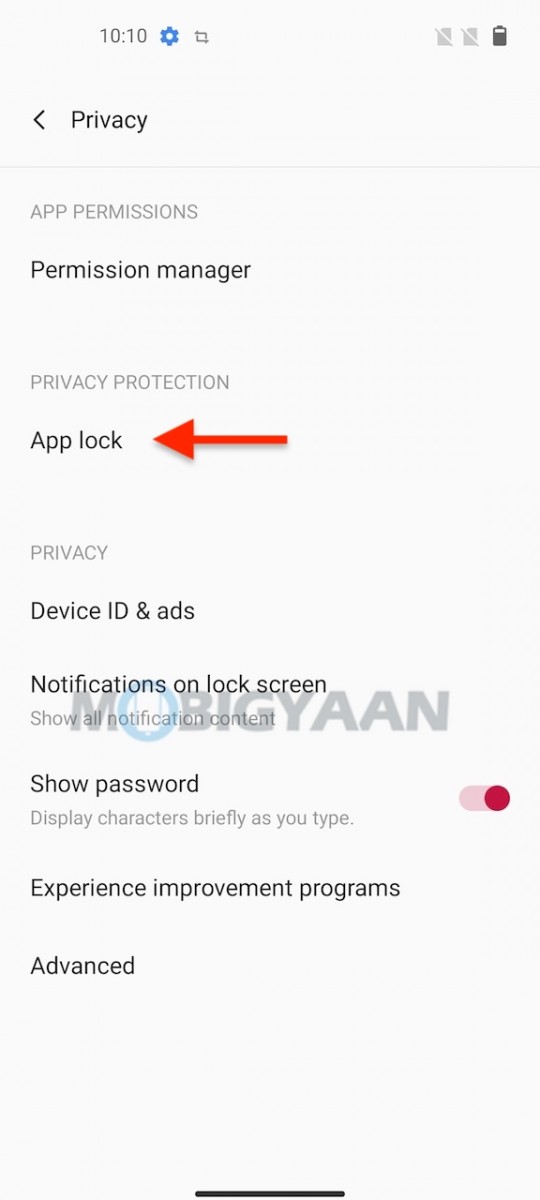
- Tap on App lock.
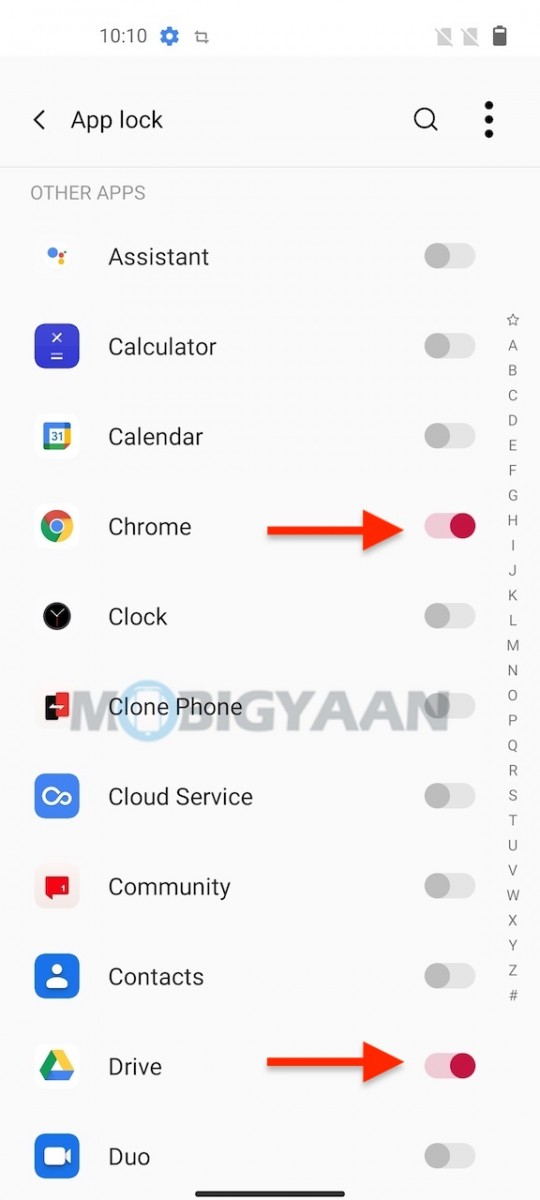
- Tap on the sliders beside the app to add the apps to the fingerprint locker, you will get a list of supported apps that can be secured via your fingerprints. Enter PIN or passcode if prompted, continue.
Now, whenever you open the locked apps, you will be asked to authenticate fingerprint, place your finger on the sensor to unlock the app, it prevents unauthorized access to the apps on your phone.
4) Change Fingerprint Animation Effect
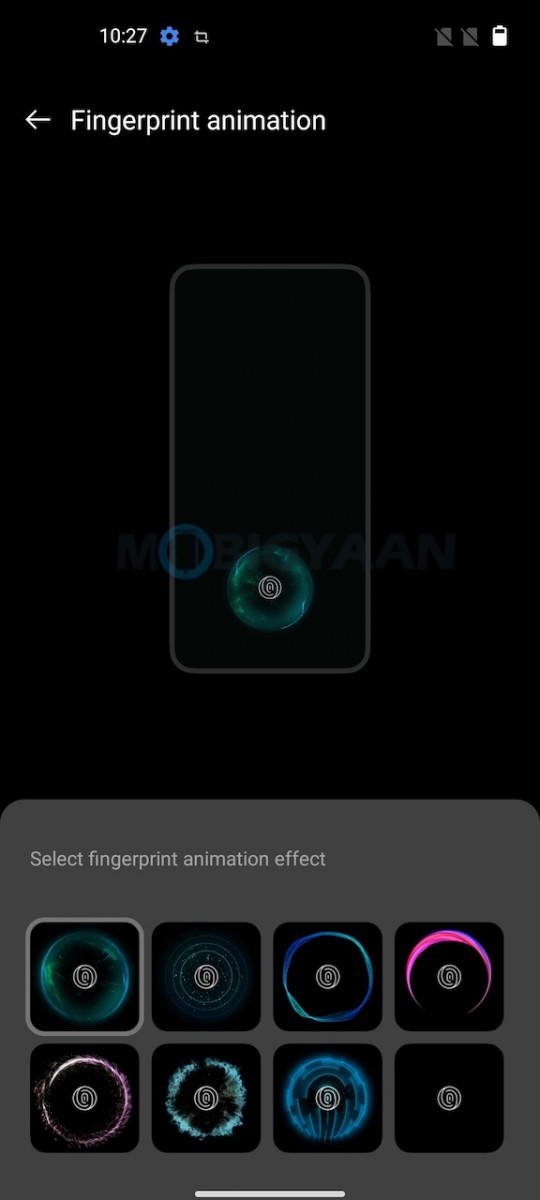
The OxygenOS also allows you to customization stuff on your OnePlus smartphone, you can simply change the animation effect of the fingerprint scanner while you use it. The fingerprint scanner features don’t end it right here, you can also customize the animations of the in-display fingerprint scanner, this animation can be changed to your liking.
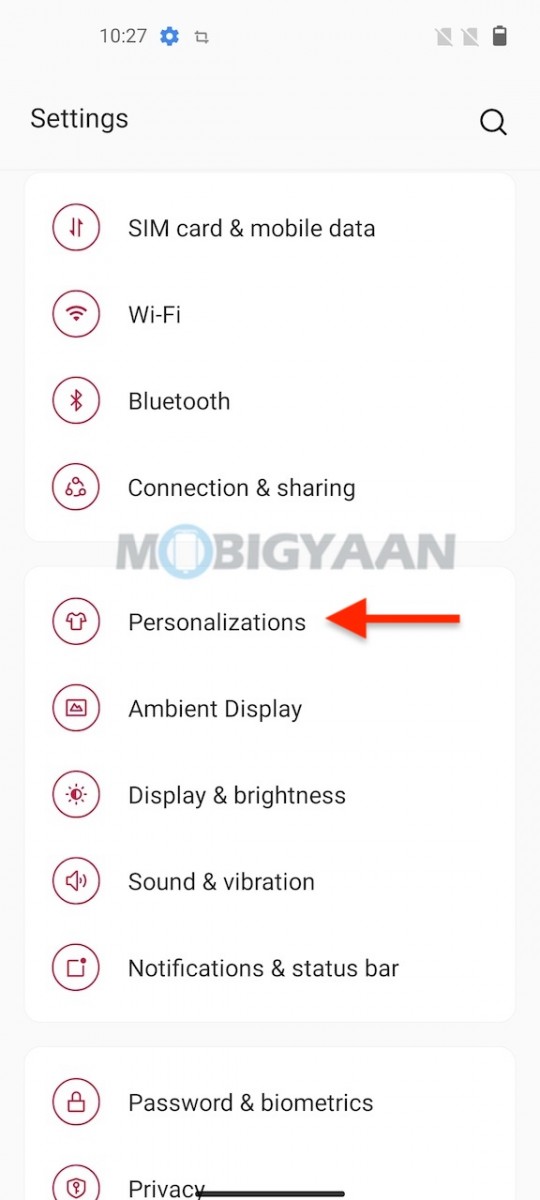
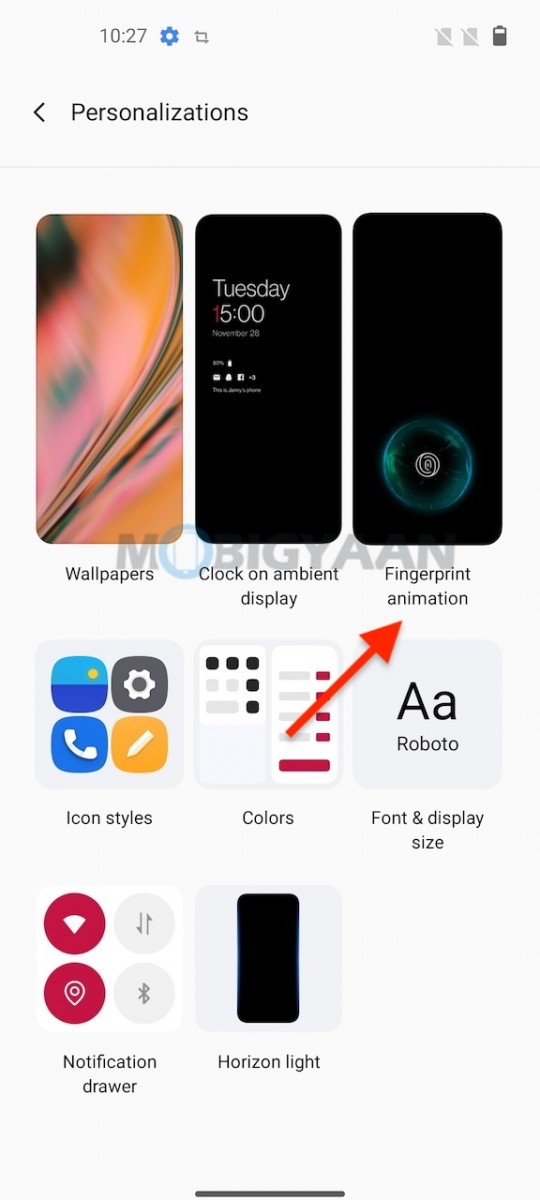
Changing the fingerprint animation is easy, head to the Settings -> Personalizations -> Fingerprint animation and choose from the different effects. Once you are good to go, lock the phone and test your new customization.
5) Launch Camera Quickly
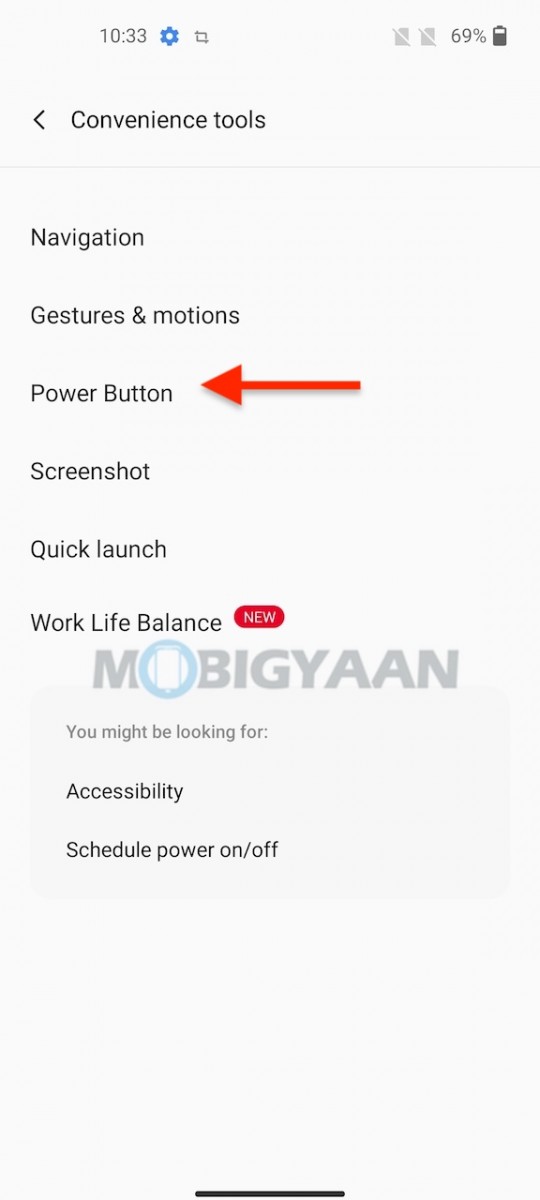
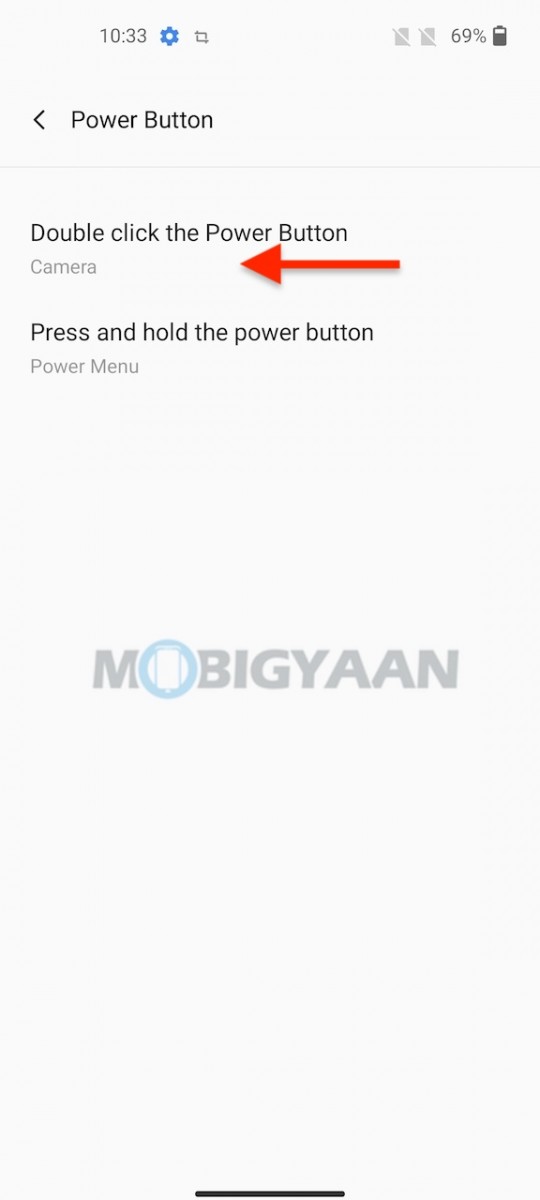
The camera also comes with a quick shortcut that allows you to open the camera instantly and without unlocking the phone. If you didn’t know about this, you can launch the camera quickly by double-pressing the Power key twice. Go to Settings -> Convenience tools -> Power Button -> Double click the power button and see if the camera is selected. Now press the Power key twice quickly to enter the camera app.
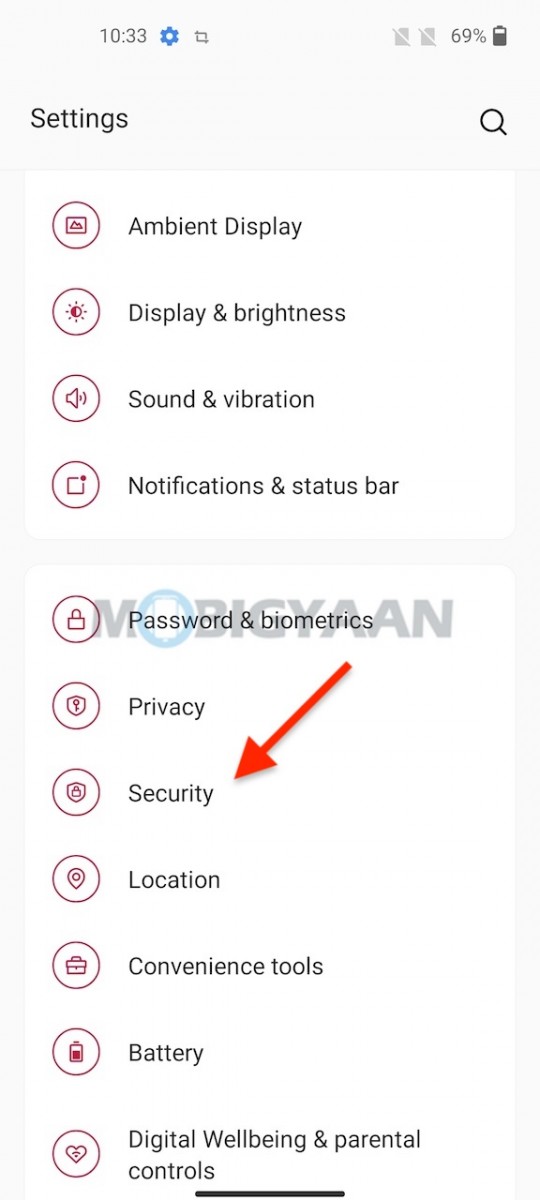
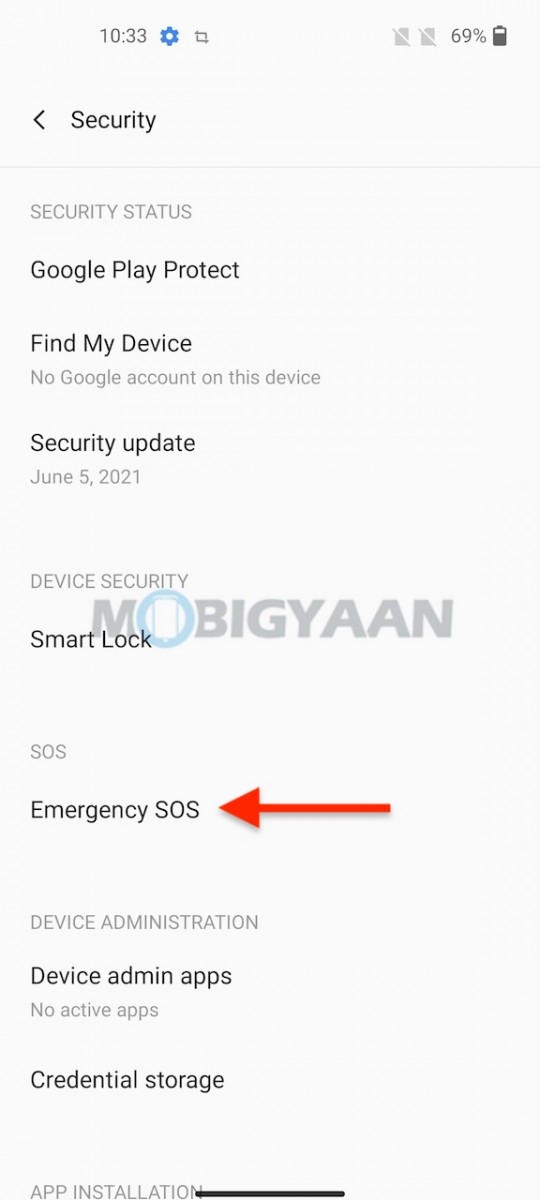
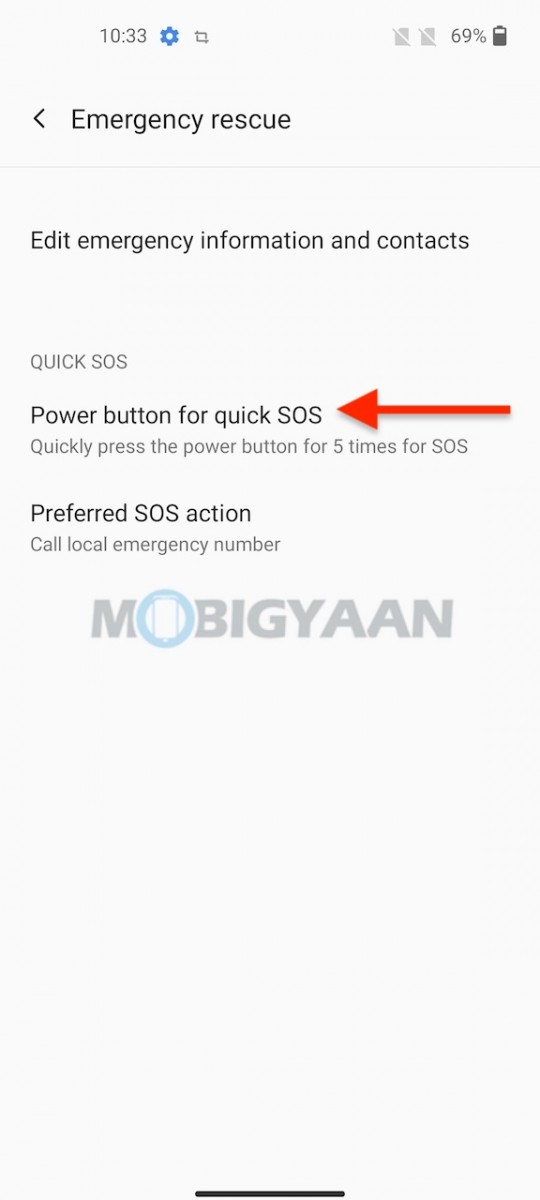
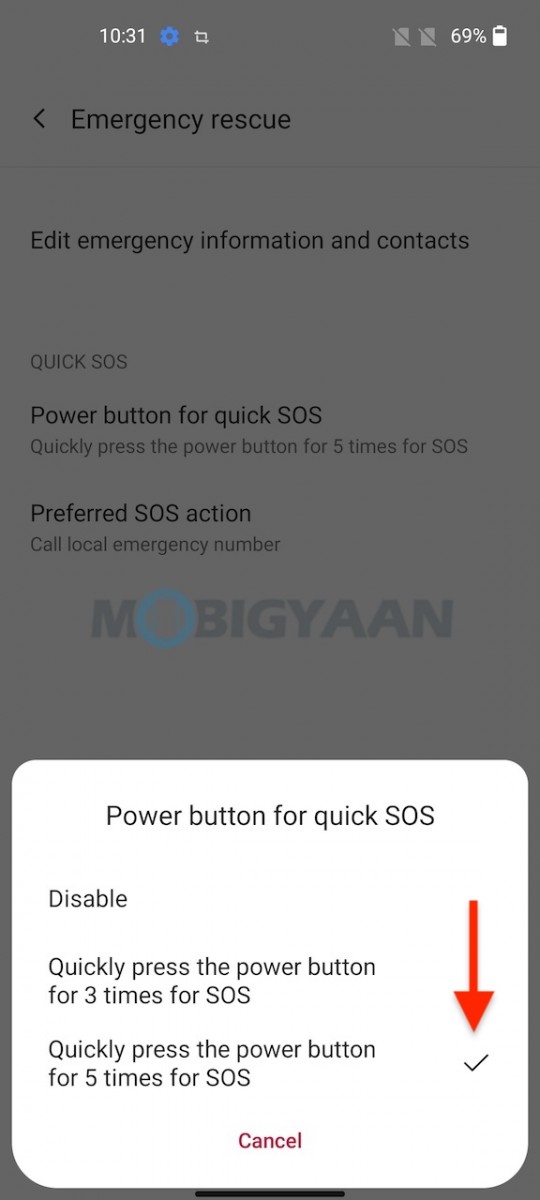
If you somehow see this option disabled, you need to change the Power button settings for Emergency Rescue. Enter Settings -> Security -> Emergency SOS -> Power button for quick SOS and change it to 5 press or disable. Now head back to Convenience tools -> Power Button, the double click power button option will be enabled and the Camera will be selected by itself.
6) Enter Dark Mode
The Dark mode is among the most useful features in smartphones nowadays and a chunk of smartphones offer the native support for the Dark mode feature. The Dark mode lets you view the screen content in dark colors to ease off the eyes when you are using it at night or in darker environments. In addition, it also helps save battery power since the Black pixels are disabled.
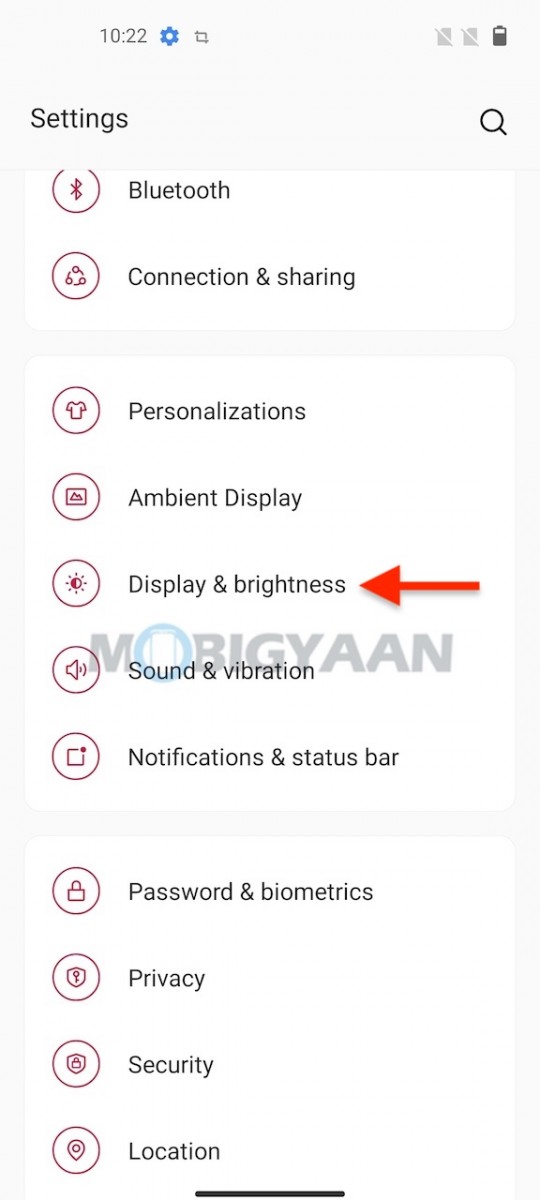
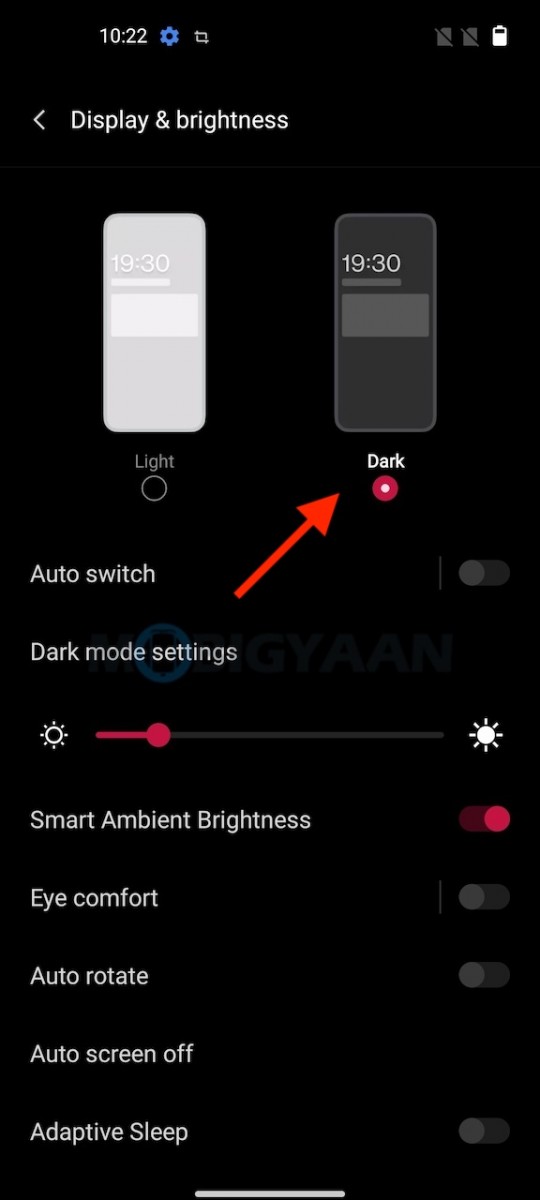
To turn on the Dark mode on Nord 2 5G, enter Settings -> Display & brightness and choose the Dark theme option.
7) Get Shot On OnePlus Watermark On Photos
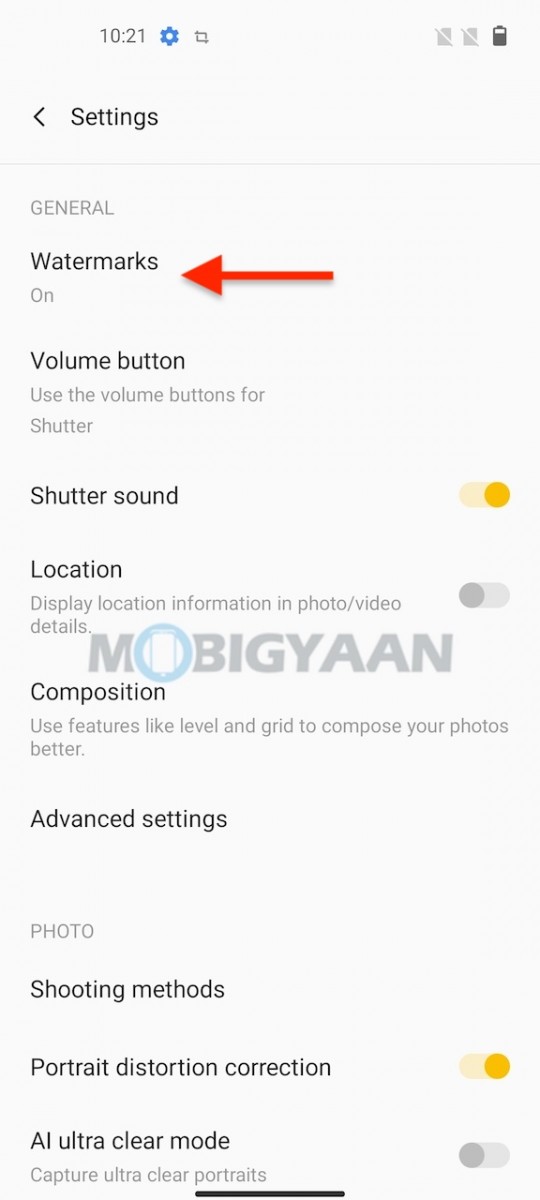
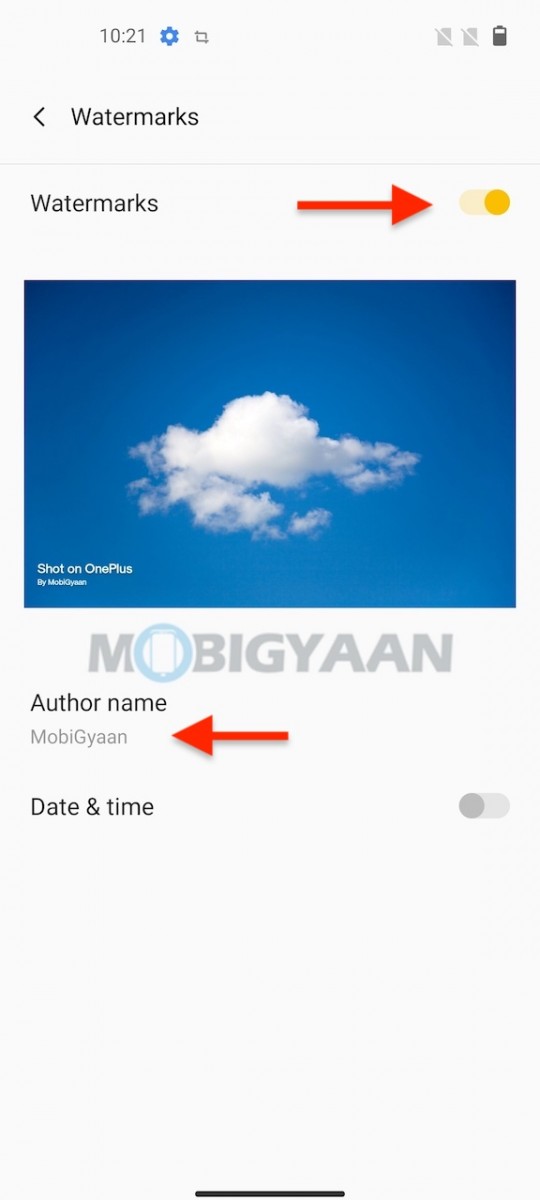
Have you seen watermarks in photos? Especially a OnePlus watermark? If you have seen any photos with the Shot On OnePlus watermark on photos that are uploaded on social media or anywhere with a name or signature on it, fortunately, this can be done on your Nord 2 5G as well, here’s what you need to do.
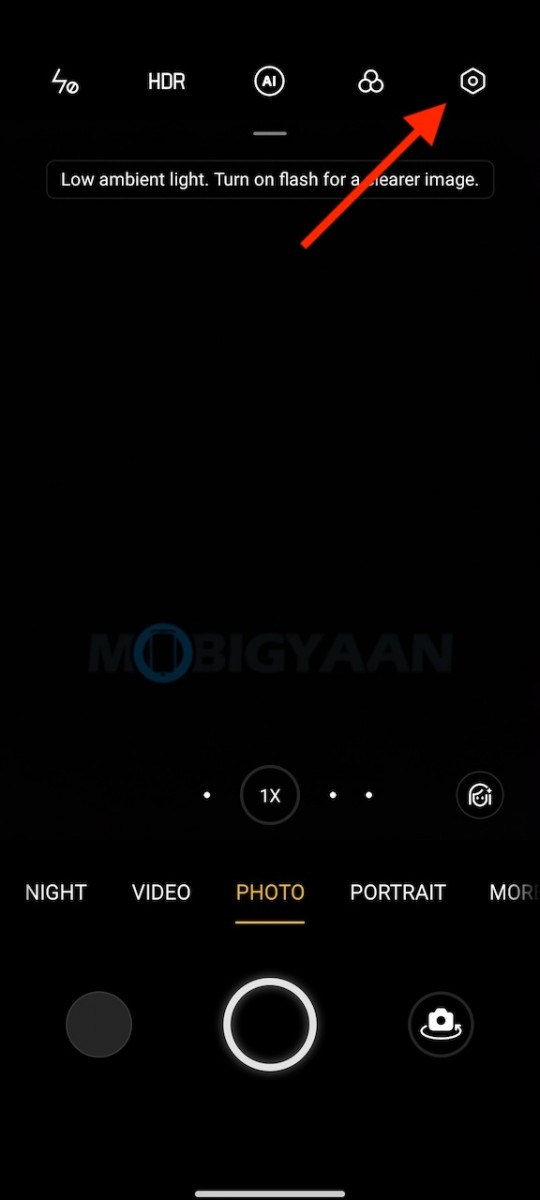
- Head to the Camera App, enter Camera Settings in the top-right corner.
- Tap on Watermarks and turn on the slider.
- You can also add your signature and time stamp on the photos from the given options.
8) Control Wi-Fi Access For Apps
Do you think your phone has an app that’s hungry for data all time? Why not take control of your phone’s Wi-Fi for the apps? This slick and handy feature will allow you to block internet access on your Nord 2 5G for the apps that you think it’s using unnecessary data. The OxygenOS has a kill switch for the internet connection on a per-app basis.
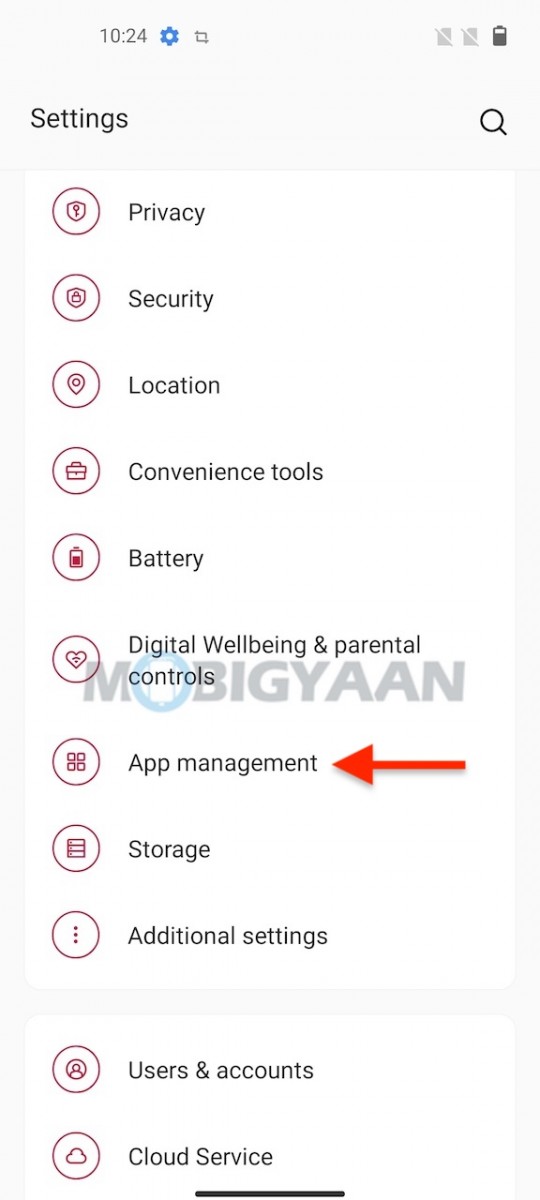
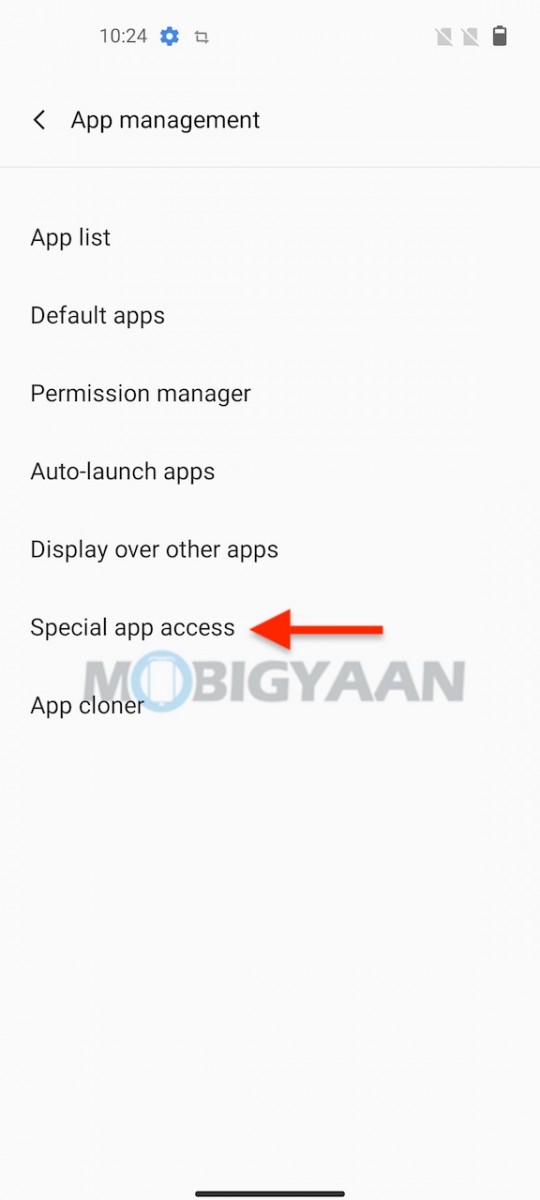
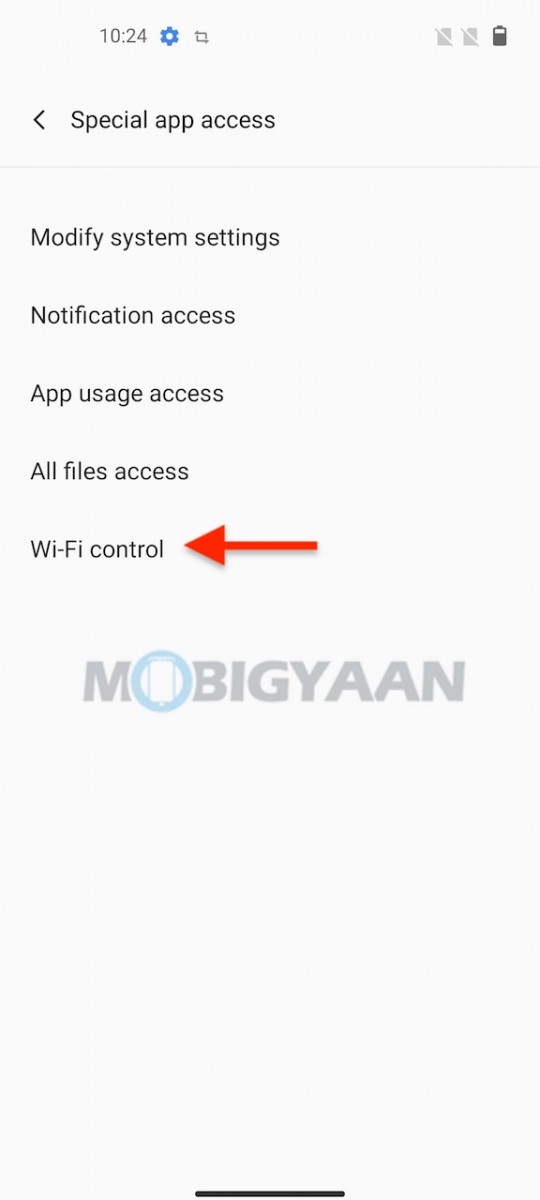
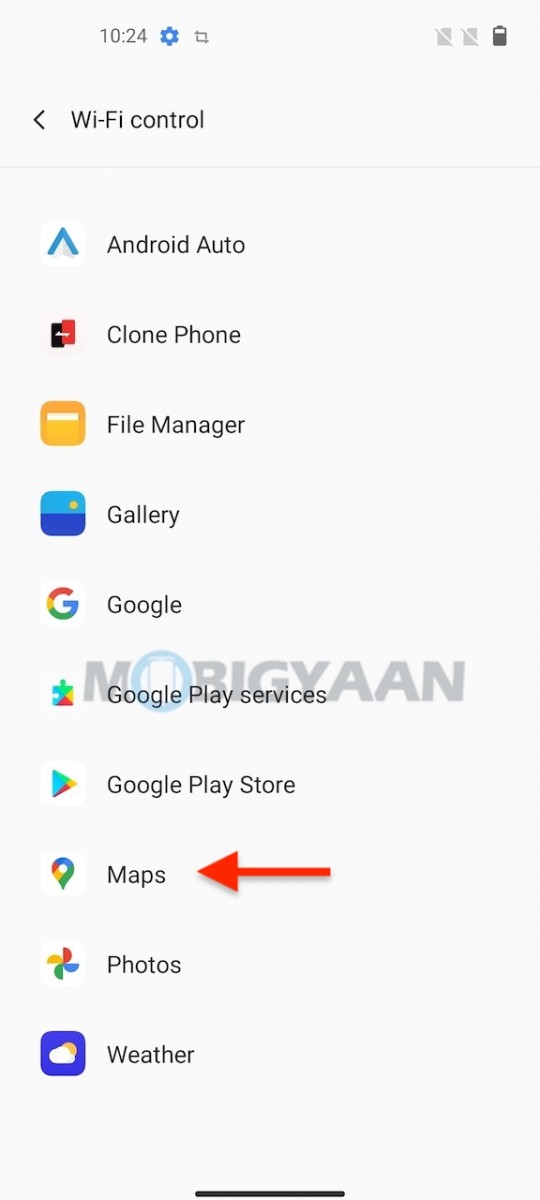
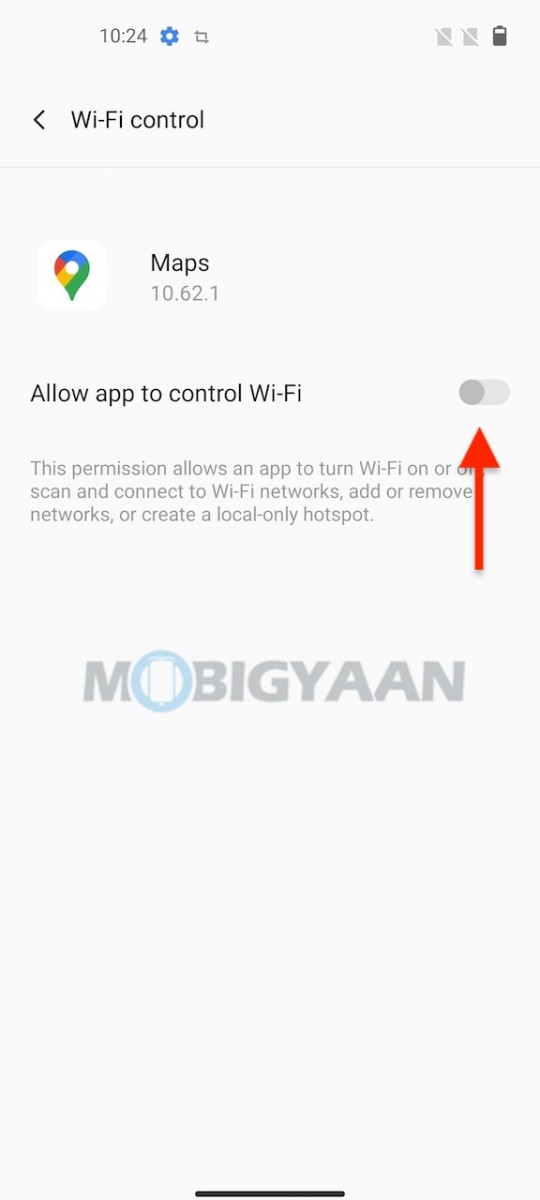
Go to Settings -> App management -> Special app access -> Wi-Fi control and choose the app that you want to block the Wi-Fi access. Turn off the slider to disable the Wi-Fi for the specific app. Now check if you are able to run the app with an internet connection.
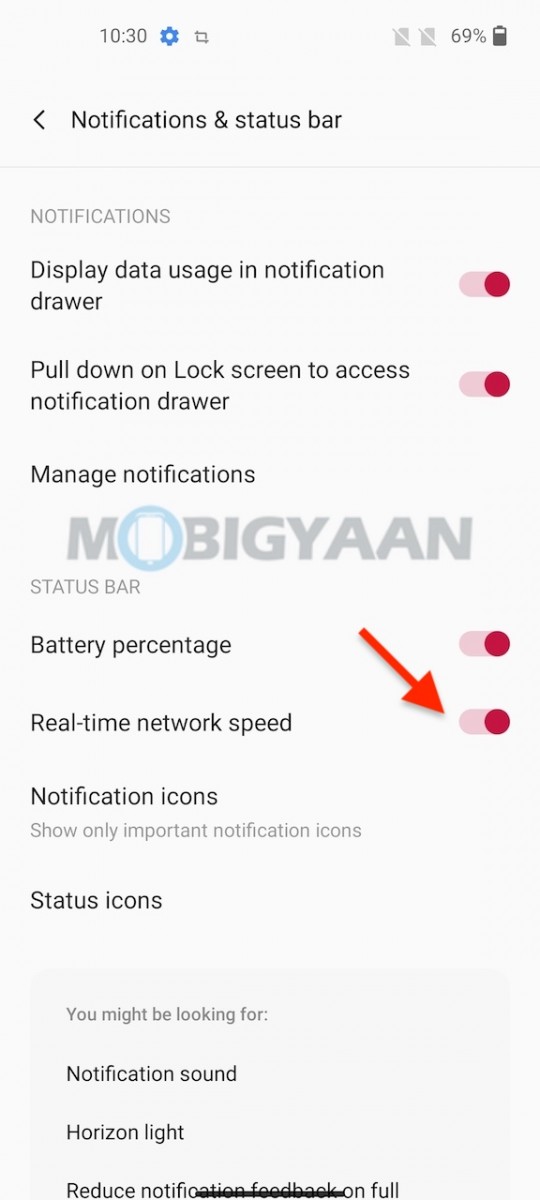
9) View Network Speed In Status Bar
Similarly, you can also view network speed in the status bar similar to the battery percentage you see in the status bar. The internet speed is shown in real-time, no wonder you download, surf, stream, or use the data, you will see the actual speed your phone uses when you use the internet on the phone. This also tells you if you are on a slow network or not.
To view the network speed in the status bar, here’s what you have to do.
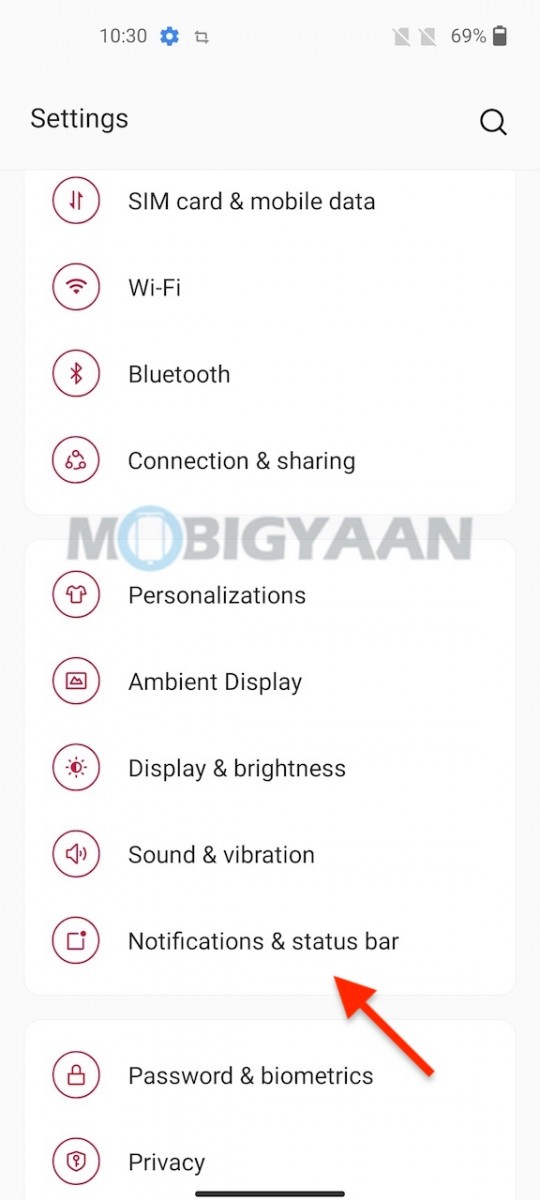
- Go to Settings -> Notifications & status bar tap the slider Real-time network speed.
Now surf the internet or download an app and see the speed in the status bar in real-time.
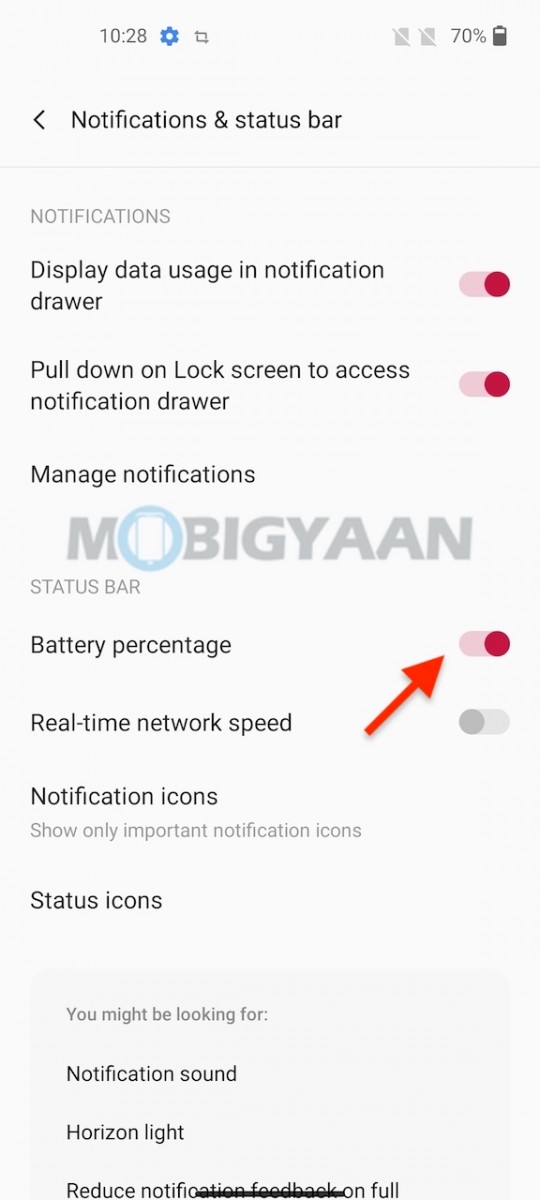
10) View Battery Percentage In Status Bar
Last but not least is to view the battery percentage in the status bar in the corner of the screen. And like most Androids, the OnePlus Nord 2 5G doesn’t show you the remaining battery percentage in the status bar by default. You can view it in the status bar by enabling a quick setting.
- Go to Settings -> Notifications & status bar tap the slider Battery percentage.
Now check the status bar, you will see a percentage beside the battery icon.
That’s it. Want more? Check out – Android & iPhone tutorials and guides. Also, check OnePlus Nord 2 5G review here. To get updates on the latest tech news, smartphones, and gadgets, follow us on our social media profiles.

