If you have been searching on how to move PC games to another drive on your Windows computer, there’s a quick trick for it. If you have a laptop or PC with a low-capacity SSD, moving the game to another location is essential. It’s easy to move PC games to another drive, not by using any external softwares or third-party apps, but by using the Window’s internal Settings. Here’s how you can do it.

How to move PC games to another drive using Windows Settings
Universal apps or games that you have installed from the Microsoft Store can be quickly moved to another drive. Microsoft’s Universal Windows Platform (UWP) lets you enjoy the same apps or games on multiple devices supporting the UWP, for example, a tablet, a laptop, or a convertible. Moving the apps or games can be handy if your device is low on primary storage, in this case, it’s C:\ drive.
Note: If you are looking for moving large PC games installed by clients like Steam, Origin, Epic Games, etc, you may find an option in the settings of the respective launchers. You may not see the option to move the games from the Windows Settings.
To move PC games to another drive, here’s what you need to do.
- Head to Windows 10 Settings by pressing the Windows Key + I or go to the Start menu and click on the Settings gear icon.

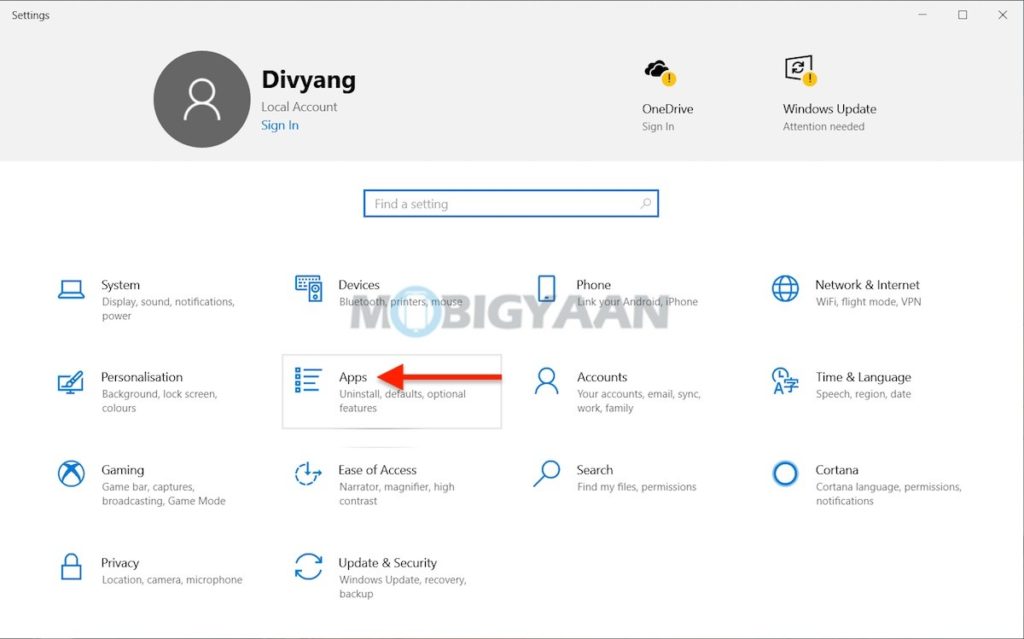
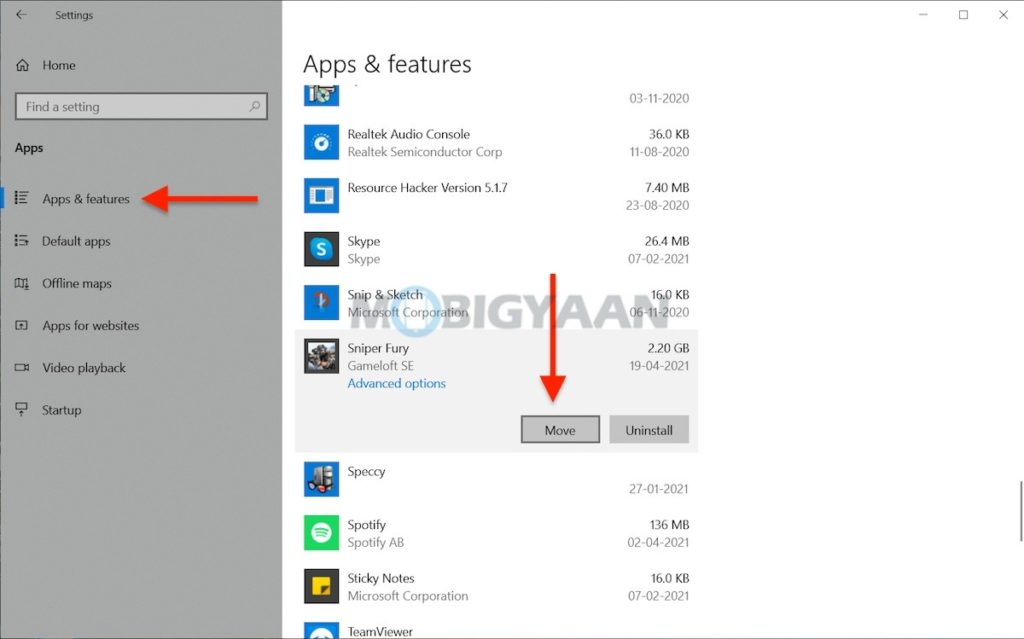
- Click on Apps and on the left side pane, click on Apps & features.
- Click on the Game or an App and select Move to move to a different drive or location.

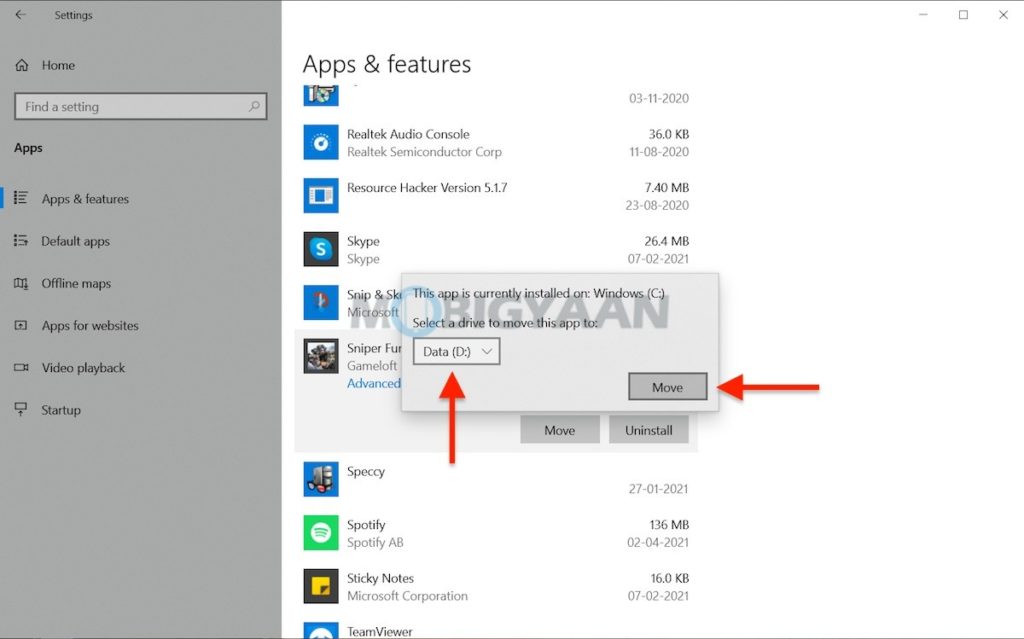
- Select a Drive to move the game and click on Move.
That’s all you have to do, this way you can move PC games to another drive and now you have the games moved to another location and don’t occupy the primary storage where Windows 10 is installed.

There’s more you can do on Windows 10, here are the top Windows 10 tips and tricks to make the most of it. More awesome stuff can be found here – Windows and Mac tutorials and guides.
To get updates on the latest tech news, smartphones, and gadgets, follow us on our social media profiles.

