Microsoft has a very successful Office suite product in the form of Microsoft Office that includes several useful tools like Word, Excel, PowerPoint, and more. Most of the users of the Windows operating system must be having the Office suite installed.
However, Microsoft Office is quite resources hungry and if you have been having issues with that, then you can put it to sleep. In this step-by-step guide, we will show you how to put the Office to sleep on your Windows 10 computer.
There are several different methods to do this, using Windows Settings, Registry Editor, and PowerShell. For this guide, we will be focusing on the easiest method of all — using the Windows Settings on your computer.
How to put Microsoft Office to sleep in Windows
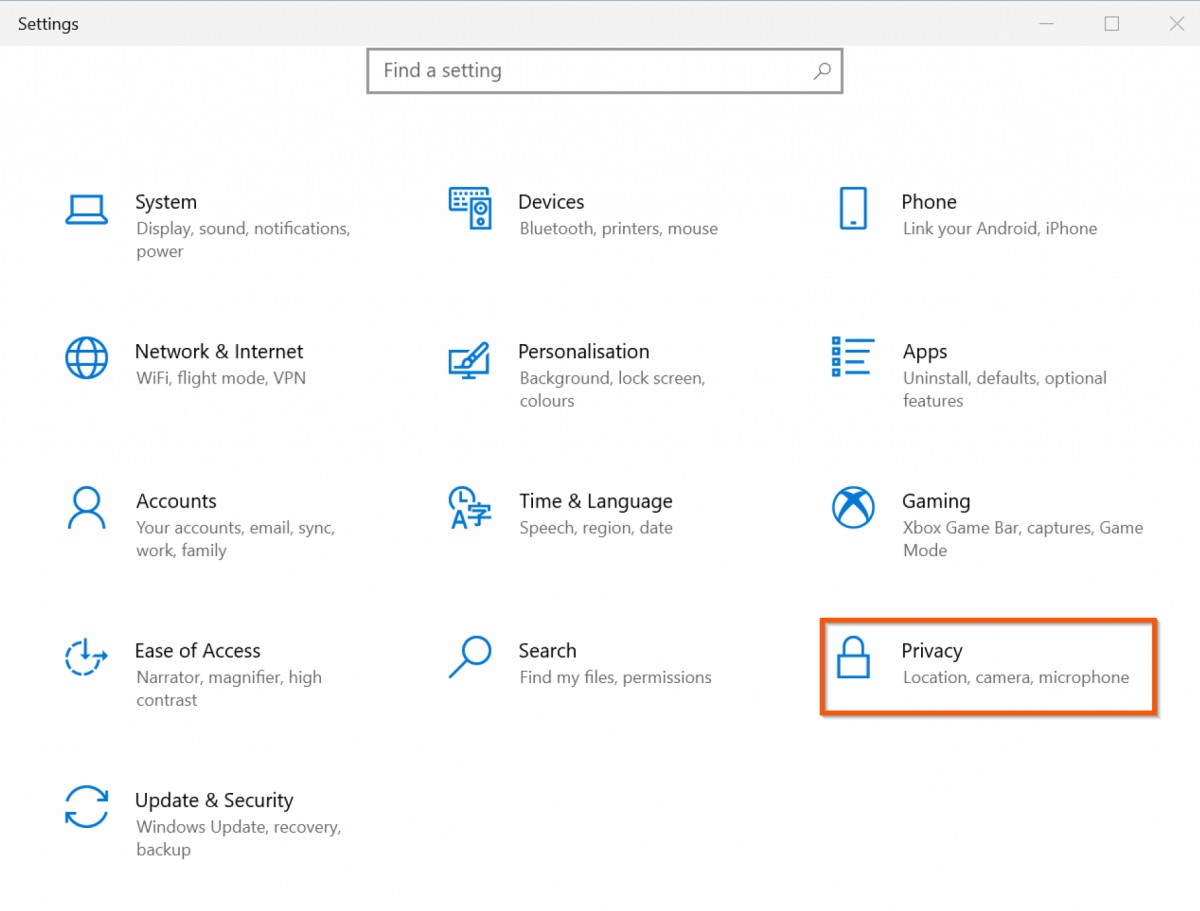
Step 1: Open the Settings app on your Windows system. For this, you can open the Start menu and search for Settings. From the list of search results, select the first app named ‘Settings.”
Step 2: Now, in the window that opens, select the “Privacy” option from the list.

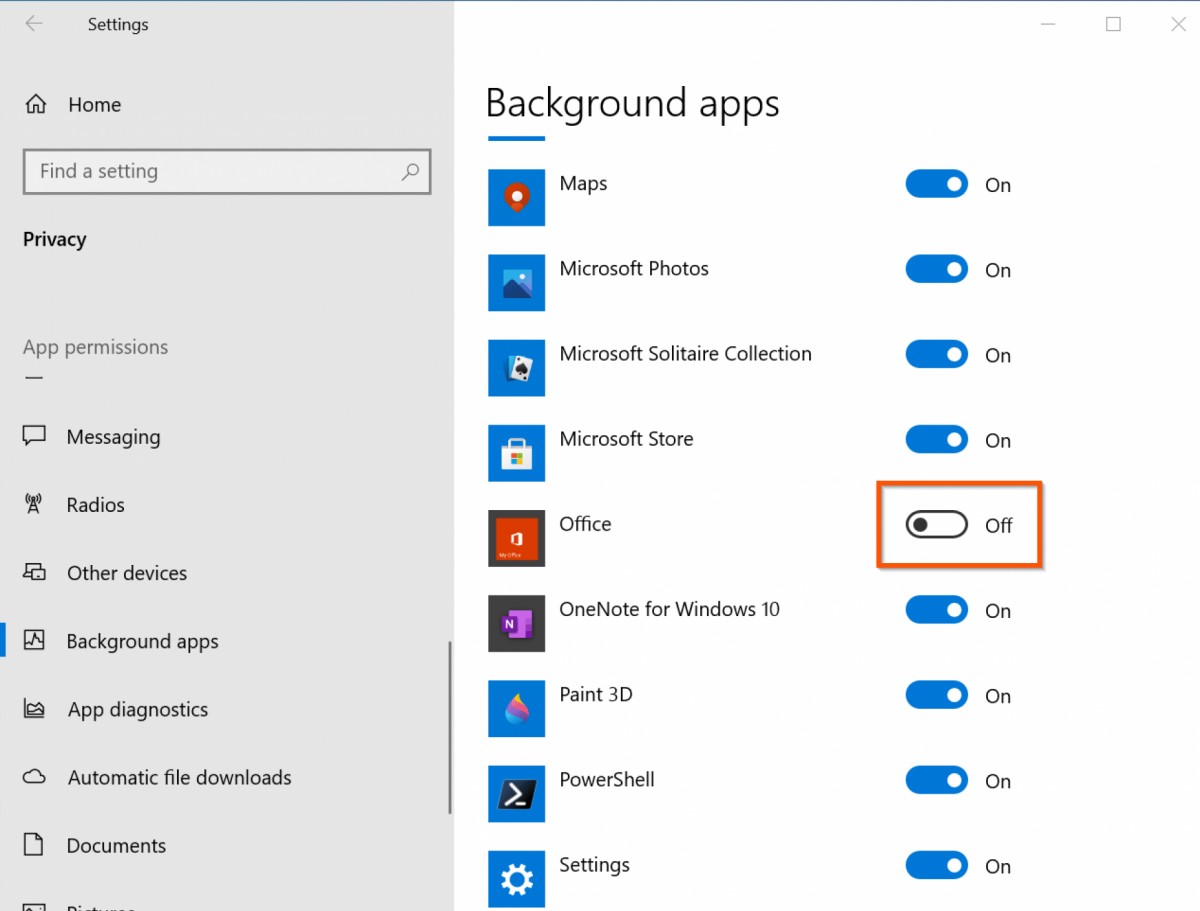
Step 3: In the Privacy Settings page, scroll down on the left-side pane and select the “Background apps” option.
Step 4: Now, on the right-side pane, scroll down through the list of applications and when you find Office, toggle the switch next to its from ON to OFF.

That’s it. When the follow the above-mentioned guide and make the changes, the system will automatically create a registry key. After the changes are made, the Microsoft application will be put to sleep mode when not in use on your computer running Windows operating system.

