In the Windows 10 operating system, when you have multiple applications, the processes will continue to work in the background even though you are not actively using them. When the processes run in the background when not needed, it wastes significant amount of power.
To optimize this, Windows 10 has “Power Throttling” which is designed to leverage power-saving capabilities or processors to limit resources in for processes running in the background with minimal power requirements.
If you are having issues with your applications or the power management on your device, we’ll show you in this guide how you can check the processor enabled for power throttling and disable those processes.

How to check processes being throttled
Step 1: Open Start menu and search for “Task Manager” and open the app.
Alternatively, you can use the Ctrl + Shift + ESC keys on your keyboard to open Task Manager application.

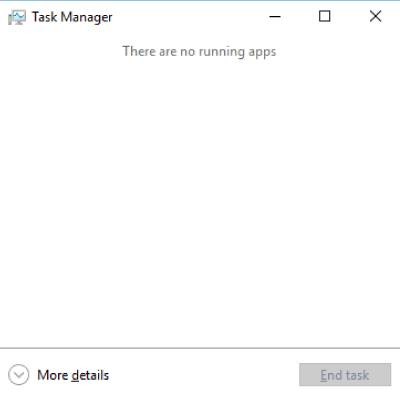
Step 2: If the Task Manager open in the compact mode, click on “More details”.
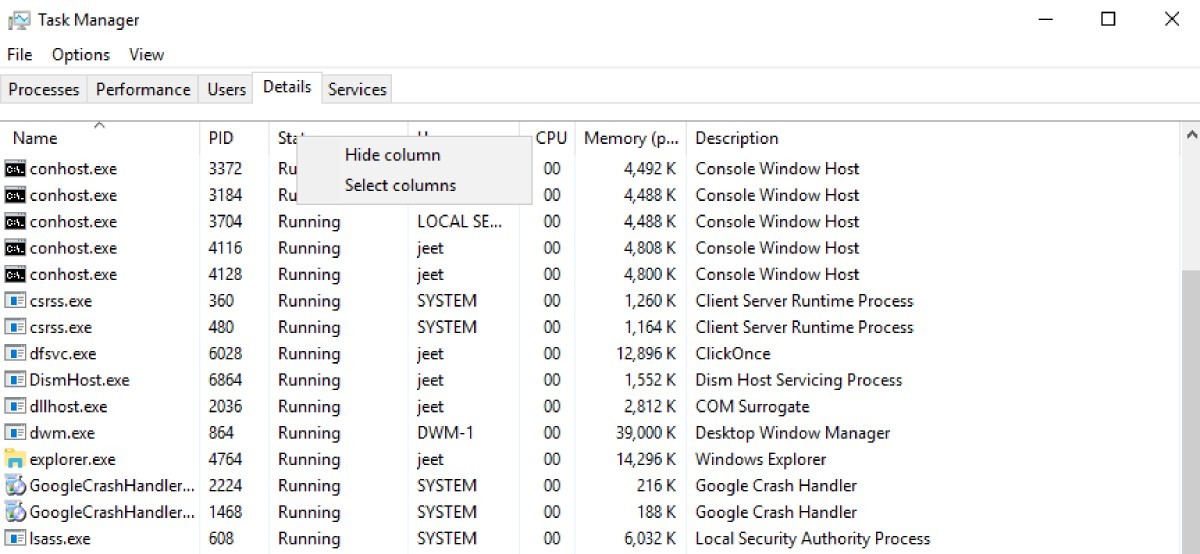
Step 3: Now, right-click the header of one of the column, and click Select columns.

Step 4: Scroll down and check the Power Throttling option.
Step 5: Click the OK button.
Now you’ll be able to see processes and applications that are being throttled by the Windows 10 operating system.
Disable Power Throttling using power settings
If you want to disable the power throttling feature on your computer, follow this guide.
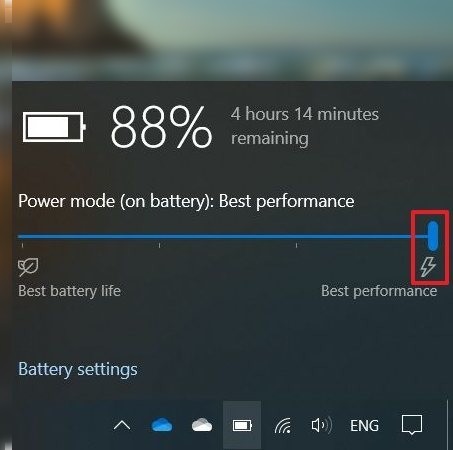
Step 1: Click the battery icon in the notification area of the taskbar.
Step 2: In the pop-up options, select the “Best performance” option using slider.

If you are unsure what are the power modes and who it affects throttling, check out the following information.
- Battery saver — Enables Power Throttling.
- Better battery — Enables Power Throttling.
- Better performance — Enables Power Throttling, but it’s a more relaxed option.
- Best performance — Disables Power Throttling.
Disable Power Throttling for individual processes
- Open “Settings” and click on “System” and go to the “Battery” section
- Under the “Overview” section, and click on the “See which apps are affecting your battery life” option.
- Now, clear the option that reads “Let Windows decide when this app can run in the background”.
- After that, clear the “Reduce the work they can do when it’s in the background” option.
- You can also clear the option “Allow the app to run background tasks”.

