Microsoft has rolled out Windows Terminal for some time now and it’s quite a good tool. It is a unified Terminal app with PowerShell, Command Prompt, Linux, and all other shells you may have on your PC.
It is a very well-rounded and feature-packed developer tool. It also has support for many features like GPU rendering, emoticon support, and also support for custom profiles. Another major feature is that it combines everything that you can do with several other tools like Command Prompt and Windows PowerShell.
If you have been using the Windows Terminal tool on your computer and if you are used to it, then it’s a good idea to keep it as a default terminal app. In this step-by-step guide, we will show you how you can set Windows Terminal as the default terminal app on your Windows 11 computer.
How to make Windows Terminal default terminal app in Windows 11
Step 1: Open the Windows Terminal application on your computer by searching for it in the Start menu.
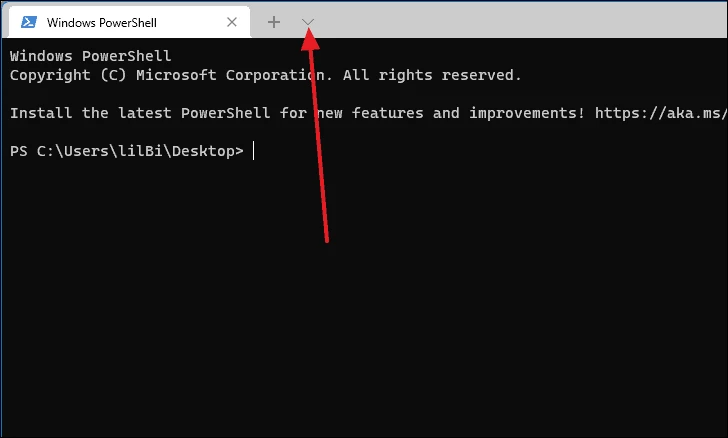
Step 2: When the Terminal window opens, click on the downward arrow icon next to the “+” sign on the toolbar.
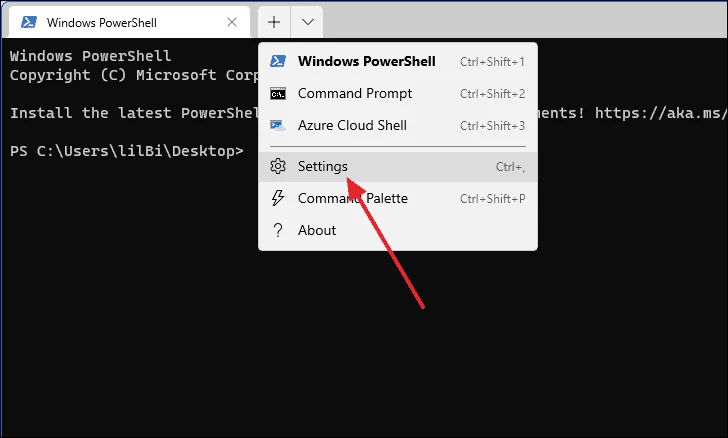
Step 3: Now, select “Settings” from the available options in the menu.

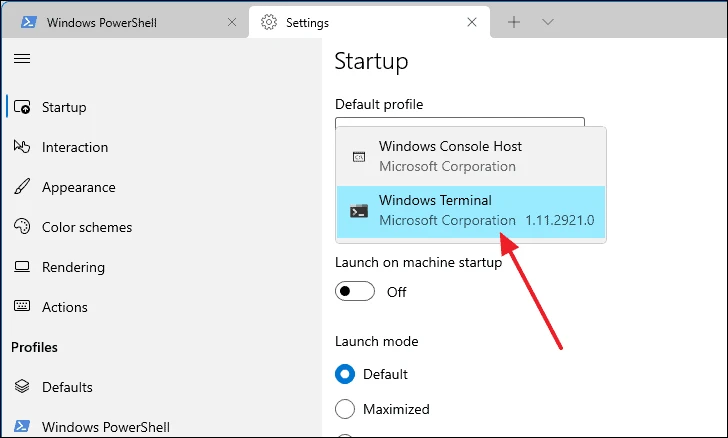
Step 4: As the Settings tab opens, click on the dropdown menu below the “Default terminal application” option and select “Windows Terminal.”

Step 5: Now click on the “Save” button located at the bottom-right corner of the window.
That’s it. Windows Terminal is now the default terminal app on your computer. If you do not see the “Default terminal application” option in step 4, then update the Windows Terminal app from the Microsoft Store and then try again.

