Microsoft has been offering Remote Server Administration Tools on the Windows operating system for a few years now which was first introduced in Windows Server 2008 R2.
Remote Server Administration Tools or RSAT is a Windows Server component for remote management of other computers also running that operating system. It allows administrators to run snap-ins and tools on a remote computer to manage features, roles, and services. It also includes tools for Group Policy management and Hyper-V management, as well as the Best Practices Analyzer.
If you want to install Remote Server Administration Tools on your Windows 11 computer, then here is a step-by-step guide on how you can do that using the Settings app.
How to install RSAT components in Windows 11
Step 1: Open the Settings application on your computer. For this, click on the Start Menu, and from there, select the Settings app to open it.
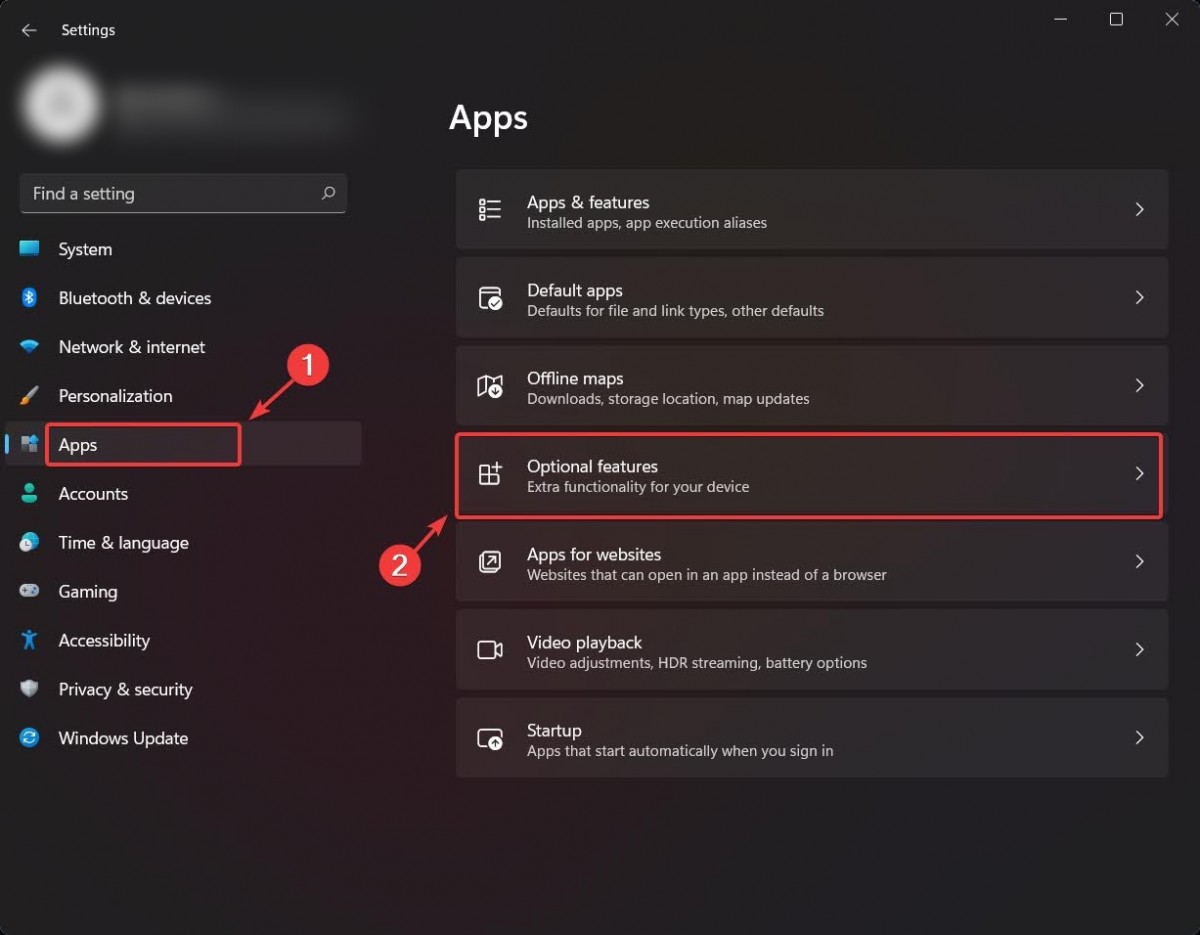
Step 2: Now, when the Settings window opens, select “Apps” from the left side menu.

Step 3: On the right side, click on the “Optional features” options.
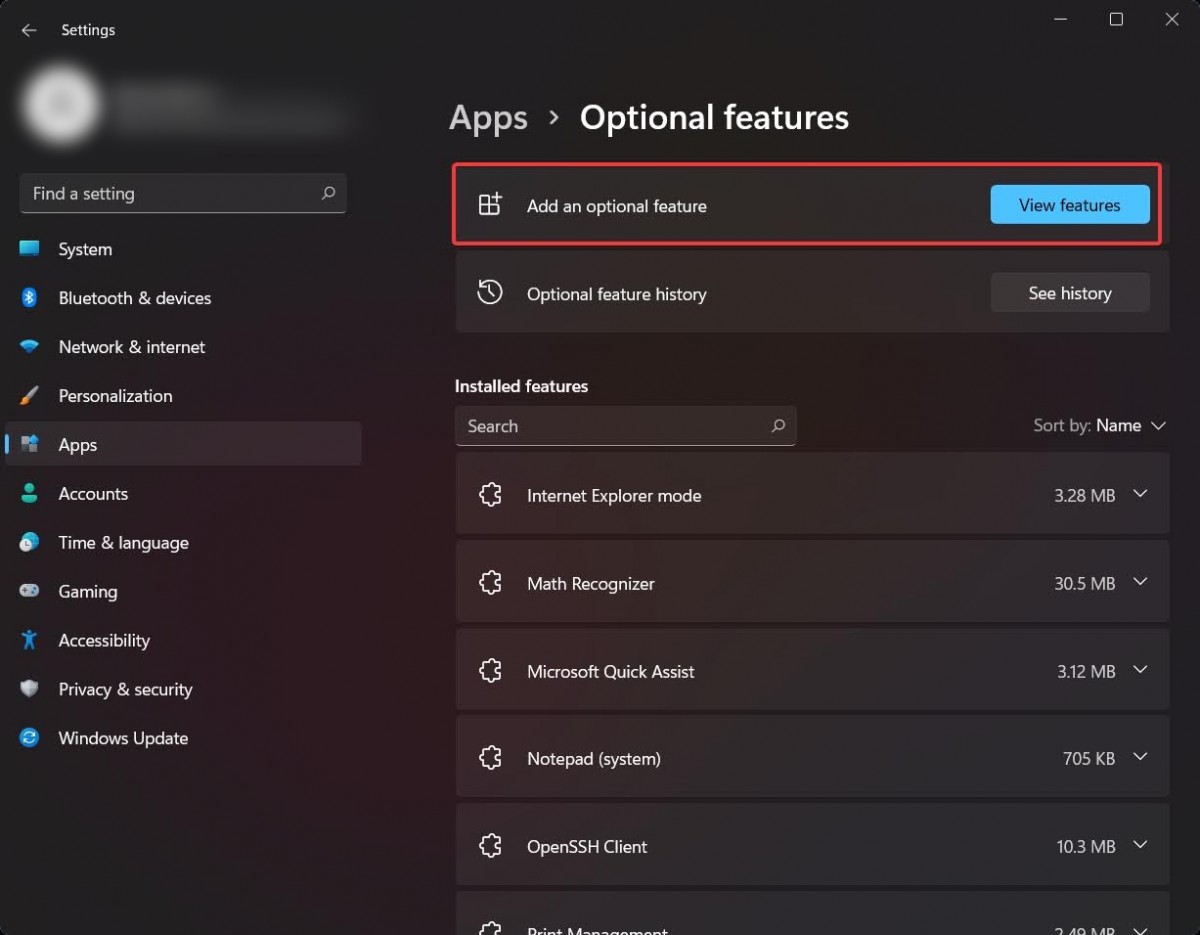
Step 4: Click on the “View features” button from the Add an optional feature tab.

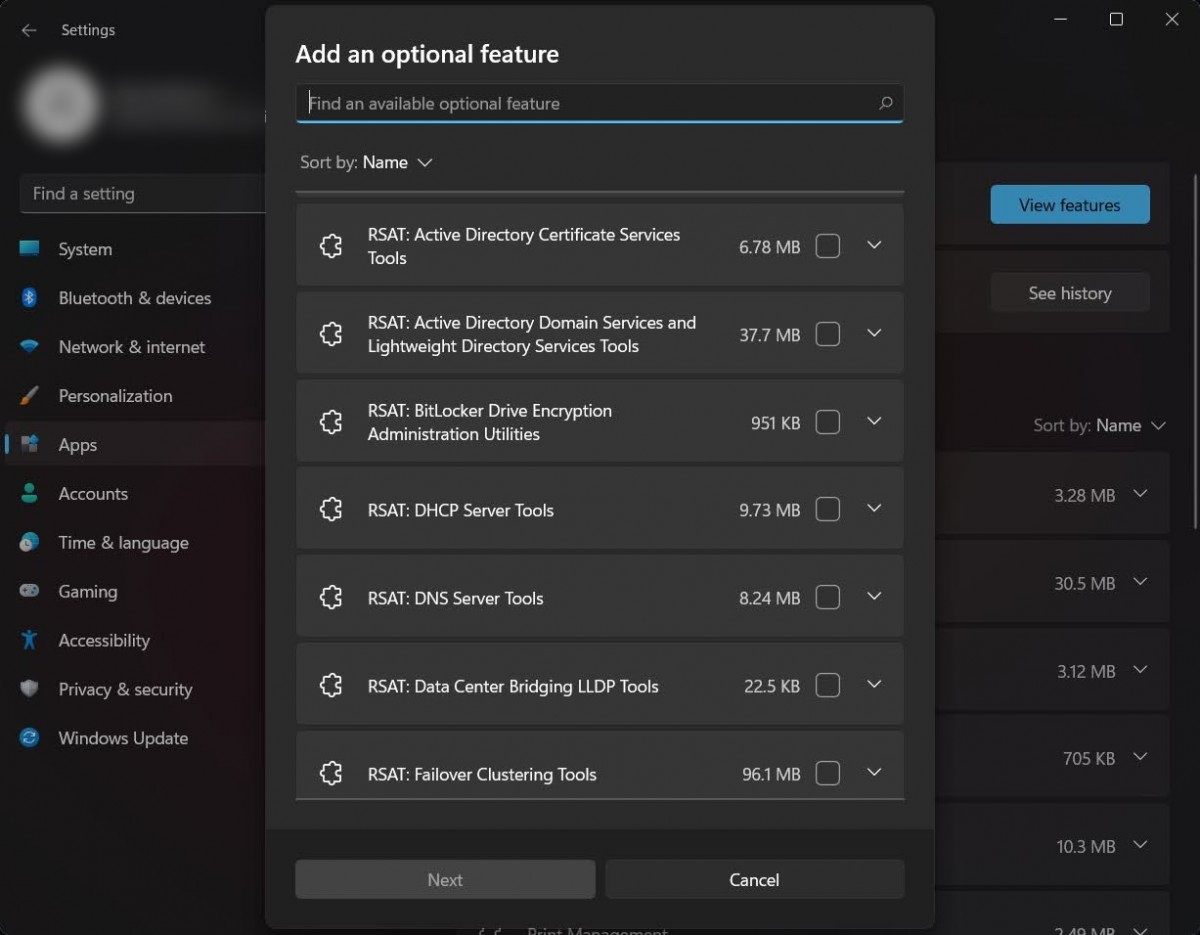
Step 5: In the search tab on the top, type “RSAT.”
Step 6: You will now get a list of all the RSAT components. Select the ones that you want to install.

That’s it. Once the required components are installed on your Windows 11 computer, you can close the Settings windows. These components or tools can also be installed using PowerShell, which will be covered in another guide.

