In Windows operating system there’s a virtual memory which is basically a hidden file (paging file) present on the hard drive for storing data and files that are not used often, freeing space on the primary or physical memory for useful files.
It also comes in handy when the system is running out of memory for certain tasks and at that time, it relies on the virtual memory for some tasks. While the system is smart enough to manage memory issues itself, there are times when the default settings don’t work up to the market.
If you are facing memory and performance issues on your computer running Windows 11 operating system or getting messages like “Your system is low on Virtual Memory,” then you might consider increasing the virtual memory on the system.

There are a few different ways to increase the virtual memory on your Windows 11 computer but for this guide, we will be taking the help of the command prompt. Here is a step-by-step procedure.
How to increasing Virtual Memory in Windows 11 using Command Prompt
Step 1: Open Command Prompt on your computer running Windows 11 operating system. For this, open the Start menu and search for “Command Prompt.” From the search results, right-click on the app and select “Run as Administrator.”
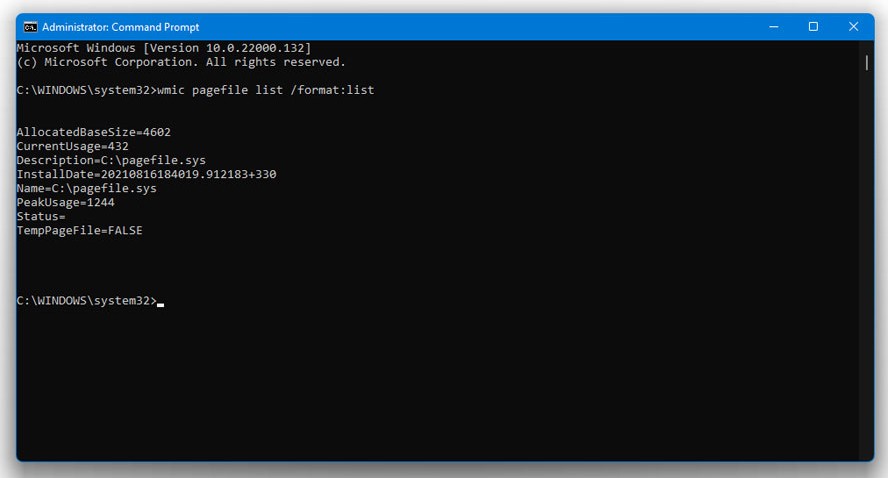
Step 2: Now, check the current status of the paging file or virtual memory on your system, enter the following command:
wmic pagefile list /format:list

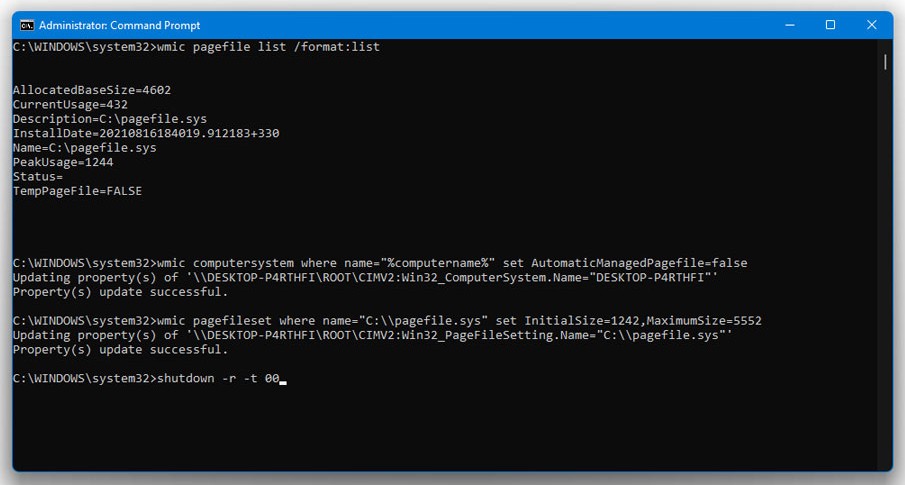
Step 3: To increase the virtual memory on your device, you will first have to disable the feature that automatically manages the paging file. For that, enter this command:
wmic computersystem where name="%computername%" set AutomaticManagedPagefile=false
Step 4: Now, you need to enter the command to set the initial virtual memory size and the maximum virtual memory size. Here is the command for the same.
wmic pagefileset where name="C:\\pagefile.sys" set InitialSize=YOUR-INITIAL-SIZE,MaximumSize=YOUR-MAXIMUM-SIZE
Make sure to replace YOUR-INITIAL-SIZE and YOUR-MAXIMUM-SIZE in the command mentioned above with the values that you want.
Step 5: Once that is done, you will need to restart your computer for the changes to take effect. To restart your system using command prompt, enter this command:
shutdown -r -t 00

That’s it. When your computer restarts, you will notice that the virtual memory on the system has now been increased. To verify this, you can repeat steps 1 and 2 of this guide to get information about the virtual memory state.
Virtual Memory is a useful feature, especially when the system’s performance is slowing down due to less memory space. But this isn’t the best solution and if the performance issue keeps arising, then the best solution is to add extra RAM to your computer and it should fix memory issues.
