When you connect multiple speakers or audio devices to your Windows 10 PC, you have to switch between the devices and you may end up changing the devices as default. If you have a display with built-in speakers or if you have a home theatre system setup for the PC, or it can be a headset, no matter what device you use, when you want to change the speakers on Windows 10, you have to set them as default. Here’s how.

How to set Speakers as default audio device on Windows 10
Once you set the speakers or the audio output device as default, all the apps, system sound, and games will use the device as default for the sound. Some apps support switching speakers easily and override the system defaults. To set an audio output device as default for all apps, here’s what you need to do.
- Head to the Windows Settings using the keyboard shortcut Windows Key + I or use the Start menu to open the Settings.
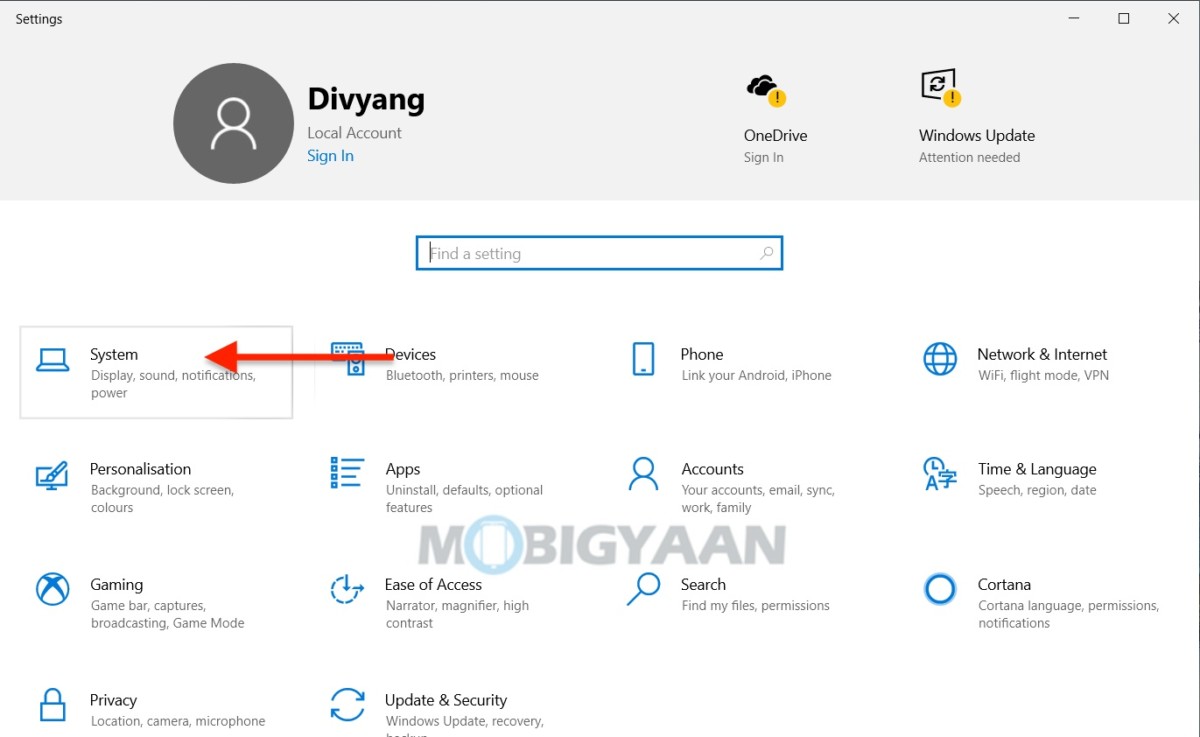
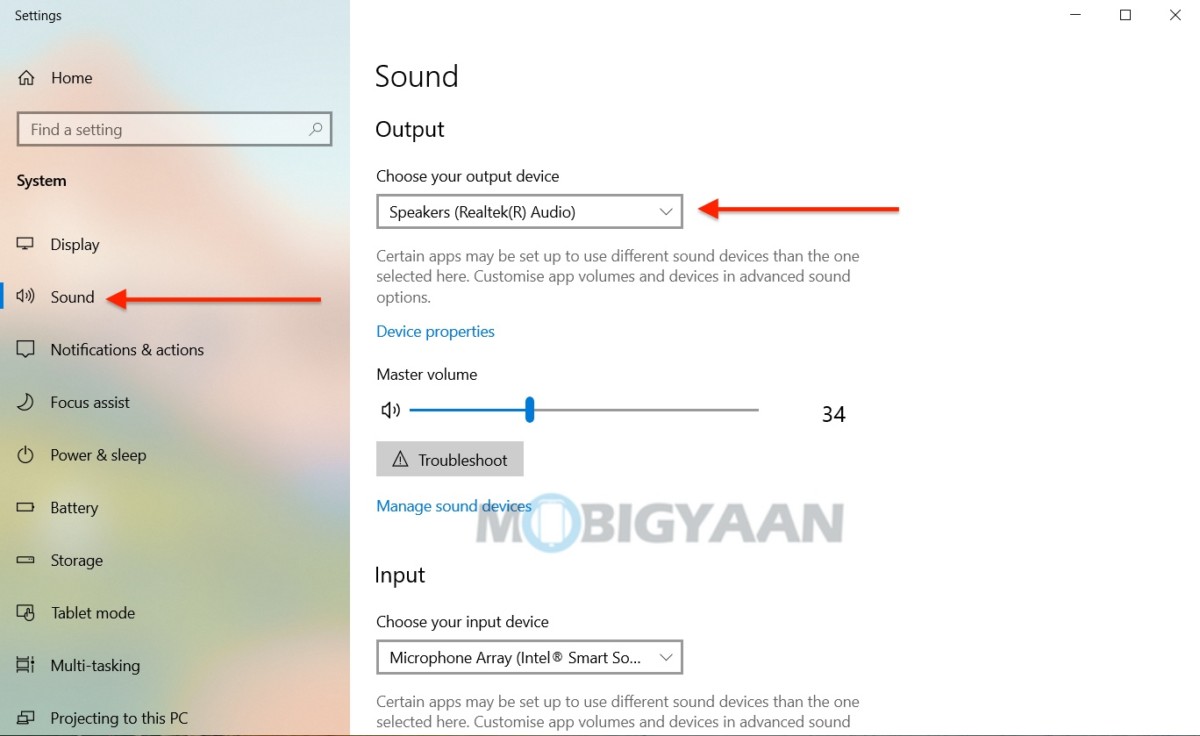
- Under Windows Settings, click on System, and then on the left side, click Sound.
- Here, you can choose the default sound device from the drop-down menu. Choose the desired device you want to keep as default.
You can also use the Sound icon in the system tray as shown to quickly open the sound settings, the tray is located in the bottom-right corner on the taskbar.
- Click on the Sound icon in the system tray and click on Open Sound Settings to open the sound settings window.
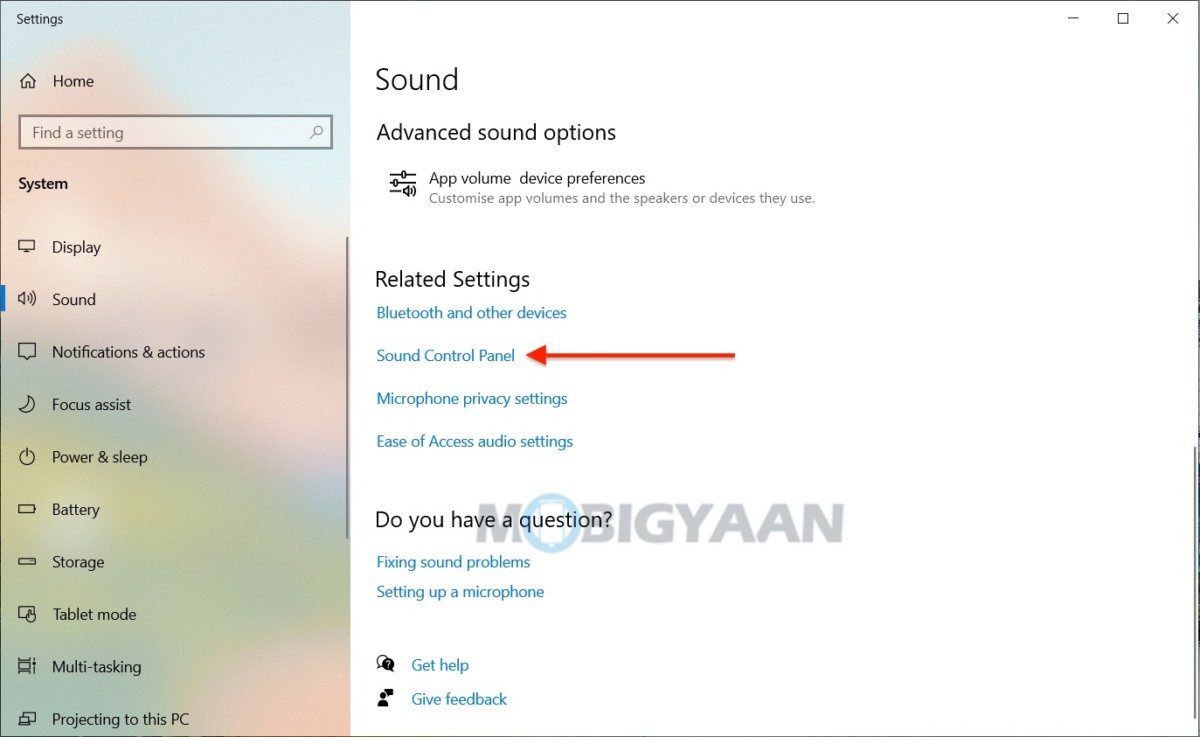
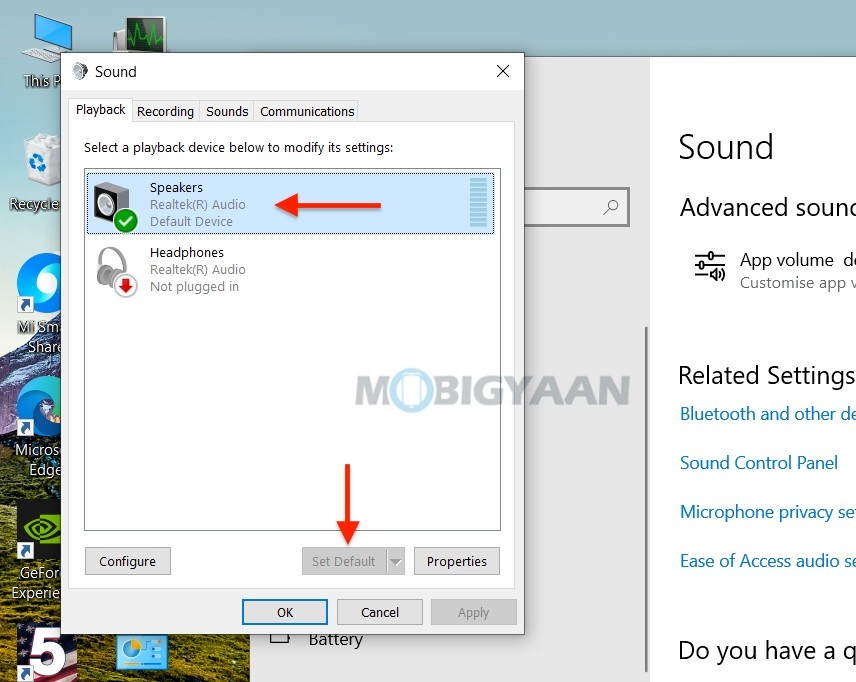
If you scroll down to the bottom, you will Sound Control Panel which can be used to set the default audio device on the Windows 10.
That’s all you have to do to set Speakers as default audio device on Windows 10.
That’s it for now, if you like this guide, do check out these top Windows 10 tips and tricks. More stuff can be found here – Windows and Mac tutorials and guides. To get updates on the latest tech news, smartphones, and gadgets, follow us on our social media profiles.


