Ever wanted to change the date and time on your Windows 10 PC but failed to do it? Your Windows PC comes with a pre-configured date and time at the time of installation and setup, if you think it has been changed or you have moved to a different time zone, Windows 10 allows you to change the date and time manually. Take a look at this guide showing you how to set or change Date, Time, and Time Zone on Windows 10.

How to set or change Date and Time [Windows 10]
Changing the date and time on your Windows 10 PC is easy, here’s what you need to do, just follow these simple steps.
- Go to the Windows Settings using the keyboard shortcut Windows Key + I or use the Start menu to open the Settings.
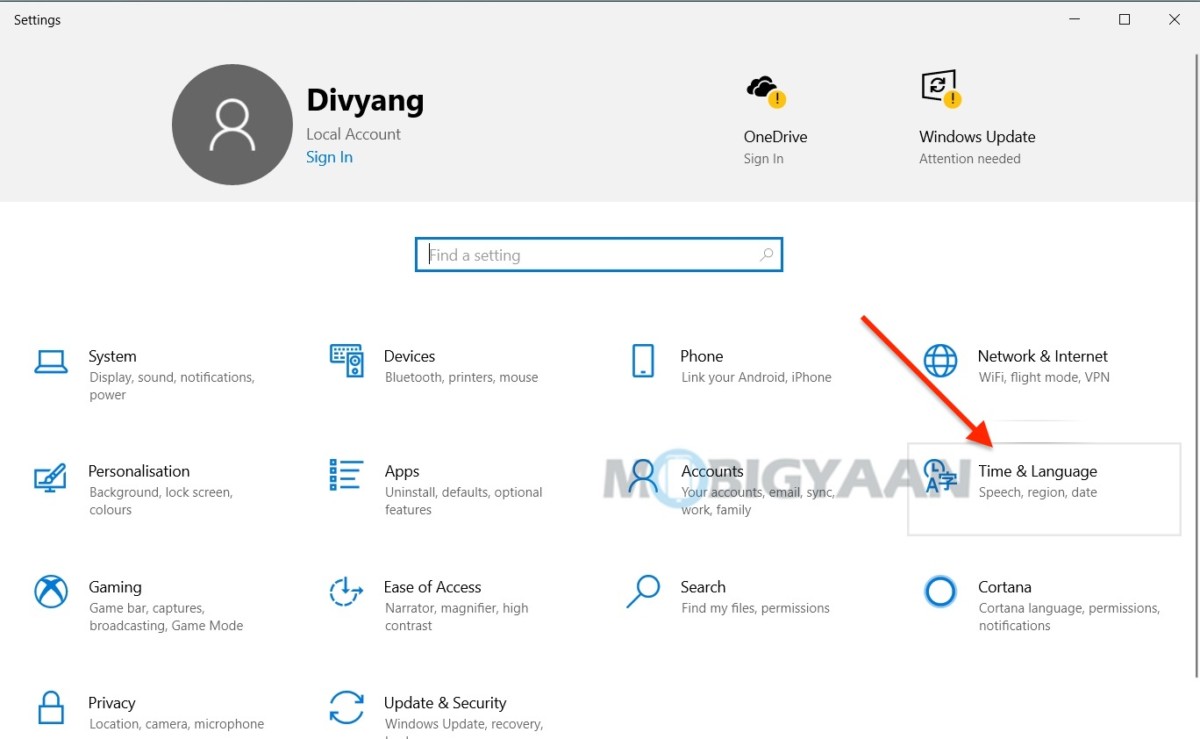
- Once you are in the Windows Settings, click on Time & Language, and then on the left side, click Date & time.
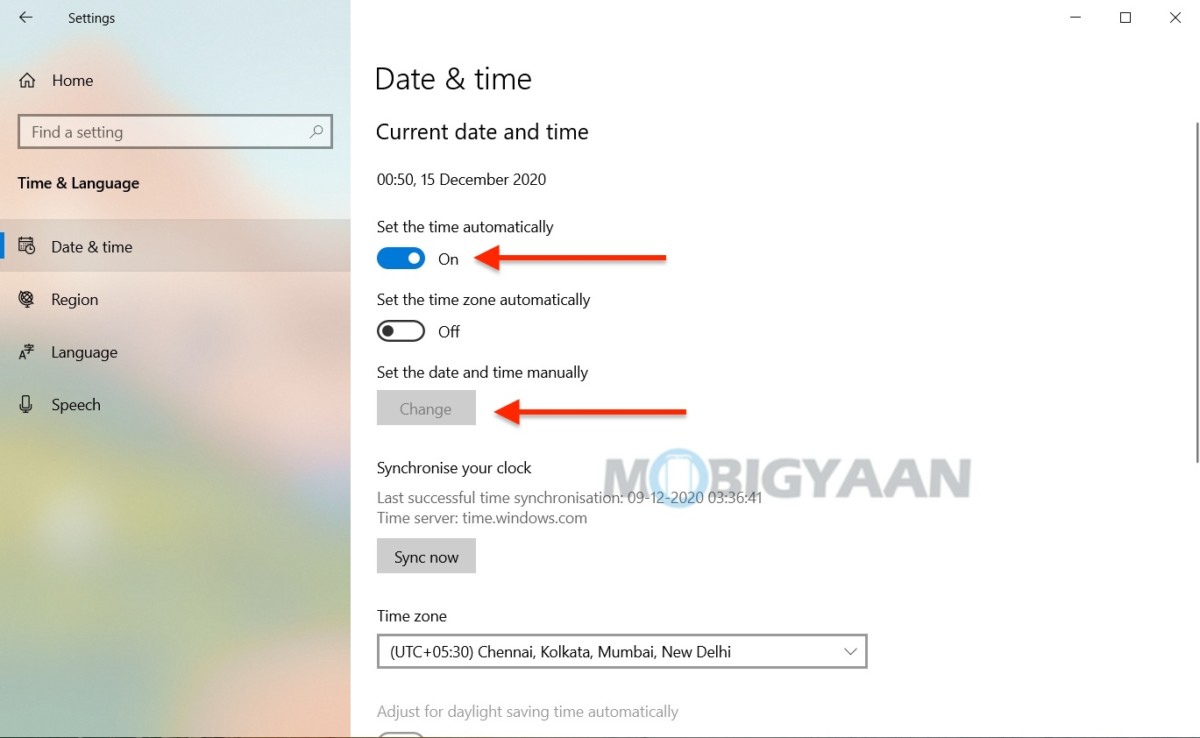
On the right side, you have options to change the Date, Time, and Time Zone, The first slider is for the date and time, you can set it as automatic or turn it off to set or change it manually. The Change button will become active once you disable the slider.
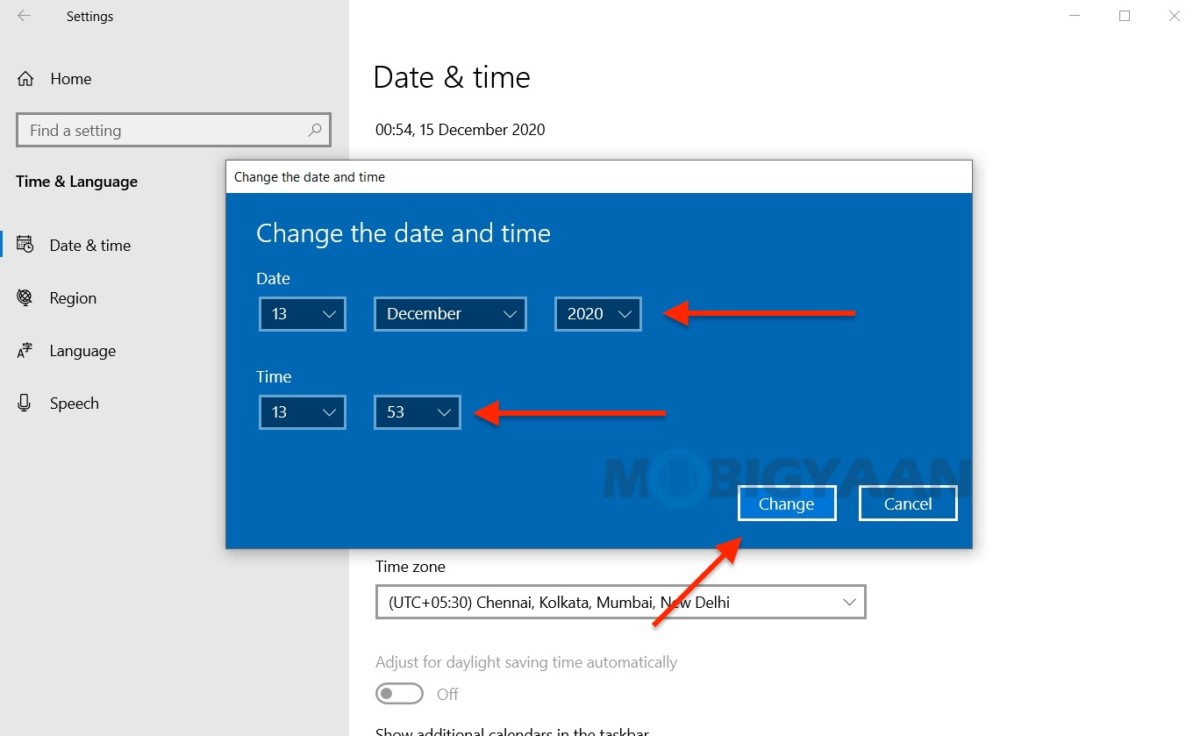
- Click on Change to change the date and time. Set the desired date and time.
Just below it, you have the option to change the Time zone, select the desired time zone from the drop-down list. You will need to disable or turn off the time zone slider before doing that. Aside from these, use the Sync now button to synchronize the time from the available Windows servers.
That’s how you can change the date and time on Windows 10. If you like this guide, also check out more awesome stuff here – Windows and Mac tutorials, guides, tips, tricks, and hidden features. To get updates on the latest tech news, smartphones, and gadgets, follow us on our social media profiles.


