There are a lot of users who do not add a Gmail signature while sending emails, and that’s totally fine if you are using it for personal emails like sharing images or documents to your friends and family. But adding a signature to your emails can be useful for business reasons. Rather than typing out your phone number or contact details every time, why not just put a signature with your contact in it?
An email signature is basically a text written at the end of the emails you send, it can be your contact information or a favorite quote or a brand name or anything. When you send an email, the signature is automatically added at the end of Gmail messages as a footer. If you are looking for setting up a signature for your Gmail account, here’s how to set or modify a Gmail signature on your smartphone.

How to set a Gmail signature on your smartphone
Setting up a signature is easy, all you need is to change a quick setting in your Gmail app, this will either add a new signature or change an existing signature that shows up at the bottom for emails you send from the Gmail app.
- Launch the Gmail app on your smartphone.
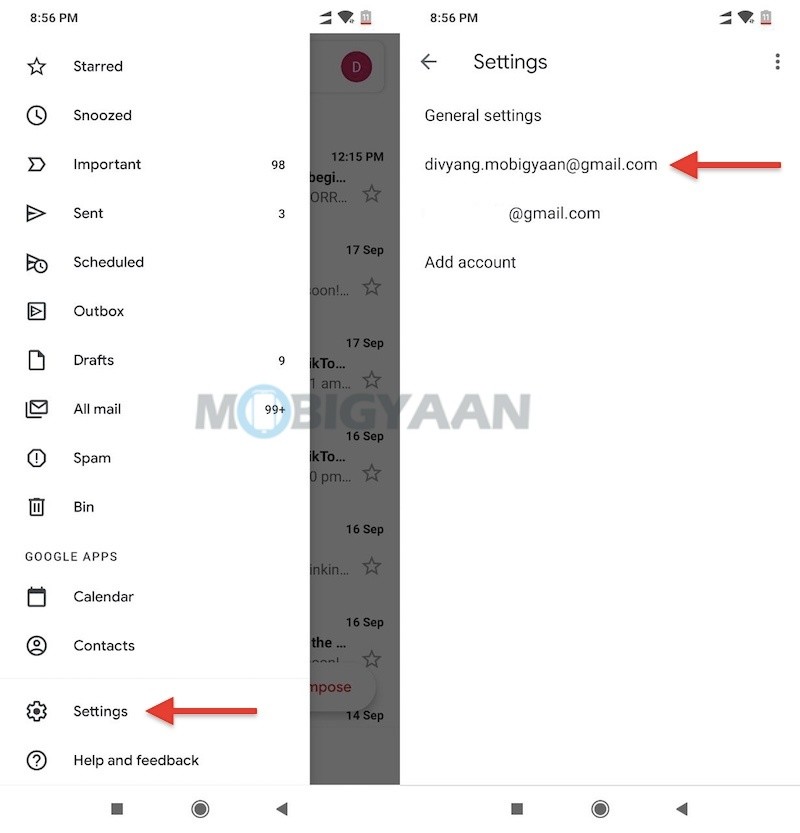
- In the top left corner, tap the Menu button i.e. three horizontal lines.
- Swipe to the bottom and tap Settings from the list.
- Here, choose the Gmail account that you are setting up the signature for.
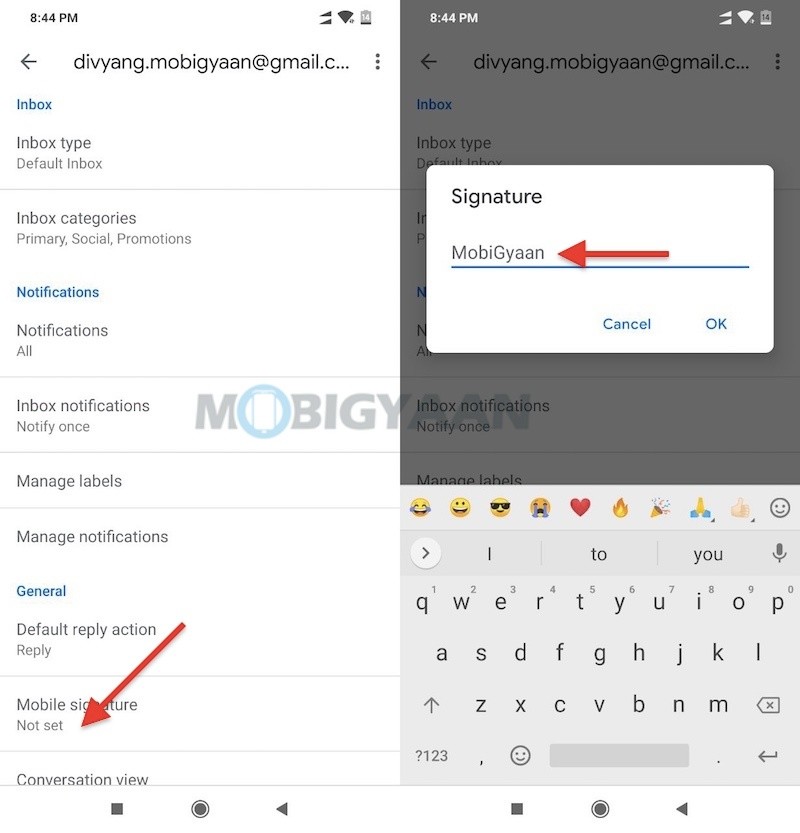
- Now tap on Mobile Signature on the next screen.
- Type the text for your signature and tap OK.


Want more tips and tricks like this? More awesome stuff can be found here – smartphones and apps tutorials, guides, tips, tricks, and hidden features. To get updates on the latest tech news, smartphones, and gadgets, follow us on our social media profiles.
