Whenever you delete files or folders on your Windows, it directly goes into Recycle Bin so that you can restore the files back whenever needed. However, at times, the Recycle Bin gets filled with so many files that it takes a chunk of storage space on your Windows PC, it also looks messy and restoring the appropriate file from the bin may be time-consuming.
Your Windows 10 comes with a built-in feature called Storage Sense and using it, you can save storage space by configuring the Recycle Bin settings to automatically delete files and folders inside the bin at a specific duration – every day, every week, or every month. Here’s how to schedule Recycle Bin to empty automatically.
How To Schedule Recycle Bin To Empty Automatically On Windows 10
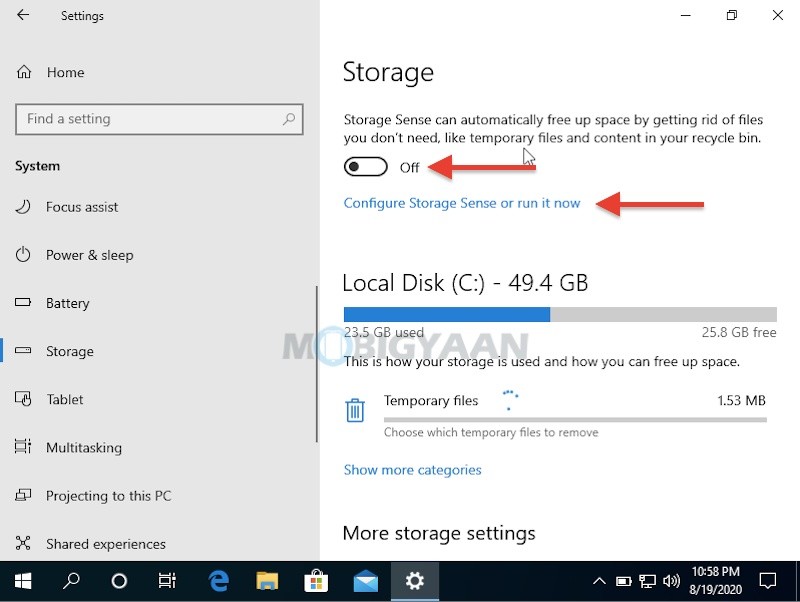
Storage Sense can automatically free up space by getting rid of files you don’t need, like temporary files and content in your Recycle Bin.
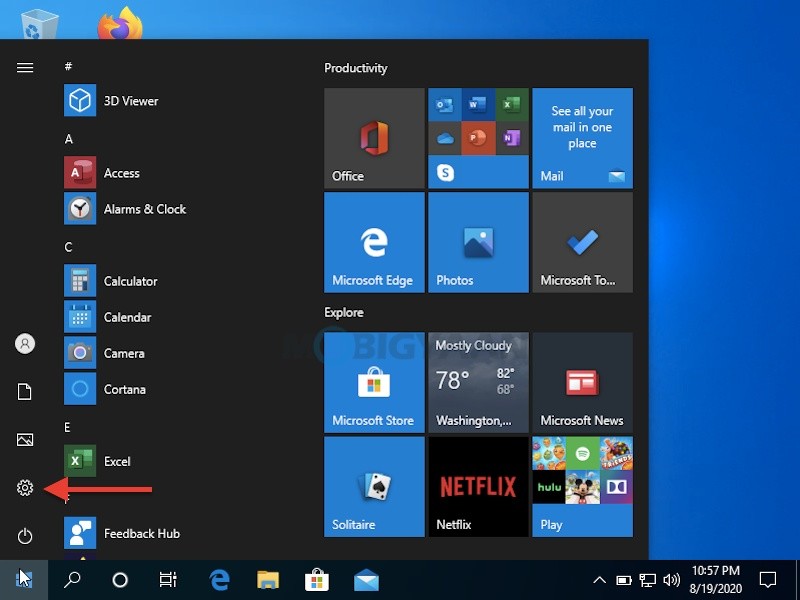
- Launch Settings by clicking on the Start Menu in the corner and clicking the settings gear icon as shown. Another way to enter the Settings is to press the shortcut key Windows + I.
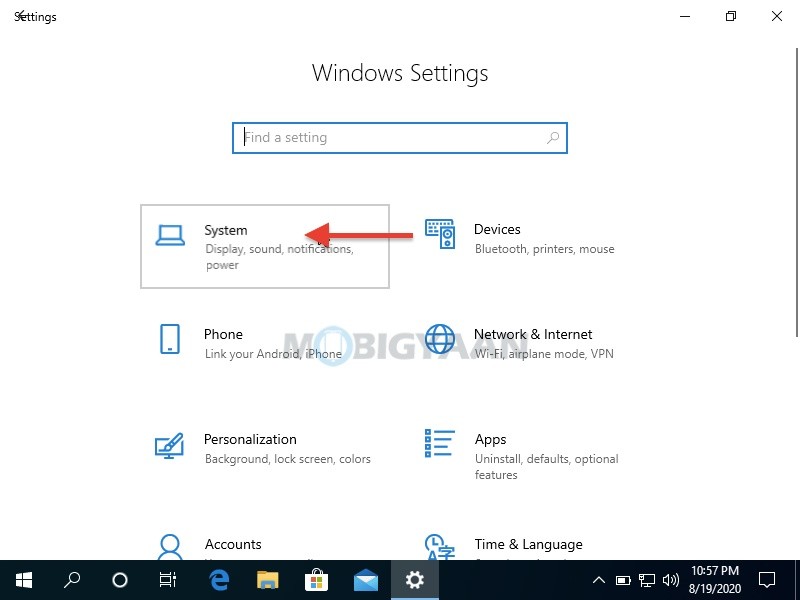
- Under the Settings, click on System and then click on Storage.
- On the right side, turn on the Storage Sense.
- Below the switch, click on Configure Storage Sense or run it now.
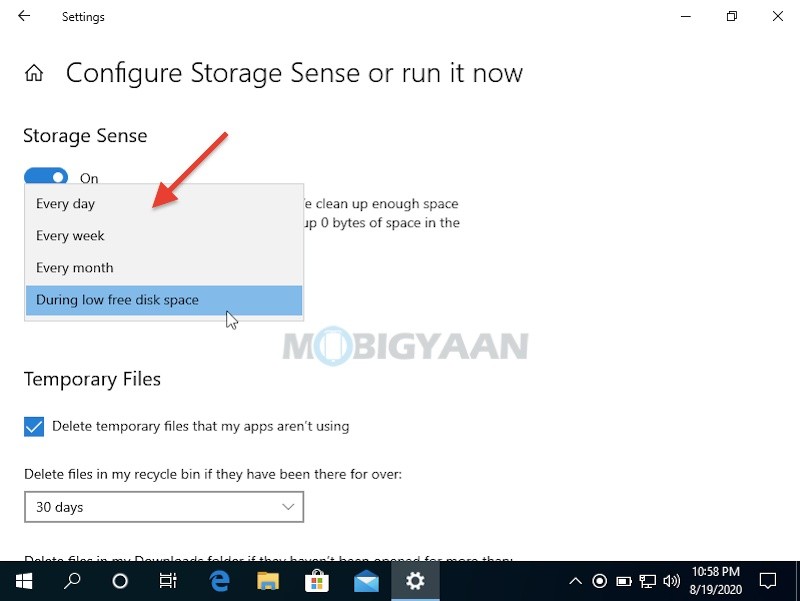
- Use the Run Storage Sense drop-down menu to select the frequency of the scheduled delete. Choose from every day, week, or month or whenever disk space is low.
You can choose to skip the Recycle Bin when deleting files and folders on Windows 10. If you liked this Windows guide, also check more Windows tips, tricks, tutorials, and guides. For more updates on the latest smartphones and tech, follow us on our social media profiles.

