For those who are using Adobe Photoshop and other graphic design tools, they will require fonts to be installed on the computer and it’s easy to install fonts on Windows 10. If you are new and want to remove fonts on Windows 10 that you have previously installed, here’s what you can do.

Although Windows 10 offers pre-installed fonts, you have the option to install the fonts that you have created or have purchased/downloaded from the internet. Managing Fonts on Windows 10 is handy, this guide will show you how you can remove fonts on Windows 10.
Installing fonts on Windows 10 is simple, all you need is to double click on the font file that you have created or downloaded, you can install fonts in the TrueType (.ttf), OpenType (.otf), TrueType Collection (.ttc), or PostScript Type 1 (.pfb + .pfm) formats. If you have installed these font files, they can be removed from the Font settings available on your Windows 10.
How to remove fonts on Windows 10
Follow these steps to remove font files on your Windows 10.
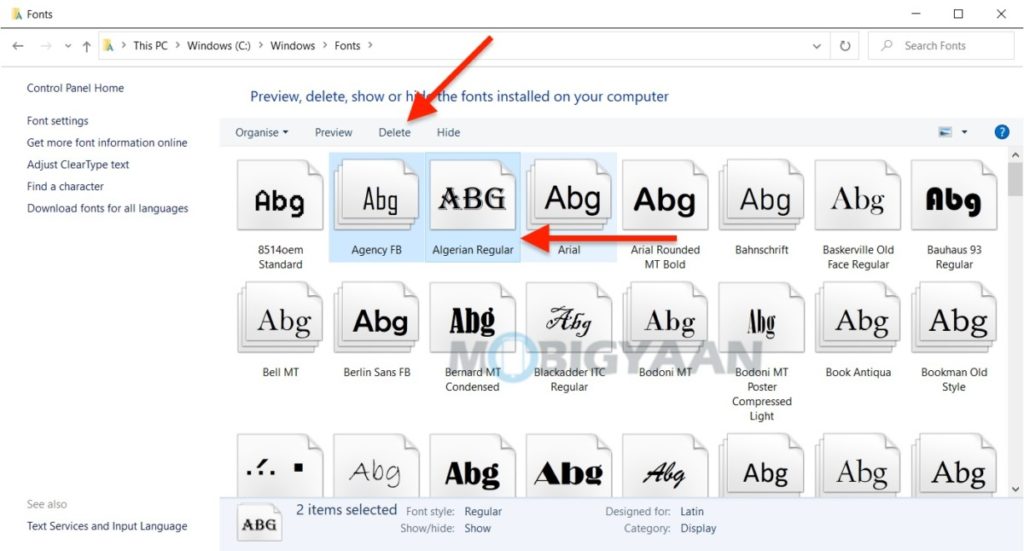
- Step 1: To quickly go to the Fonts management on your Windows 10 PC, head to the C:\Windows\Fonts in the Windows Explorer or use the Run command by pressing the Windows Key + R and enter the path shown above.

Once you open the Fonts settings, all the installed fonts will be visible here and you can choose the ones that you want to remove.
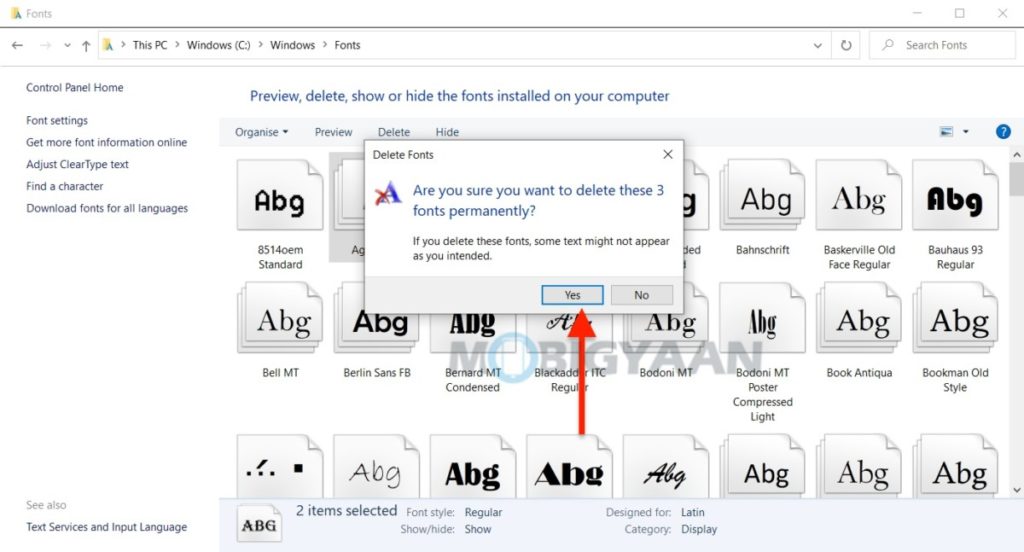
- Step 2: Choose the ones by pressing and holding the Ctrl button and left mouse click for multiple selections and remove them all at once by using the Delete at the top bar.

- Step 3: Alternatively, you can go to the font file in Windows Explorer and right-click on it to remove it by choosing the Delete option from the menu.
This is how you can remove fonts on Windows 10 and manage them. If you like this guide, do check out more awesome stuff here at Windows and Mac tutorials, tips, and tricks.
To get updates on the latest tech news, smartphones, and gadgets, follow us on our social media profiles.
