Your Windows 10 PC has automatic updates enabled and it installs whenever the updates become available for your computer. But some of you don’t want Windows to update automatically or at least don’t want the update at the moment. Whether you want to stop the update or install it later, Windows offers you to pause it, the Windows updates can be paused for up to 35 days. Here’s how to pause Windows 10 Updates on your computer

Note: It’s recommended to update the Windows as it offers you security updates to protect the PC as well as adds the features and functionalities to the Windows to keep things up to date.
How to pause Windows 10 Updates on your PC
To stop or pause the update for Windows 10, all you need to do is change a quick setting on your PC.
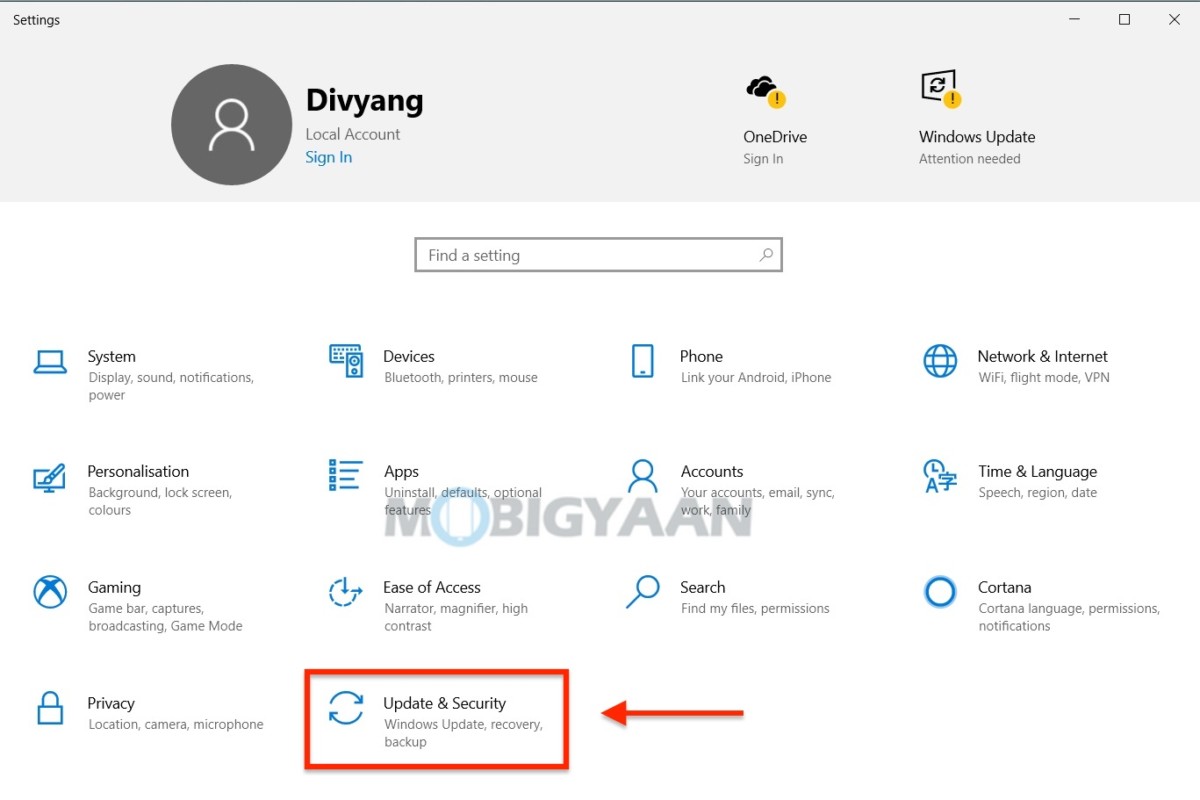
- Go to Windows Settings by pressing the keyboard shortcut Windows Key + I and navigate to the Update & Security -> Windows Update section on the left side. You can also use the Start menu to open the Settings.
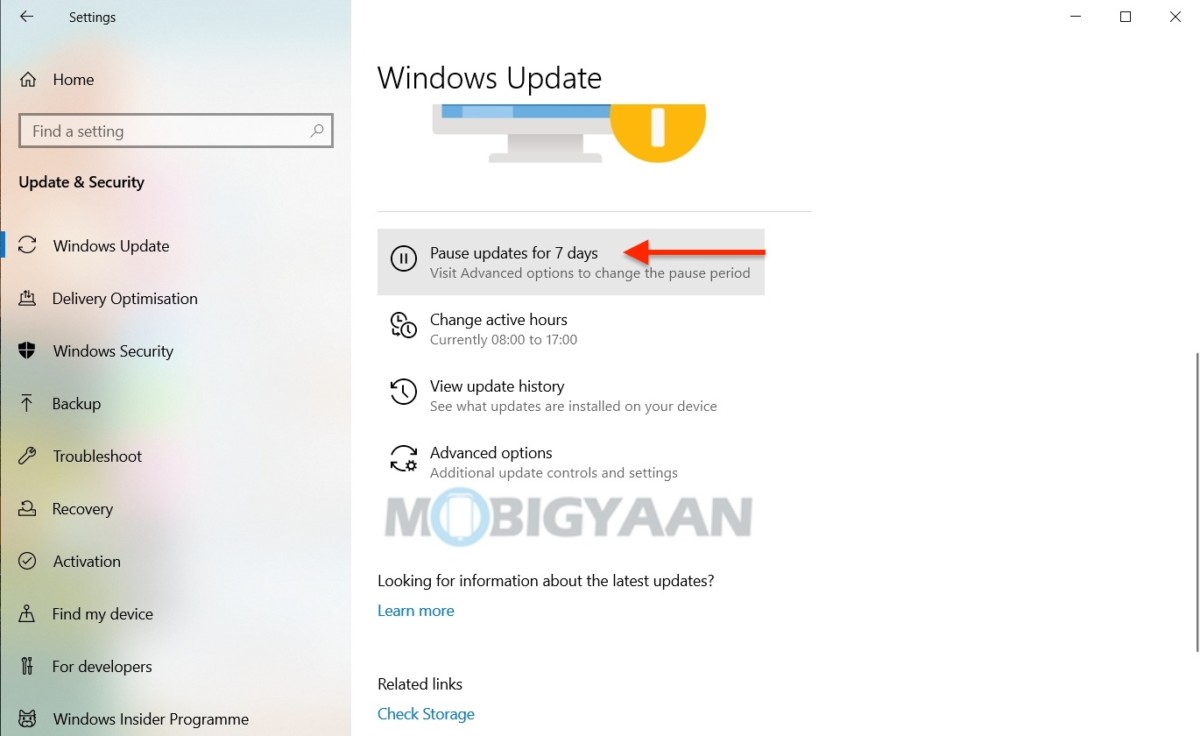
On the right side, you will see an option to pause the updates for 7 days. Windows won’t automatically download or install updates for the next 7 days.
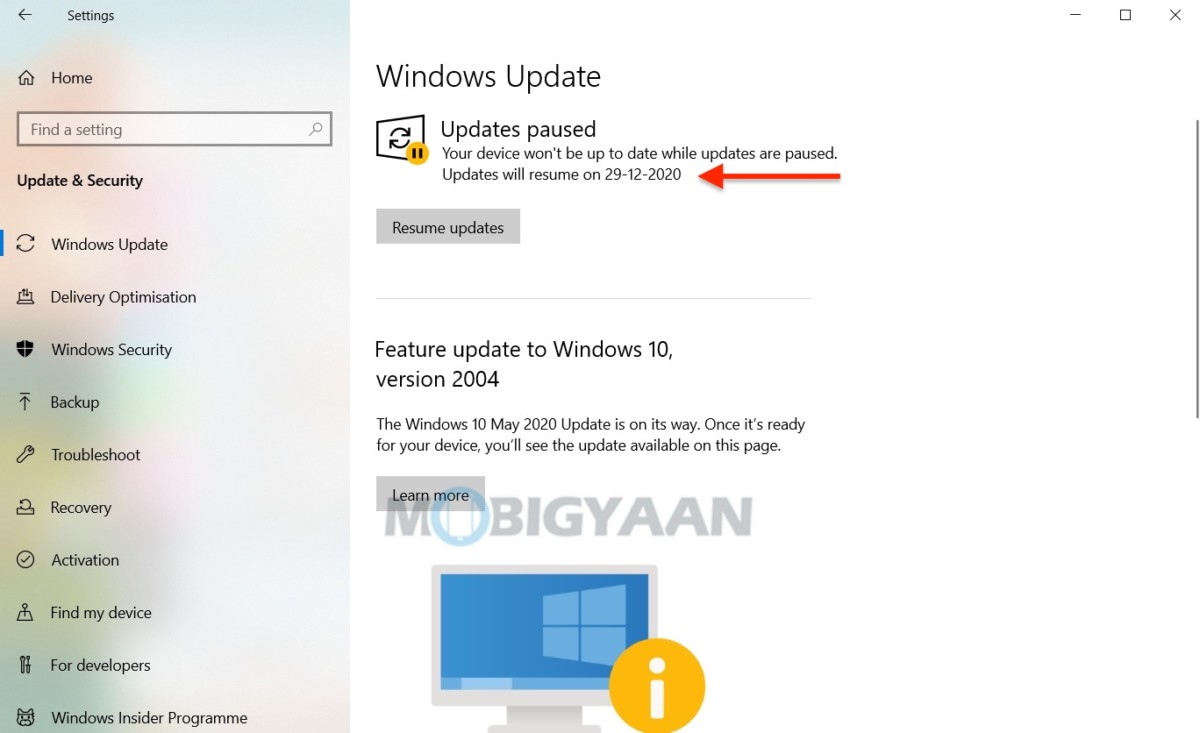
- Click on Pause updates for 7 days to pause the update, click again to add more time to the pause period. You can always visit the Advance options to change the pause period.
Once the pause period expires, Windows 10 Update will automatically download and install any available updates before you pause them again.
That’s all you have to do to pause the Windows 10 Updates. Want to check if your PC is running the latest Windows 10 version? Here’s how. More awesome stuff can be found here – Windows and Mac tutorials and guides.
To get updates on the latest tech news, smartphones, and gadgets, follow us on our social media profiles.


