Microsoft Windows 10 installs the apps and programs in the Windows disk (C: Drive) by default, whether you are installing a game or an app from the Microsoft Store, you will see the default path that’s selected is in the Windows drive. But if you want to move the apps to another drive after they are installed, there’s a straightforward way.
You can certainly change the location of the apps after installing them in Windows 10, users can move their installed Windows apps from the Microsoft Store to another drive easily. There’s much you can do, move apps to an internal or external drive which includes SD cards, USB drives, as well as thumb drives.
The default location where the apps are installed is This PC -> Windows C: drive -> %ProgramFiles%/WindowsApps and %LocalAppData%/Packages for the user app data. Here’s how to move installed apps to another drive in Windows 10.
How to move apps to another drive in Windows 10
- Launch Windows Settings using the keyboard shortcut Windows Key + I or use the Start menu and open the Settings from the settings gear icon.
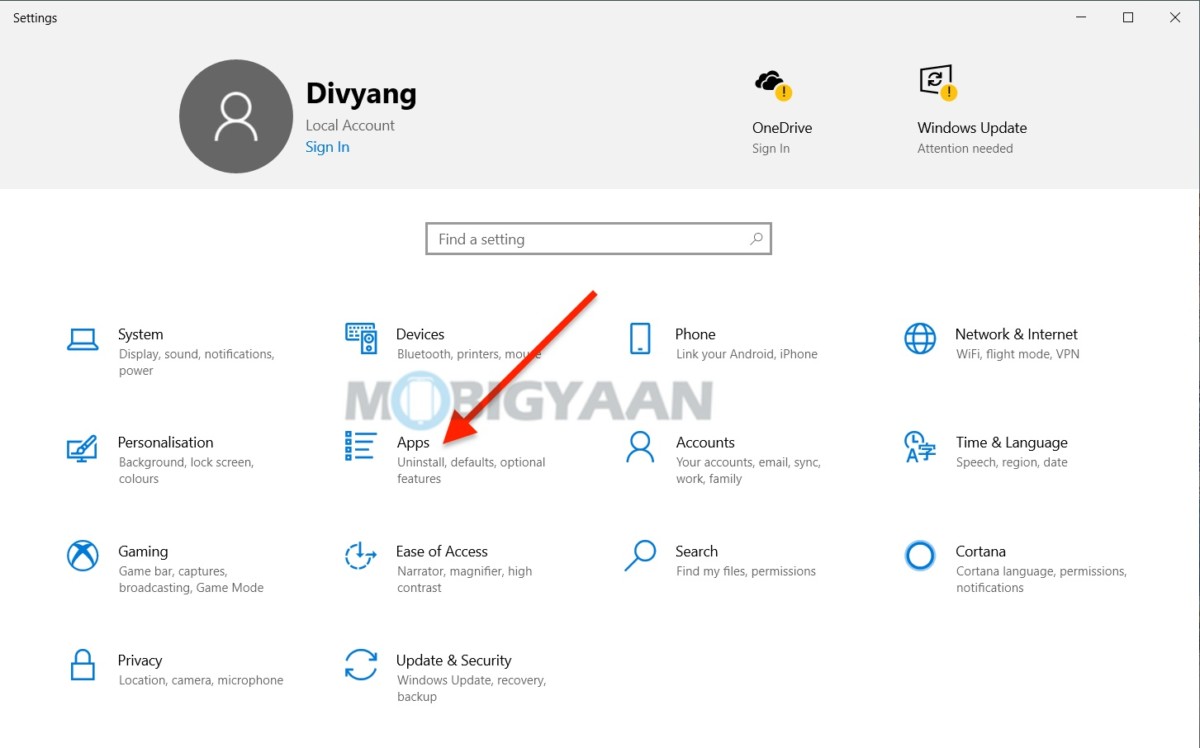
- Under the Settings, click on Apps.
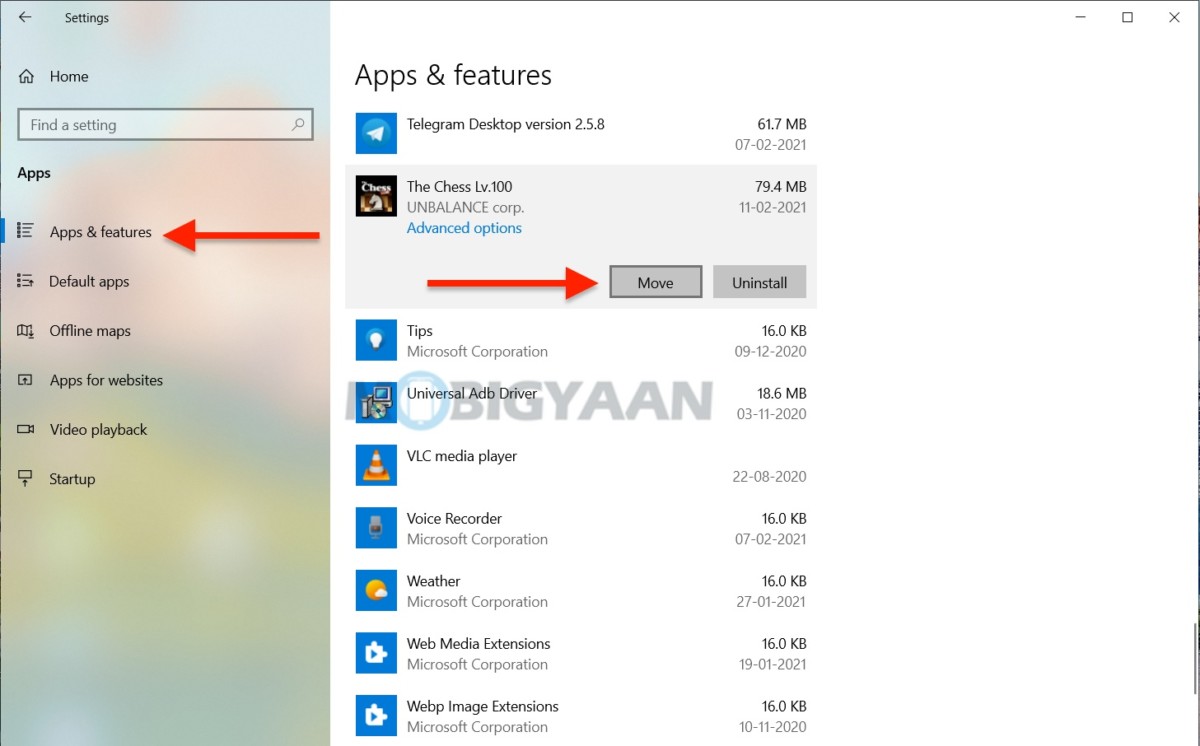
- On the left side, select Apps & features.
- On the right side under Apps & features, you will see a list of apps installed on your system, click on the one you want to move.
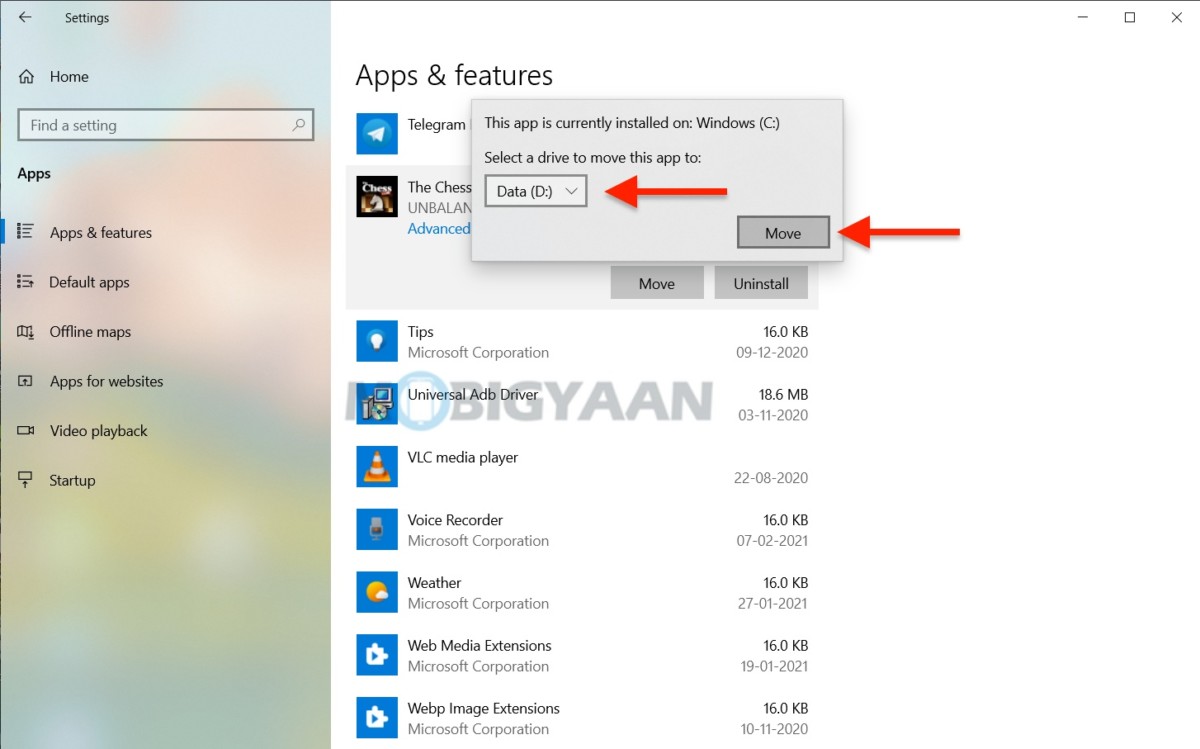
- Click Move and choose a drive in the next window, for instance, D: drive, and click on Move.
That’s it, the app will be then moved to the new location. If this drive has apps from another device on it, then you will be prompted either Yes or No to delete other apps data on it and continue.
If you like this guide, do check out more awesome stuff here at Windows and Mac tutorials and guides. For more updates on the latest tech news, smartphones, and gadgets, follow us on our social media profiles.

