The videos we shoot normally aren’t perfect and hence editing them to improve the visual experience becomes important. Earlier, users had to look for third-party programs that allowed editing videos but with the introduction of iOS 13, that work has been made easier. iOS 13 comes with a new and improved Photos app that allows its users to edit videos like a pro in just a few easy steps.
From beginners to professionals, everyone can edit videos easily with the inbuilt Photos App on iOS. In this guide, we are going to have a look at how you can master the Photos App and edit videos on your iPhone or iPad for free. Let’s get started.
1. Trim your video on iPhone and iPad
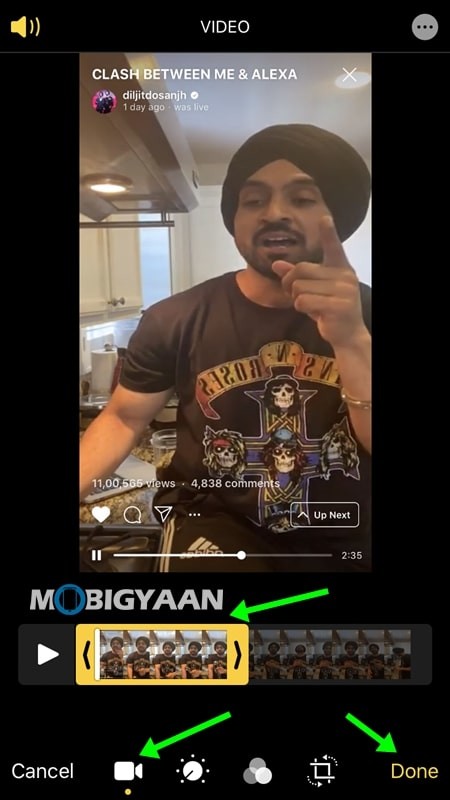
Whenever we record a video it comes with a lot of unwanted parts that increase the duration and make the video boring. Hence, to solve that problem, users can cut out parts of a video on the iPhone and make it shorter. To trim your video all you have to do is:
- Launch the Photos App on your iPhone or iPad and select the video you want to edit.
- Tap on the Edit button in the top right corner to bring up the editing section.
- Drag the slider from left and right to trim your video. Press “Done” to save your changes.
Have a look at the image below to see how it’s done.
2. Make use of Filters in your video.
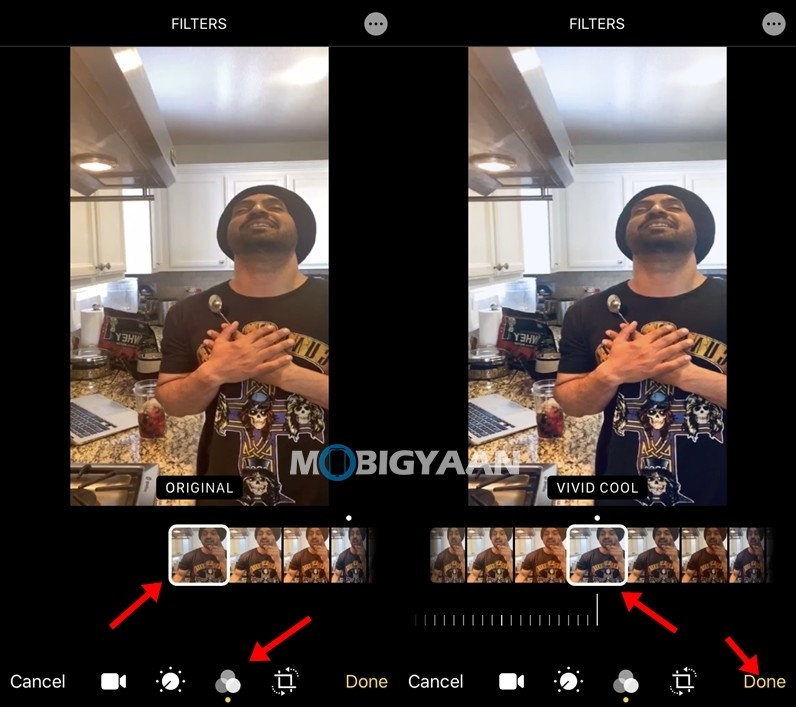
Filters play an important role if you want to make your videos more visually appealing. These filters make changes to your overall color tones and as a result, the videos look much better when you compare it with the natural color tones. The inbuilt Photos app on iOS 13 comes with 10 filters and applying them on your videos is not that tough. Have a look at the steps below to see how it’s done.
- Open the Photos app and look for the video you want to edit.
- Tap on the Edit button from the top right corner and head to the filters section.
- Apply the filter that fits the best for your video and press “Done” to save your changes.
3. Resize your video by using the Crop tool
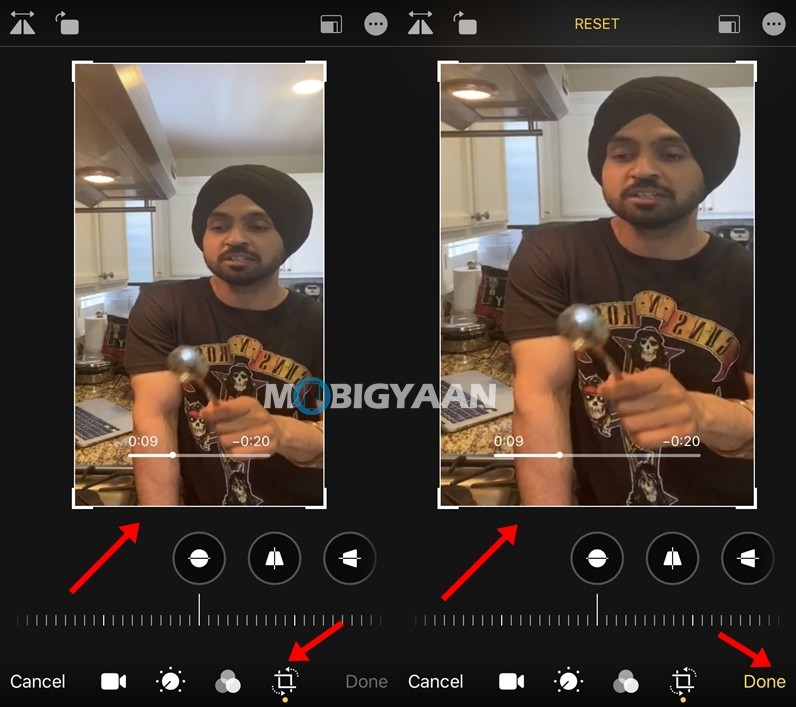
Thanks to the inbuilt crop tool in the Photos app, a lot of users have said Goodbye to the third-party video apps they used to crop their videos. This tool can be used to remove unwanted areas from your video so that people can focus on the video. To resize your videos using the crop tool all you have to do is:
- Select the crop tool in the editing section.
- Adjust the area selection tool to select the area you want to crop and press “Done” to save your changes.
Have a look at the screenshots below to see how it’s done.
4. Flip and Rotate your video
Now this feature may not be useful to everyone using the Photos app but the crop tool also allows you to Flip and Rotate your video. Doing this is an easy job, have a look at the steps below to see how it’s done.
To flip your video:
- Bring up the video you want to edit and select the Crop tool from the editing section.
- Tap the flip icon in the top left corner and press “Done” to save your changes.
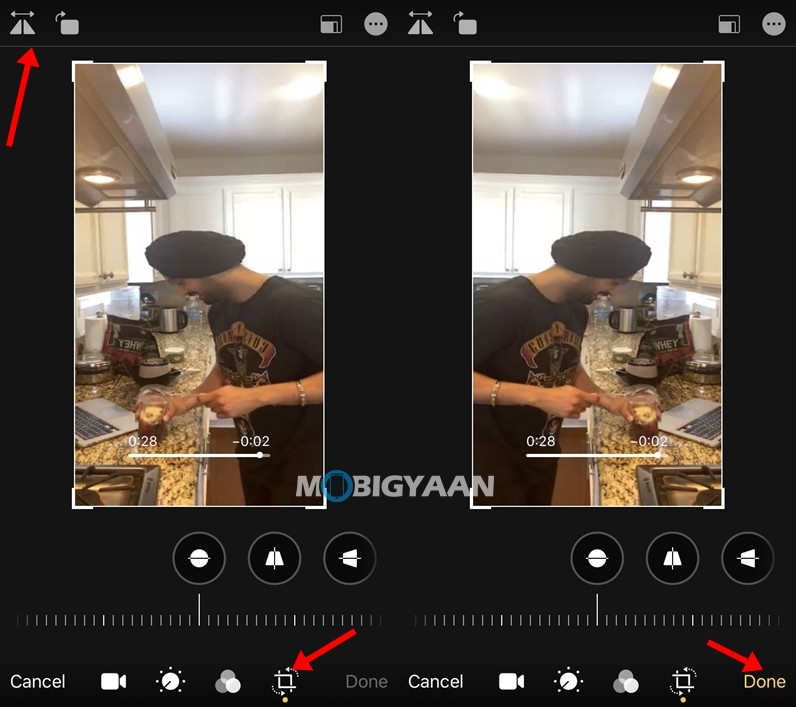
To rotate your video:
- Bring up the video you want to edit and select the crop tool.
- Tap on the Rotate icon to rotate your video and press “Done” to save your changes.
Have a look at the image below to see how it’s done.
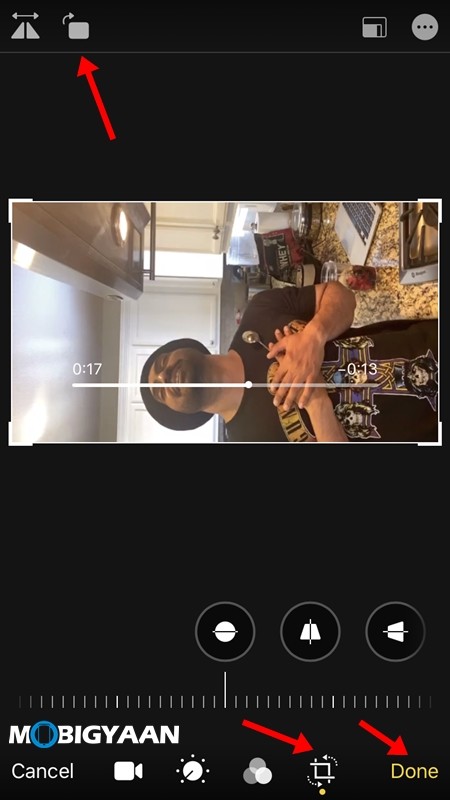
5. Make changes to the Brightness and Color Tones.
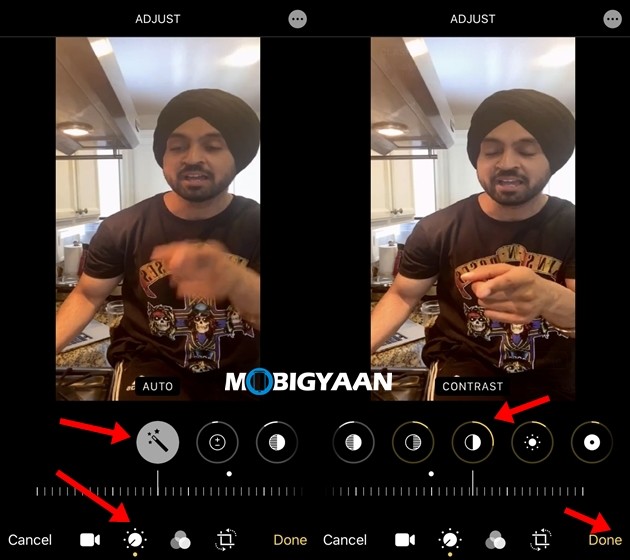
If using filters isn’t your thing then you can also manually make changes to the color tones and adjust the brightness in your video. In addition to this, the Photos app also comes with an Auto Edit feature that automatically applies the best tones for your video and saves you the editing job. Have a look at the step-by-step instructions below to see how it’s done.
- Tap on the “Adjust” section to bring up the editing tools.
- Select the effect you want to adjust and move around your slider to increase or decrease that effect.
- Tap Done to save your changes.
For Auto Edit:
- Tap on the Adjust section to bring up editing tools on your screen.
- Tap on the Magic Wand (Auto) feature and your video will be edited automatically.
- Save your changes by tapping “Done” from the bottom right corner.
Have a look at the images below to see how it’s done.
6. Remove Sound from your Video
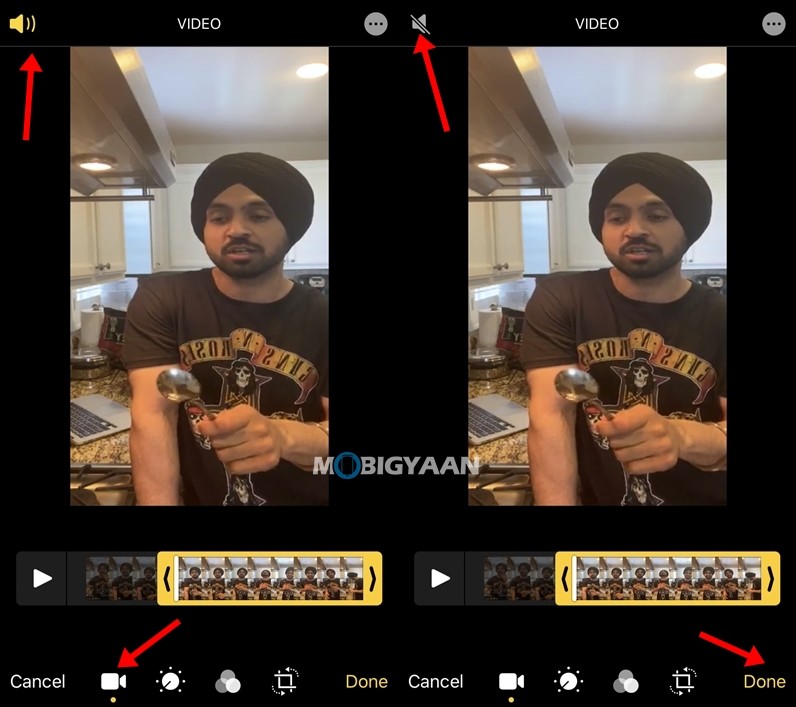
With the help of the Photos app on iOS, you can also remove sound from your videos with just a single click. This feature can come in handy when you are editing a personal video and don’t want other people to listen to your conversations. You can also use this when you want to replace the background music. To remove sound from your video all you have to do is:
- Bring up the video you want to edit and press the edit button,
- Click on the Sound icon from the top right corner to turn off the sound.
- Press “Done” to save your changes.
That’s all, folks! For more updates on the latest smartphones and tech, follow us on our social media profiles.

