Want a full-screen experience? You can hide Taskbar in Windows 11 if you think it’s taking up screen space. Get more window space by hiding the Taskbar from the bottom, the Taskbar will be automatically hidden when not in use and can be brought back by hovering the cursor at the bottom edge.

Here are the steps you need to follow to automatically hide Taskbar in Windows 11.
How to automatically hide Taskbar in Windows 11
- Step 1: Open the Windows Settings on your PC using the keyboard shortcut Windows + I or use the Start button to enter Settings.
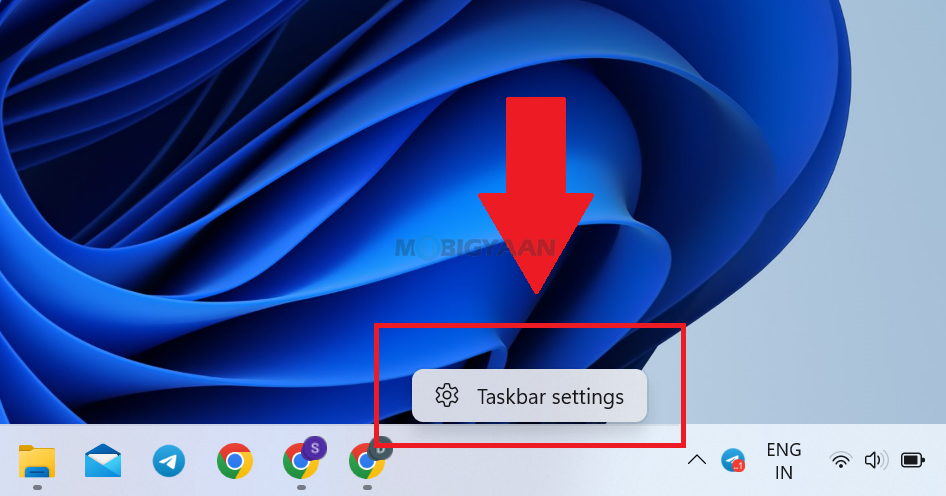
- Step 2: Click on Personalization on the left side, and on the right side, click Taskbar. Alternatively, you can right-click on Taskbar and click the Taskbar settings option to jump directly into the Taskbar settings.
![]()

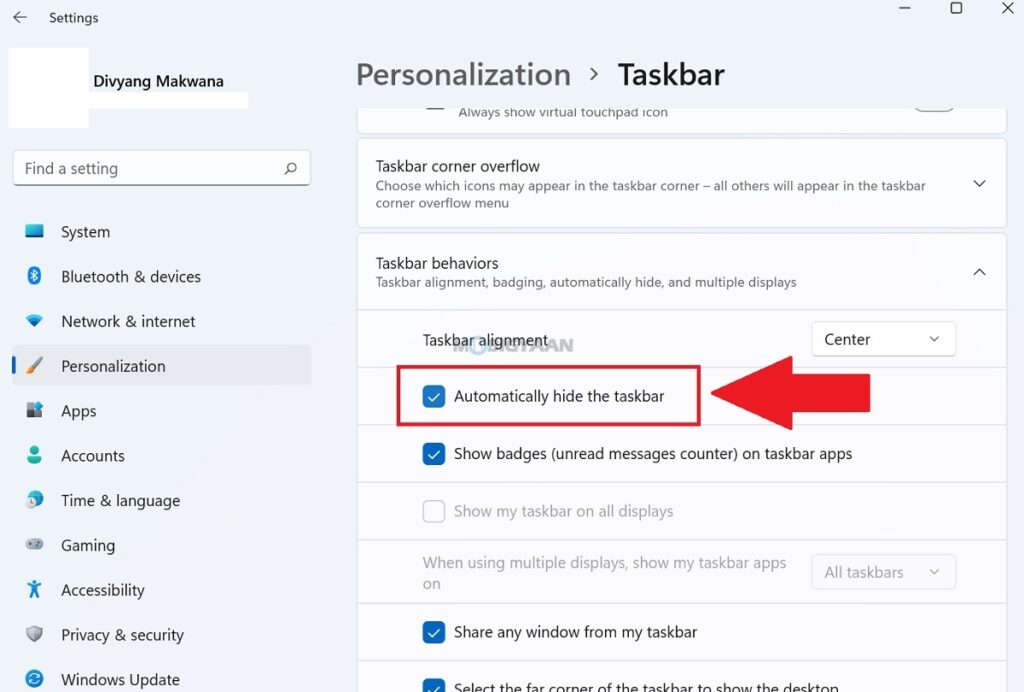
- Step 3: Under Taskbar settings check the box that says Automatically hide the taskbar option.
Now the Taskbar will be automatically hidden when not in use. You can hover the arrow at the bottom edge to return the Taskbar for a few seconds. Please note that the Taskbar will be on top of all other windows and will appear for a few seconds. You can also tweak more settings related to the Windows Taskbar here. Now you know how to hide Taskbar in Windows 11.

You can browse more content like this, take a look at some suggested guides for Windows 11 below.
- How to move icons on the left side in Taskbar [Windows 11]
- How to always show the touch keyboard icon in Windows 11
- How to show file extensions in Windows 11
- How to quickly stop apps from starting up with Windows 11
- How to set lock screen timeout in Windows 11
Want more? Check out our How-To Guides section. To get updates on the latest tech news, smartphones, and gadgets, make sure you follow us on our social media profiles.

