Working with Excel sheets? There are a number of easy tips and simple shortcuts in Excel that can save you time and boost productivity for both beginners and advanced users. One of which is to add a drop-down list in Microsoft Excel and some of you aren’t possibly aware of it.

If you are using repeated values in the cell, it’s better to choose from the drop-down menu rather than typing in every time, this makes things simple for you while you work with the Excel sheets.
The more rows in your Excel sheet, the more it can be a mess, it’s a lot easier when you add a drop-down list, it also saves you a number of rows, and also prevents users from filling up the wrong values. Here’s how you can insert or add a drop-down list in Microsoft Excel.
How to add a drop-down list in Microsoft Excel
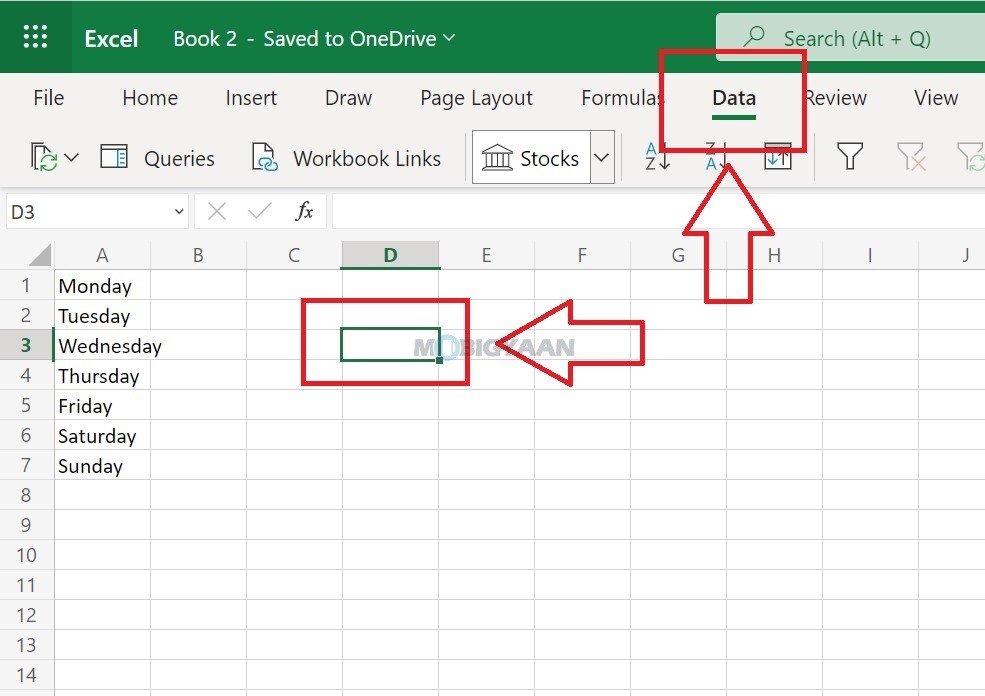
- Step 1: Select the Cell, the one that you want to make as a drop-down list.
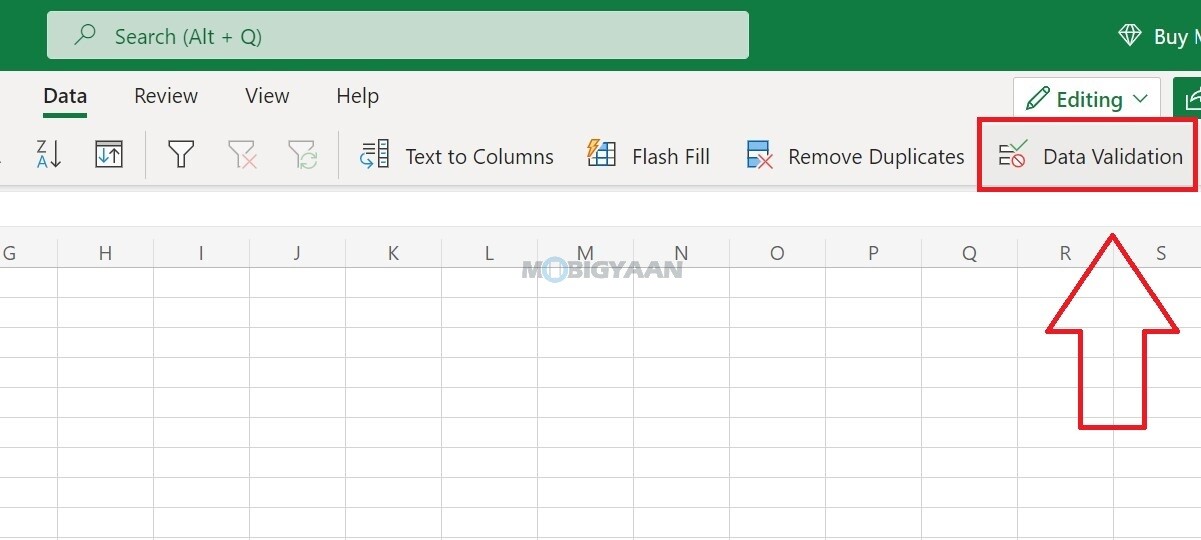
- Step 2: In the menu bar, click on Data and choose Validation.
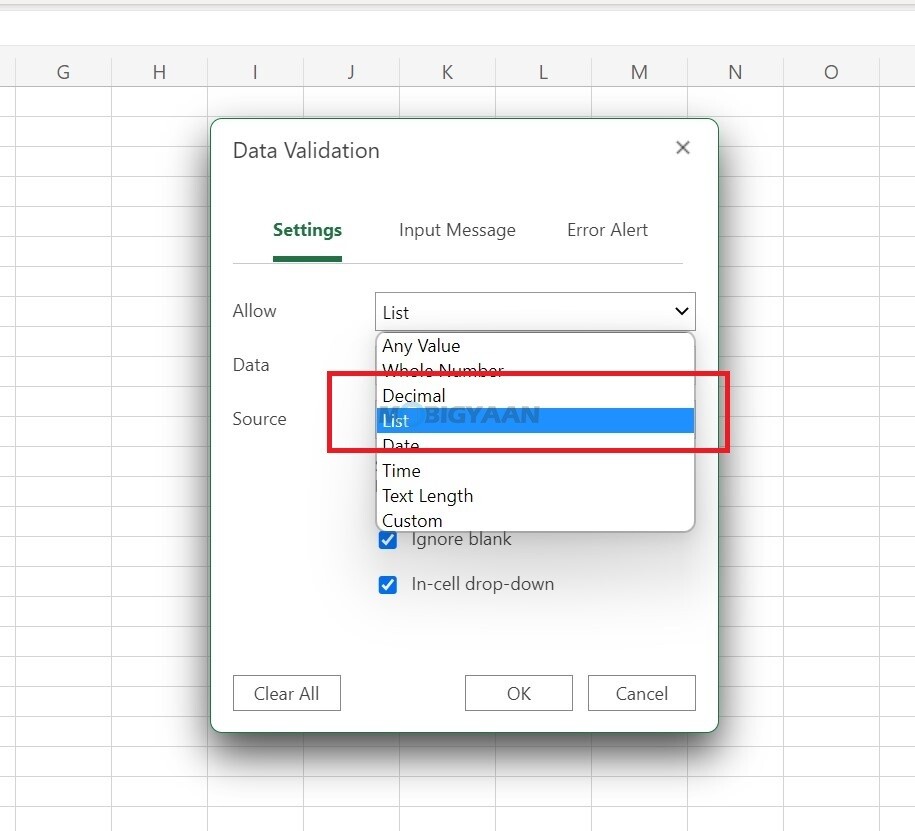
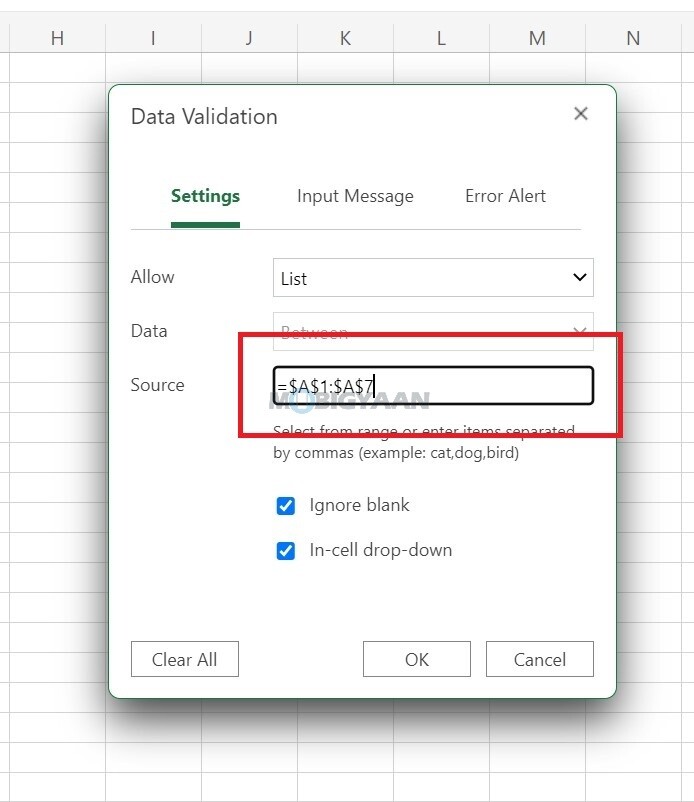
- Step 3: Under the Settings tab, you can see the Validation criteria. Here in the Allow field, choose List from the drop-down and type the cell source from where you are taking data to the list e.g. B1 to B10.
- Step 4: Click Ok to save and close the window.
Now the cell you have selected will be transformed into a drop-down list that shows you the list of data you have sourced. Here’s the result, you can see the drop-down list in the image below.
Note: We have used Microsoft Excel using office.com, but the features remain very similar just as you use the dedicated Excel app.
That was it, this is how you can add a drop-down list in Microsoft Excel. Like this easy guide? More stuff can be found below, check them out.
- How to use the Amazon app in your regional language
- How to merge duplicate contacts on your Android smartphone
- How to merge multiple PDF documents in a single file on Mac
- How to remove logged-in devices in the Disney+ Hotstar app
To get updates on the latest tech news, smartphones, and gadgets, make sure you follow us on our social media profiles.


