When the Microsoft Office is installed on the Windows computer, whatever be the version — Microsoft 365 Apps, Office LTSC 2021, Office 2019, Office 2016, or even Office 2013, there are by default configured to have the automatic update option enabled whenever a new update has been released by the company.
If you find that the updates are disabled or the option to manage the updates is disabled or unavailable, then you can hide the option to enable or disable Office Updates on your system for Microsoft Office using the Registry Editor or the Local Group Policy Editor.
In this step-by-step guide, we will show you how you can hide the automatic office updates option for the Microsoft Office using the Local Group Policy editor, which is a bit easier compared to the lengthy process that needs to be followed when opting for the Registry Editor to make the changes.

How to hide enable or disable updates option in Microsoft Office
Step 1: Download the Office Group Policy templates on your device using this link.
Step 2: Open the download file and extract its contents. Then, copy all the content into “C:/Windows/PolicyDefinitions/admx” and copy the admin folder to the language-locale subfolder.
Step 3: Open the Local Group Policy Editor tool on your computer.
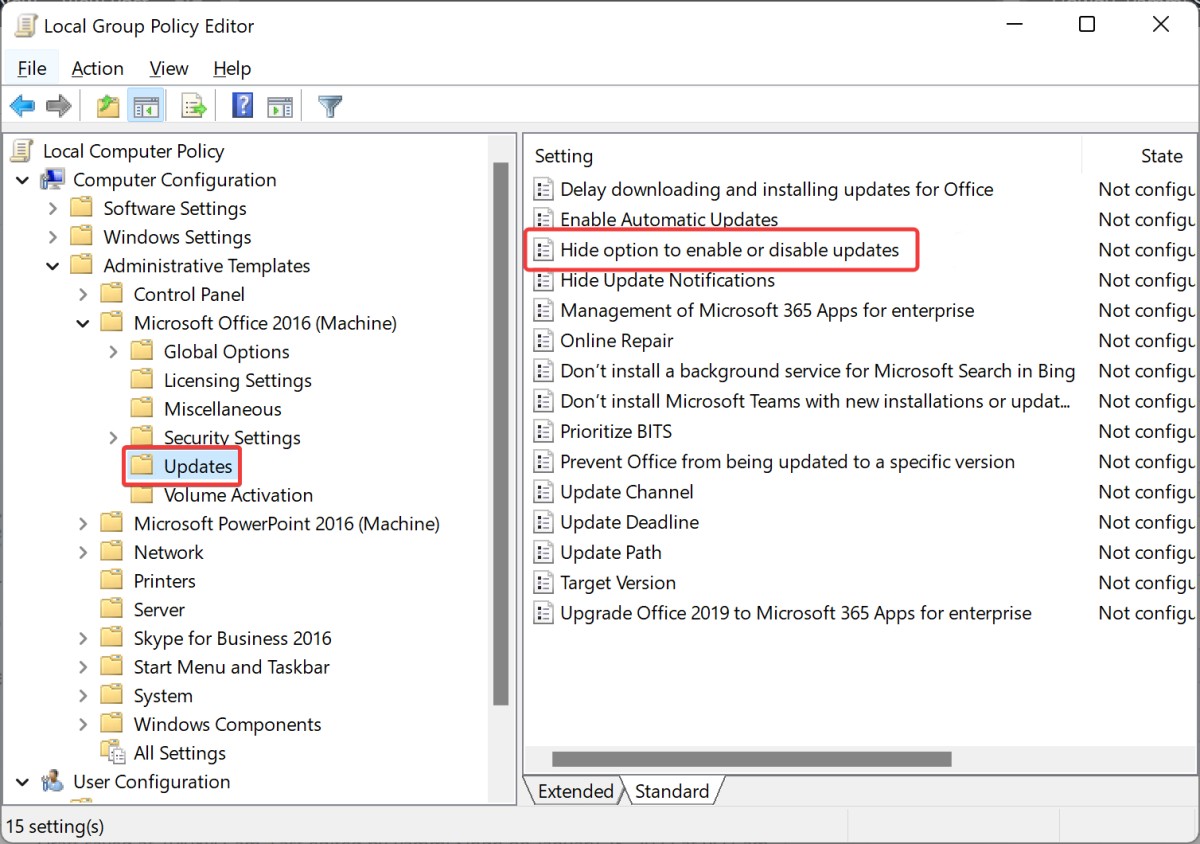
Step 4: When the Group Policy Editor opens, navigate to the following location:
Computer Configuration > Administrative Templates > Microsoft Office 2016 (Machine) > Updates

Step 5: Look for the policy named “Hide option to enable or disable updates” on the right side and double-click on it.
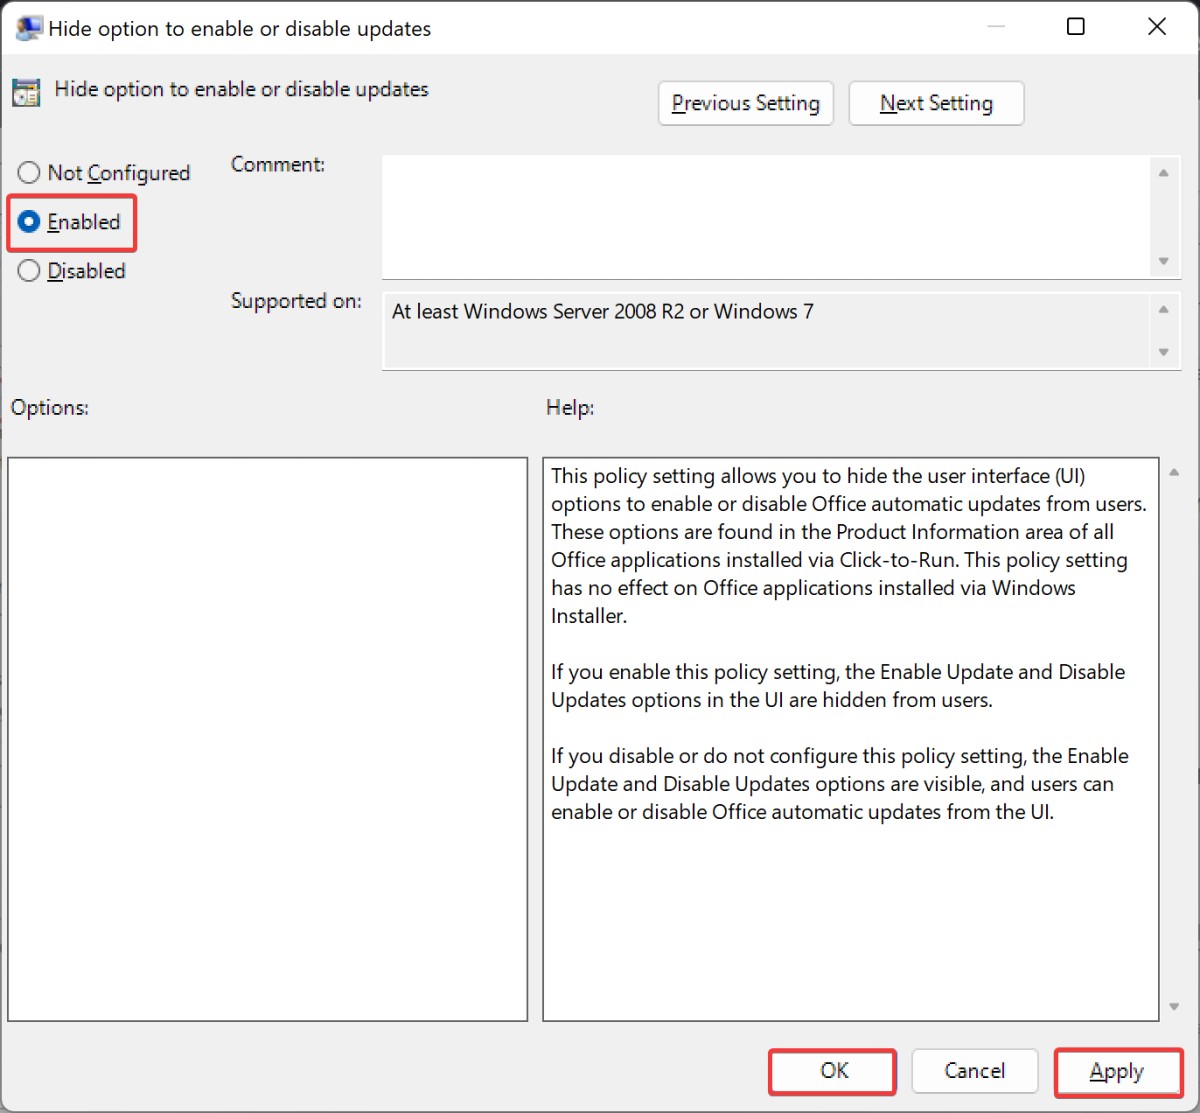
Step 6: In the new window that opens, select the “Enabled” radio button from the options and then click the “Ok” button.

That’s it. Making the above-mentioned changes using the Local Group Policy Editor on your Windows computer will hide the enable or disable office updates button from the Microsoft Office applications on your device.
