Microsoft has been offering a built-in encryption feature in the Windows operating system — BitLocker. It is designed to protect your files and data from unauthorized access by encrypting the entire hard drive. It can then only be accessed with a password or a smart card that you set up when enabling Bitlocker Drive Encryption.
In case you have forgotten the password or PIN, then you can use the BitLocker Recovery Key to access the encrypted drive. The key is a unique 48-digit code that is automatically generated when the Bitlocker Drive Encryption is enabled.
There are several different ways to get the BitLocker Recovery Key on your Windows 11 computer but in this step-by-step guide, we will show you how you can get details via Command Prompt and save the key into a text file.
How to get the BitLocker Recovery Key using Command Prompt in Windows 11
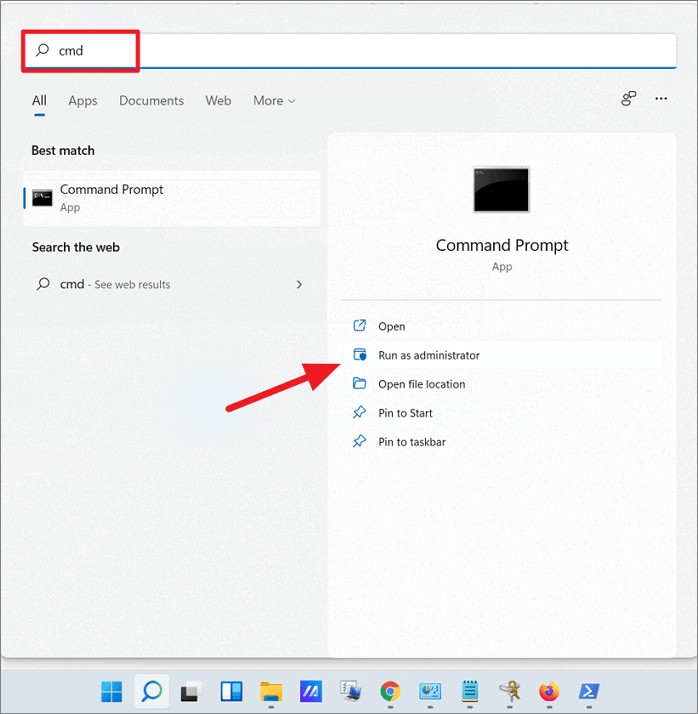
Step 1: Open the Command Prompt on your Windows 11 computer as an Administrator. For this, search for “Command Prompt” or “CMD” in the Windows Search of Start Menu, and from the results, select “Run as Administrator” for the app.

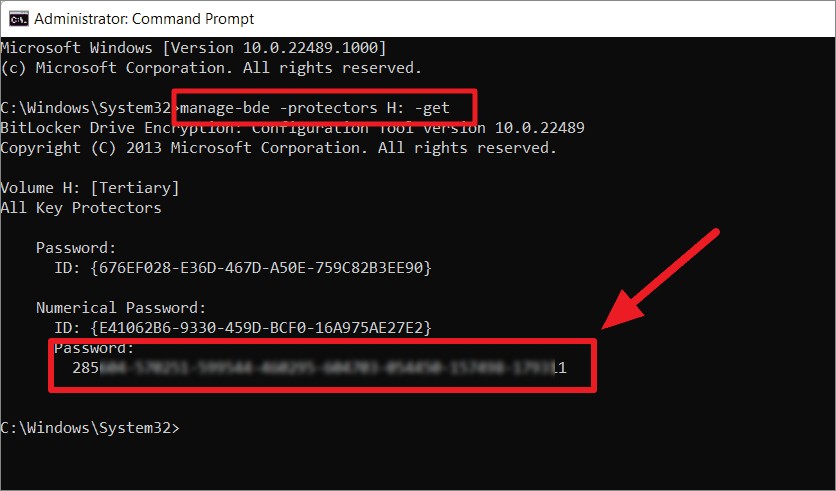
Step 2: Now, when the Command Promot opens, type and enter the following command:
manage-bde -protectors H: -getMake sure that you replace “H” in the above command with the drive for which you want to find the recovery key. This will differ from computer to computer.

Once you have entered the command, you will get all the details and will be able to see the recovery key under the password section. It is a string of 48 digit long numbers.
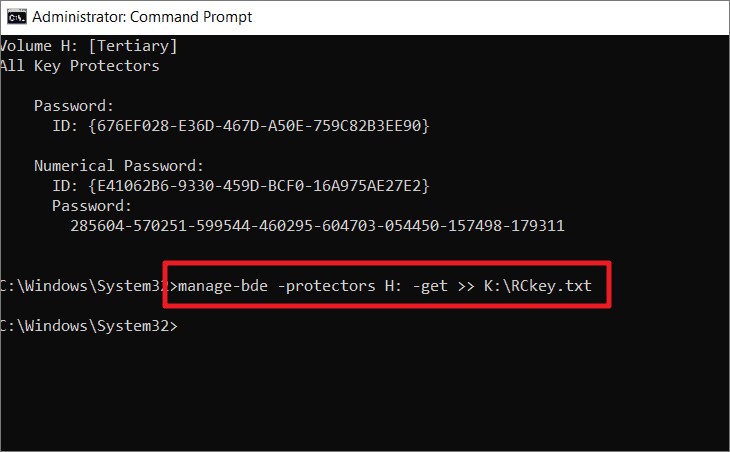
Step 3: To save the recovery key into a text file on a different drive, enter the following command:
manage-bde -protectors H: -get >> K:\RCkey.txt
As it’s pretty clear from the command, the recovery key details will be saved into a file named RCkey.text in the K drive. You can change the location by replacing the value of K:\ with anything you want.

